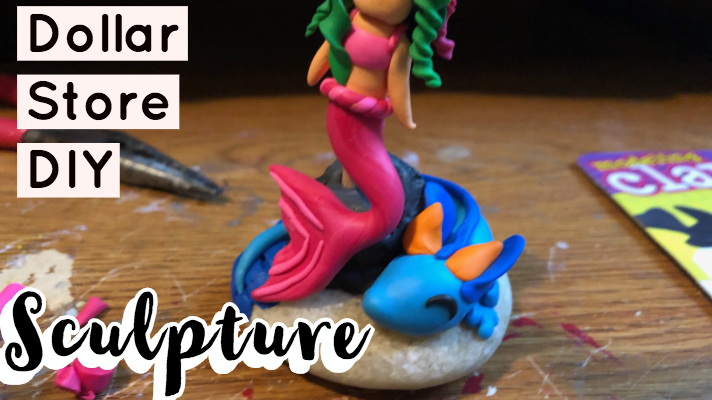
Before I started working with polymer clay, I used normal modeling clay a lot. Polymer clay is very expensive and even a small project can become costly quickly. Modeling clay is great for concepts and to help learn about clay and how to sculpt before playing with the good stuff. This cheap clay was only a dollar, and I wanted to see just what I could do with it.
What you will need
- Dollar store clay
- Optional tools such as a dotting tool and wire
- A random rock
Base
Start by scrubbing your rock really well. The clay will not stick to a gross nasty rock.
Sculpting the Polymer Clay Sculpture Rock
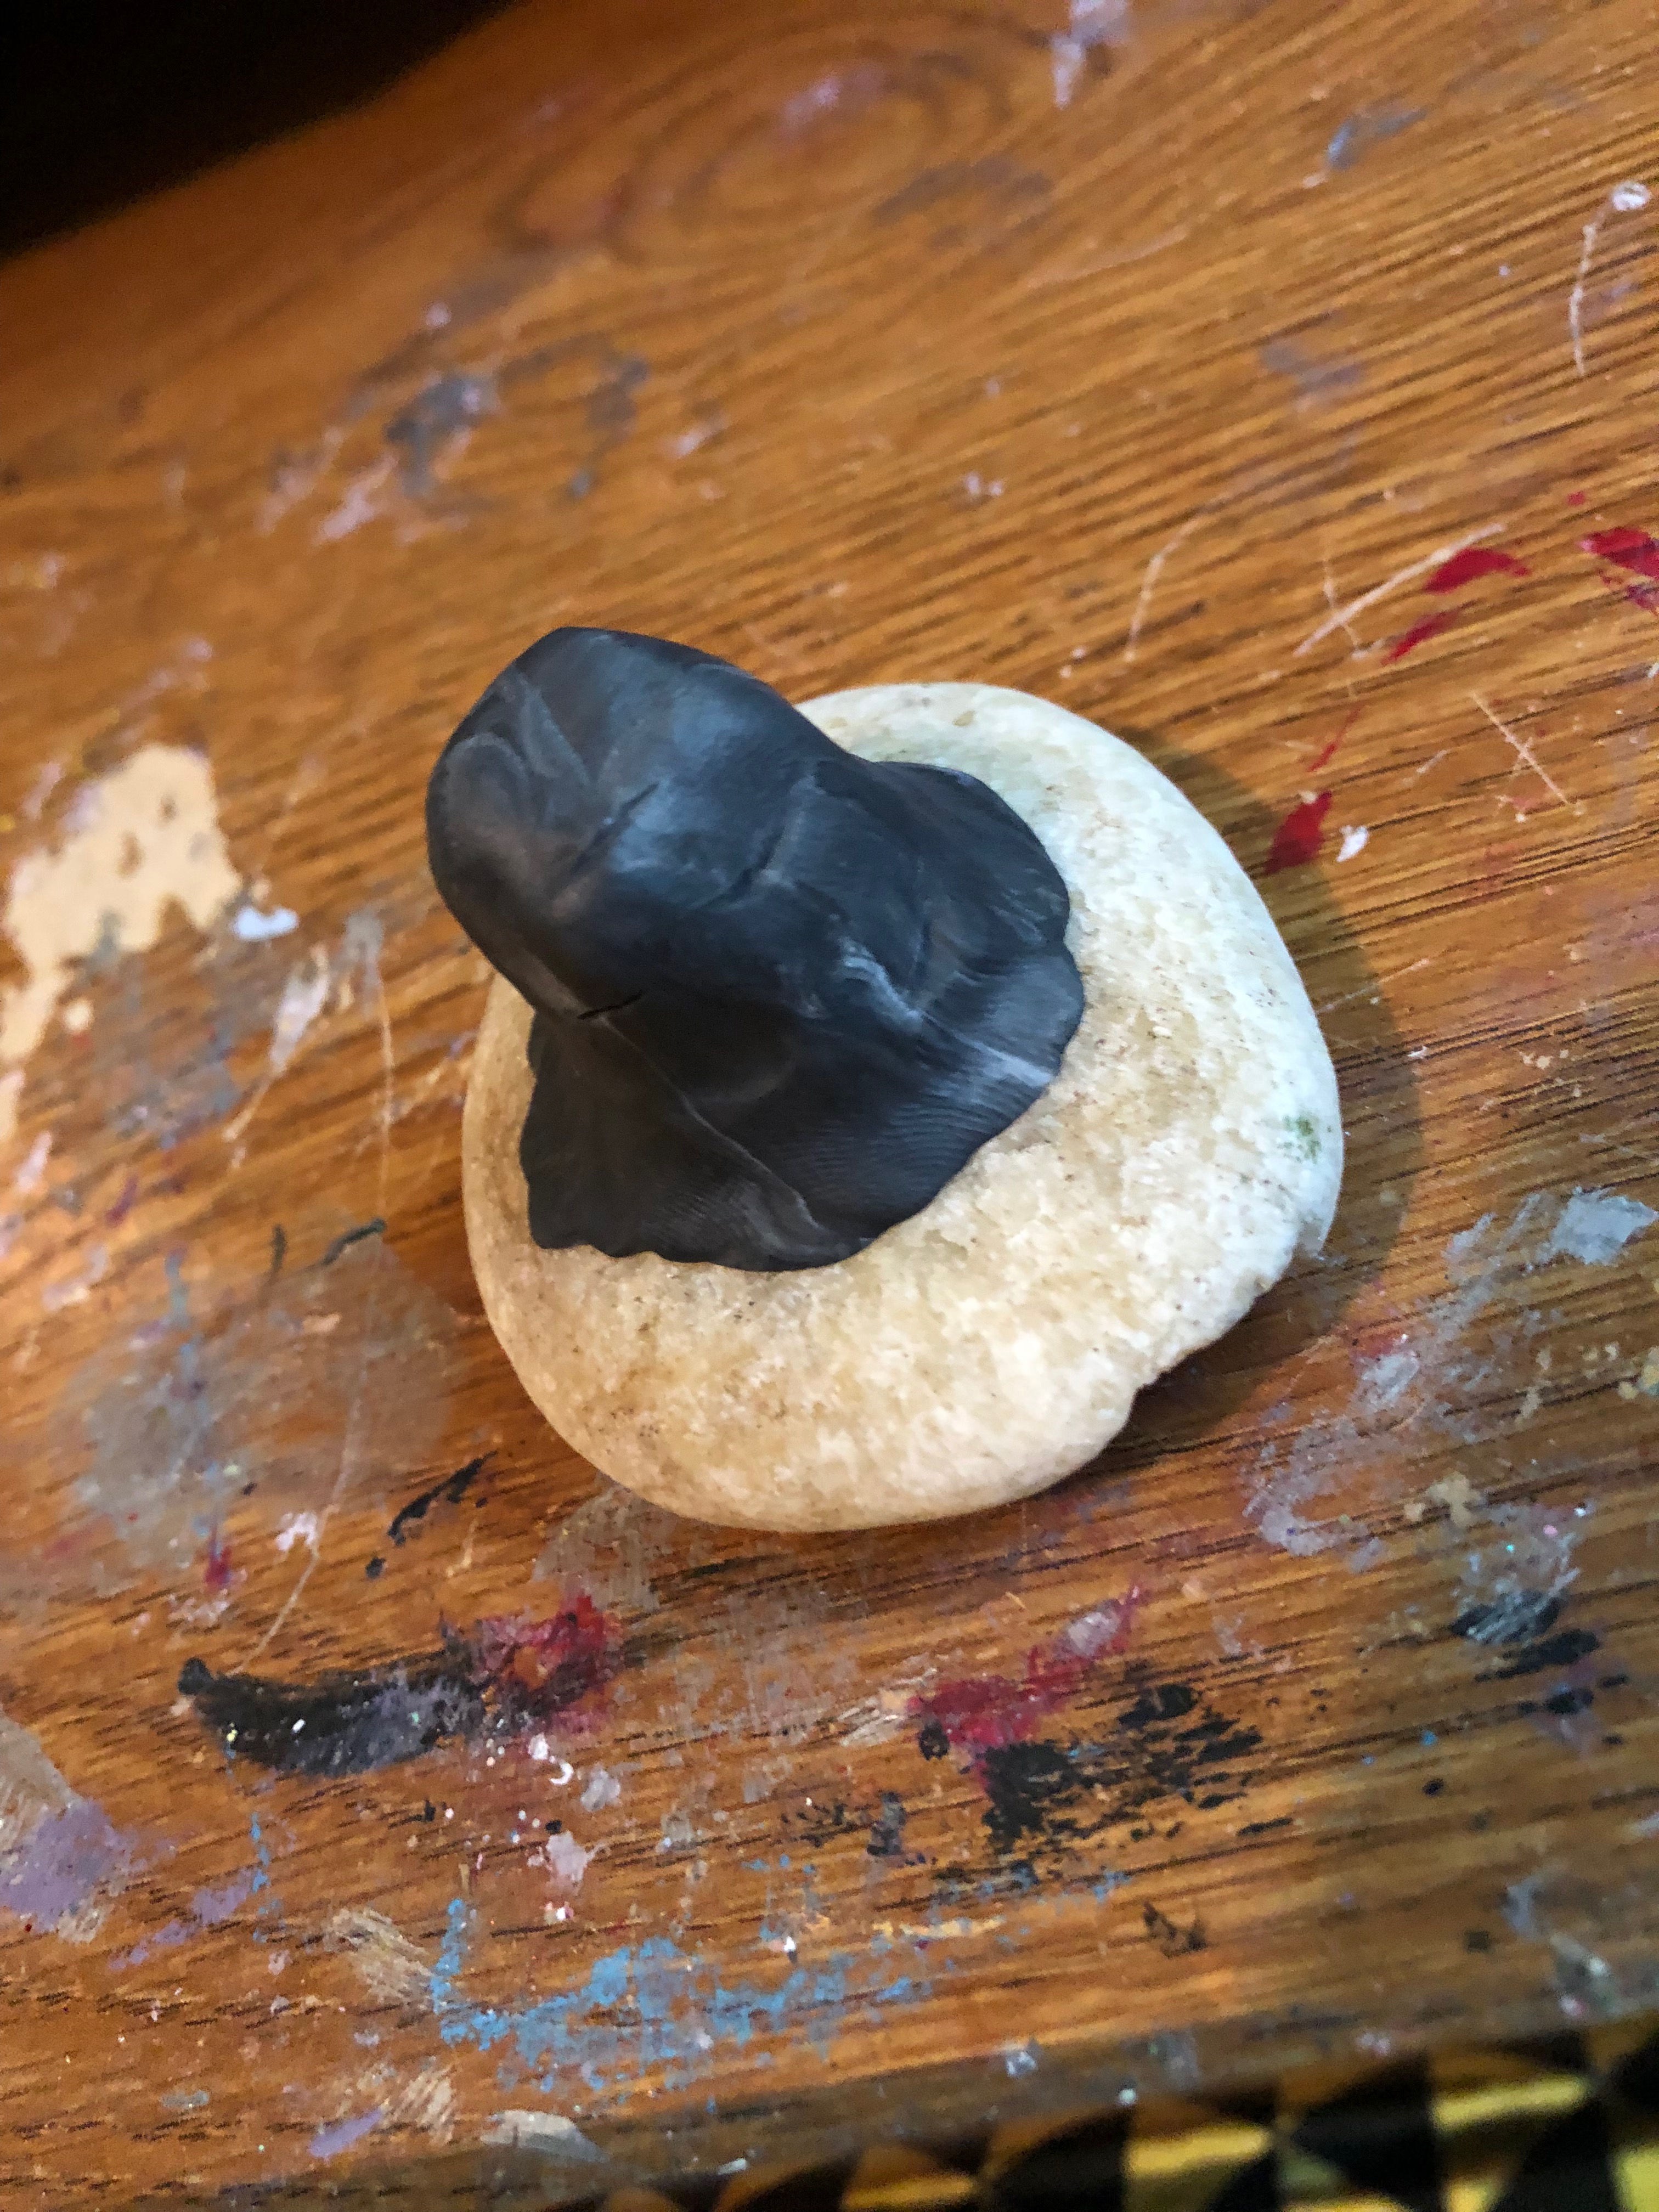
Take all the brown clay and shape it into a lovely lump of brown clay. Lightly poke it with a variety of different textured things, like wood handled paintbrushes and scrub brushes, to make the rock look like an actual rock. Smooth the edges securely to the real rock and hit it with a bit more texture. Make it sort of flat on top for the mermaid to perch on.
Sculpting the Mermaid’s Tail
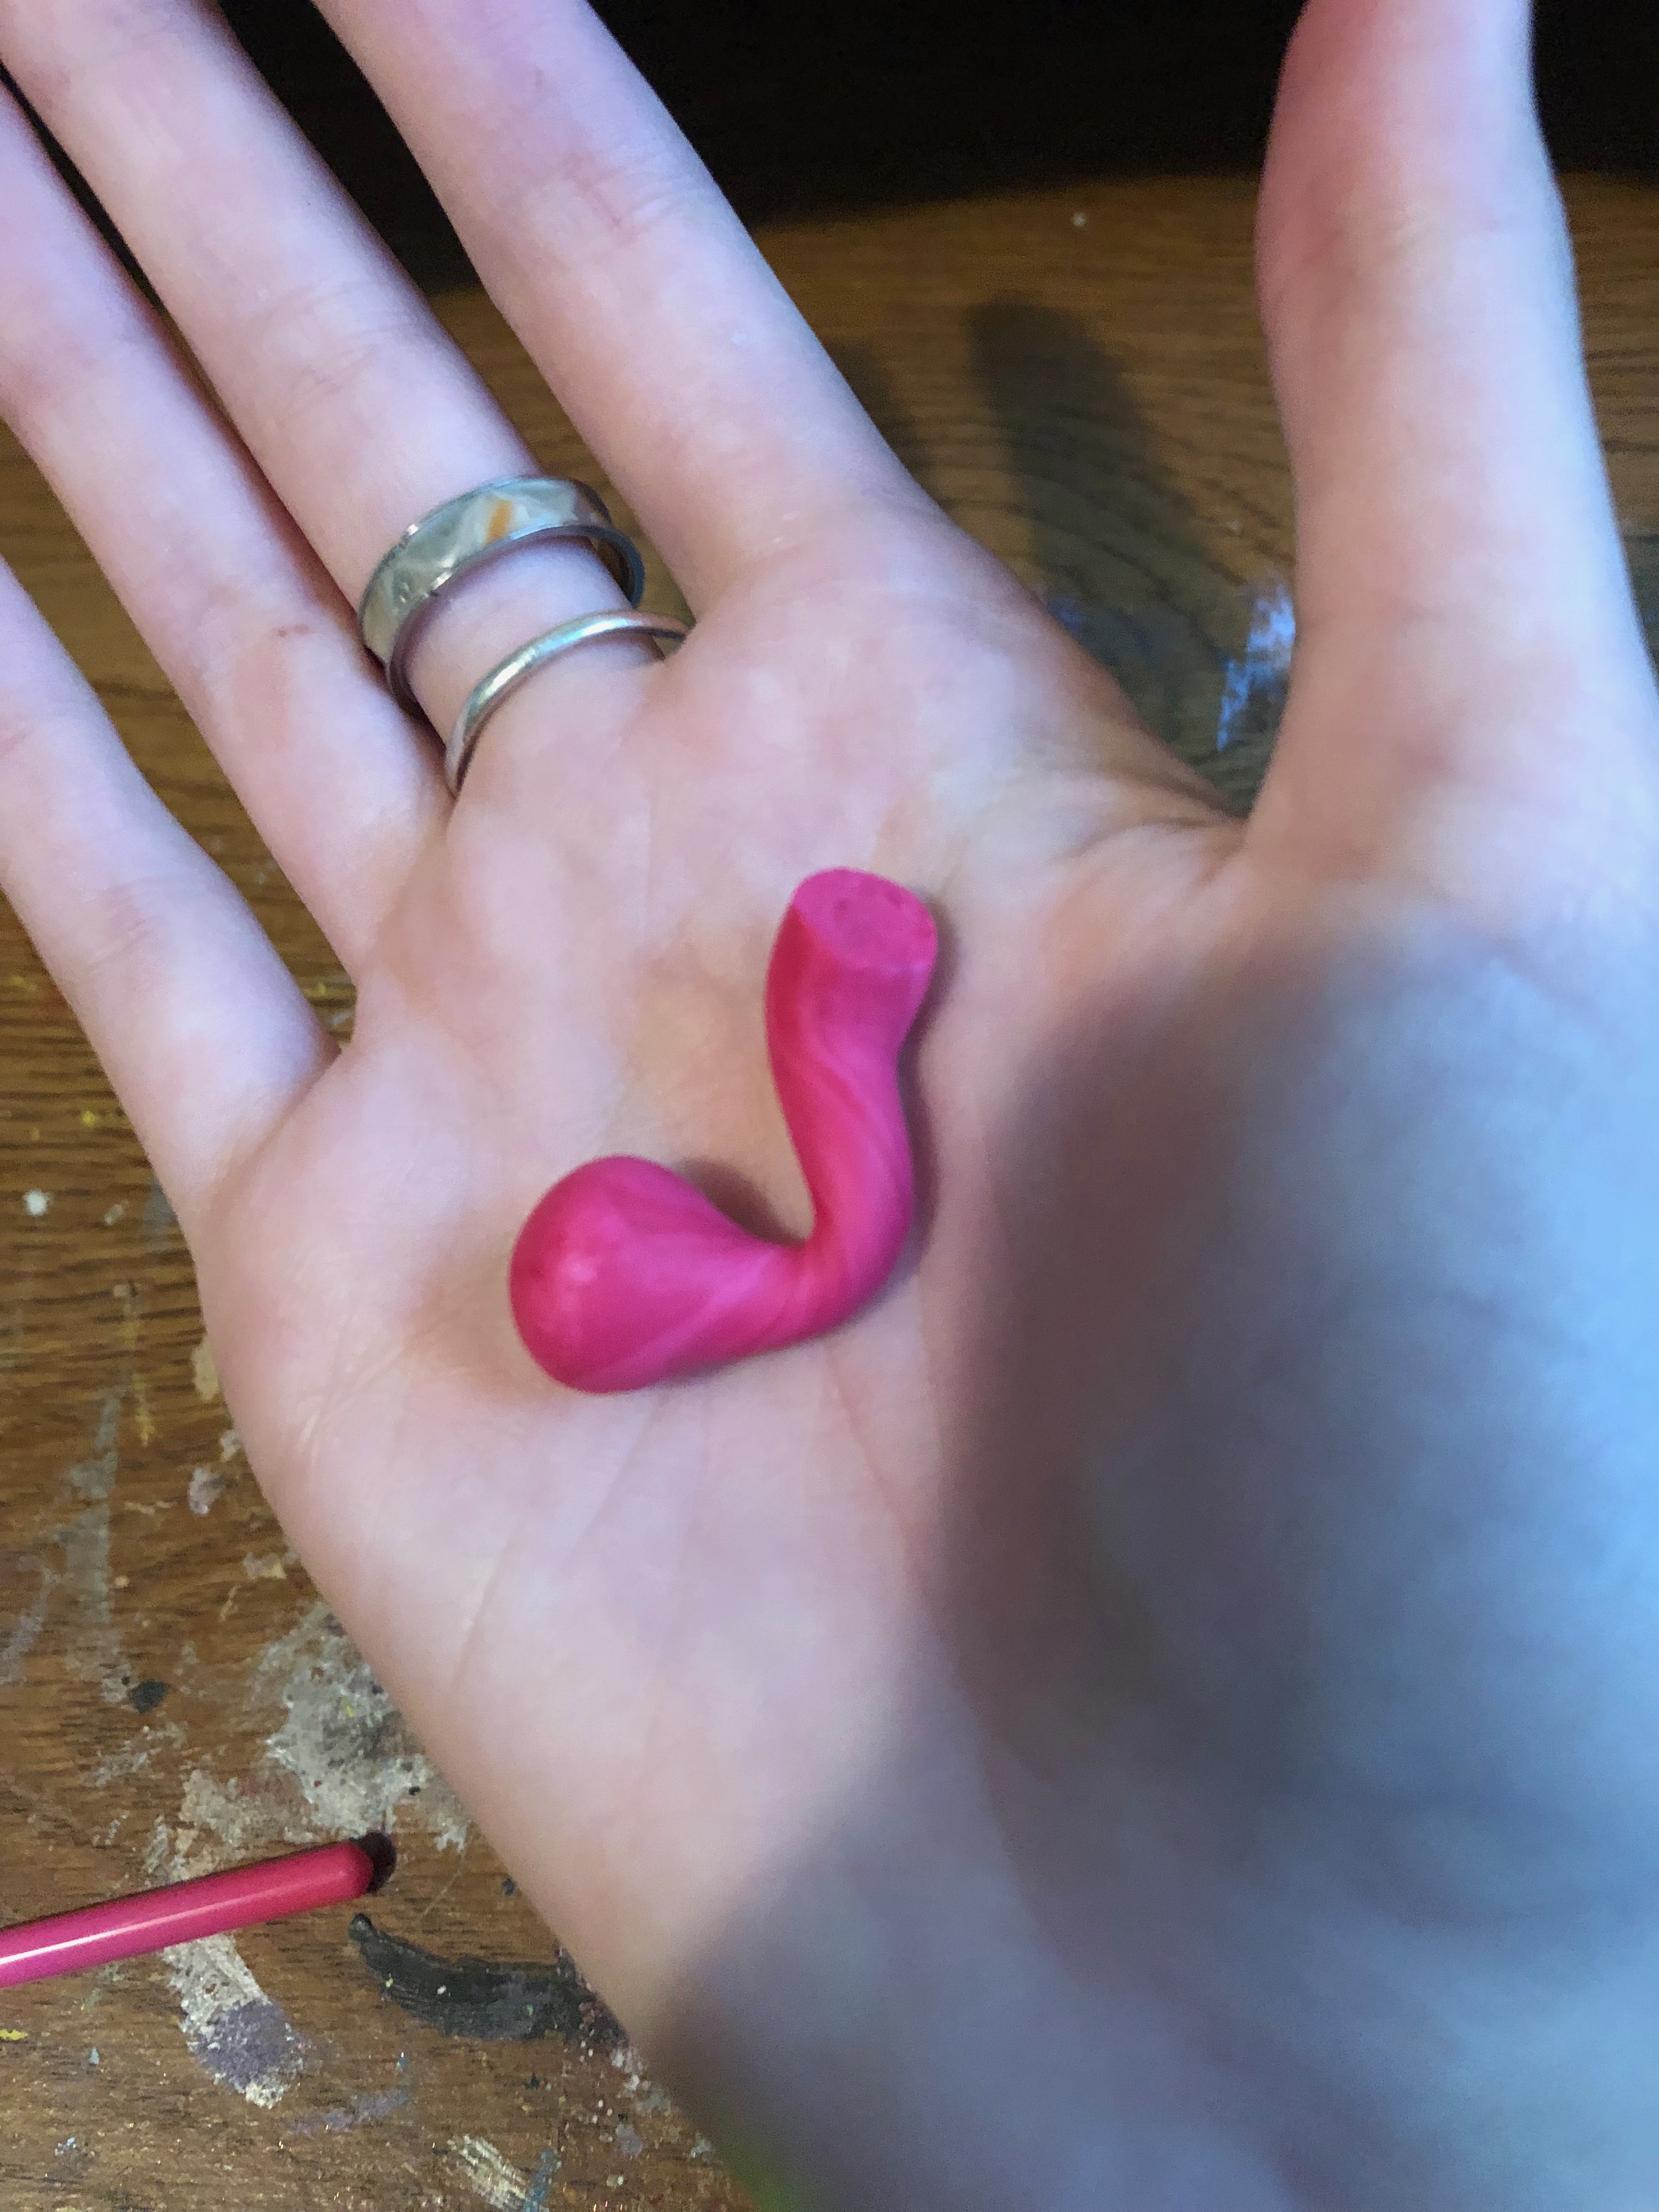
Take some pink clay and make a worm out of it. Flatten one end and shape it to look like a whale’s tail. Make the rest of the tail curvy and flowy and all of that mermaidey stuff.
Adding Details to the Polymer Clay Sculpture
Use some white or light pink clay to make little veins on the tail. Stick them on there and go on with life. Don’t overthink it too terribly much, or you’ll be too tired to sculpt the dragon.
Sculpting the Top and Head of the Mermaid
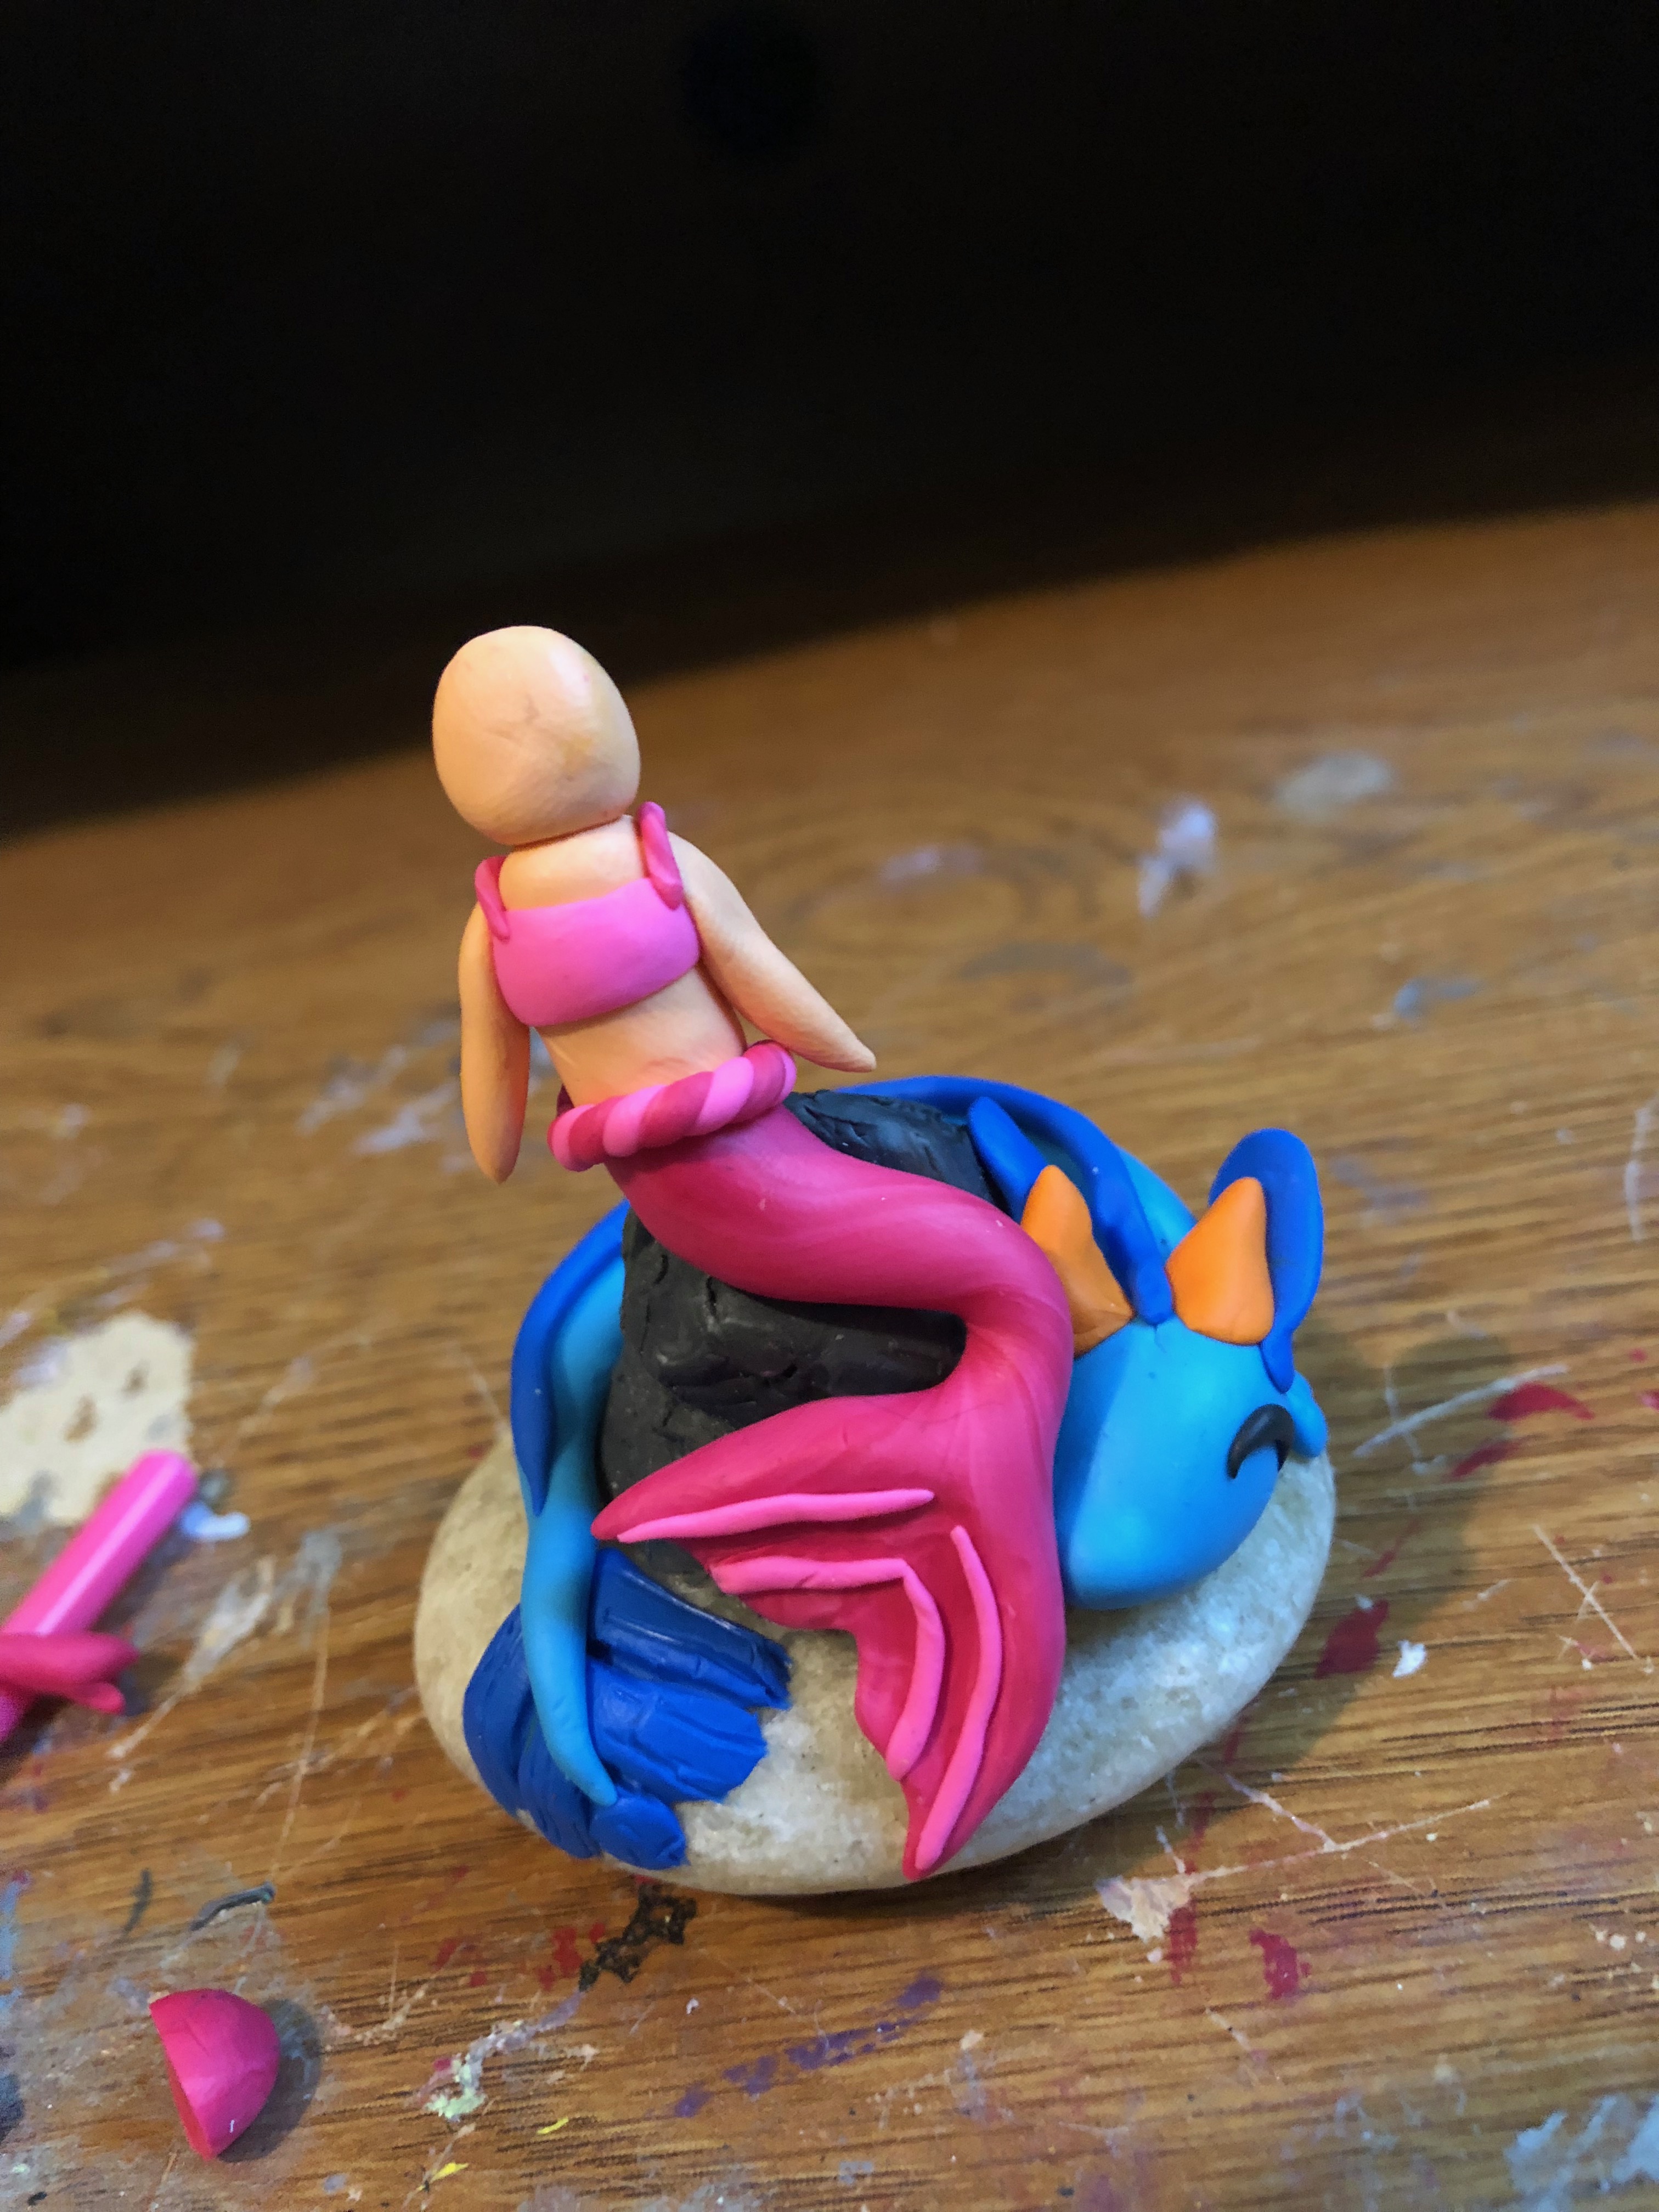
Mix some yellow, brown, and white to make a tanish color. Ajust the color as needed, or pick a funky color, like red or blue. Sculpt a rounded rectangle and a round circle for the torso and head. Plonk the two together and set them on the base of your mermaid tail.
Sculpting the Hair
Mix some blue and green to make a marbled color, and roll it in a thin roll. Flatten it with your fingers and curl them up like noodles. Attach to the head, making them full and long enough to cover the back of the head. Stick the finished mermaid on the rock, using a toothpick to secure if the mermaid will not stay on her own. Add a few colored highlights for a personal touch.
Starting the Dragon Polymer Clay Sculpture
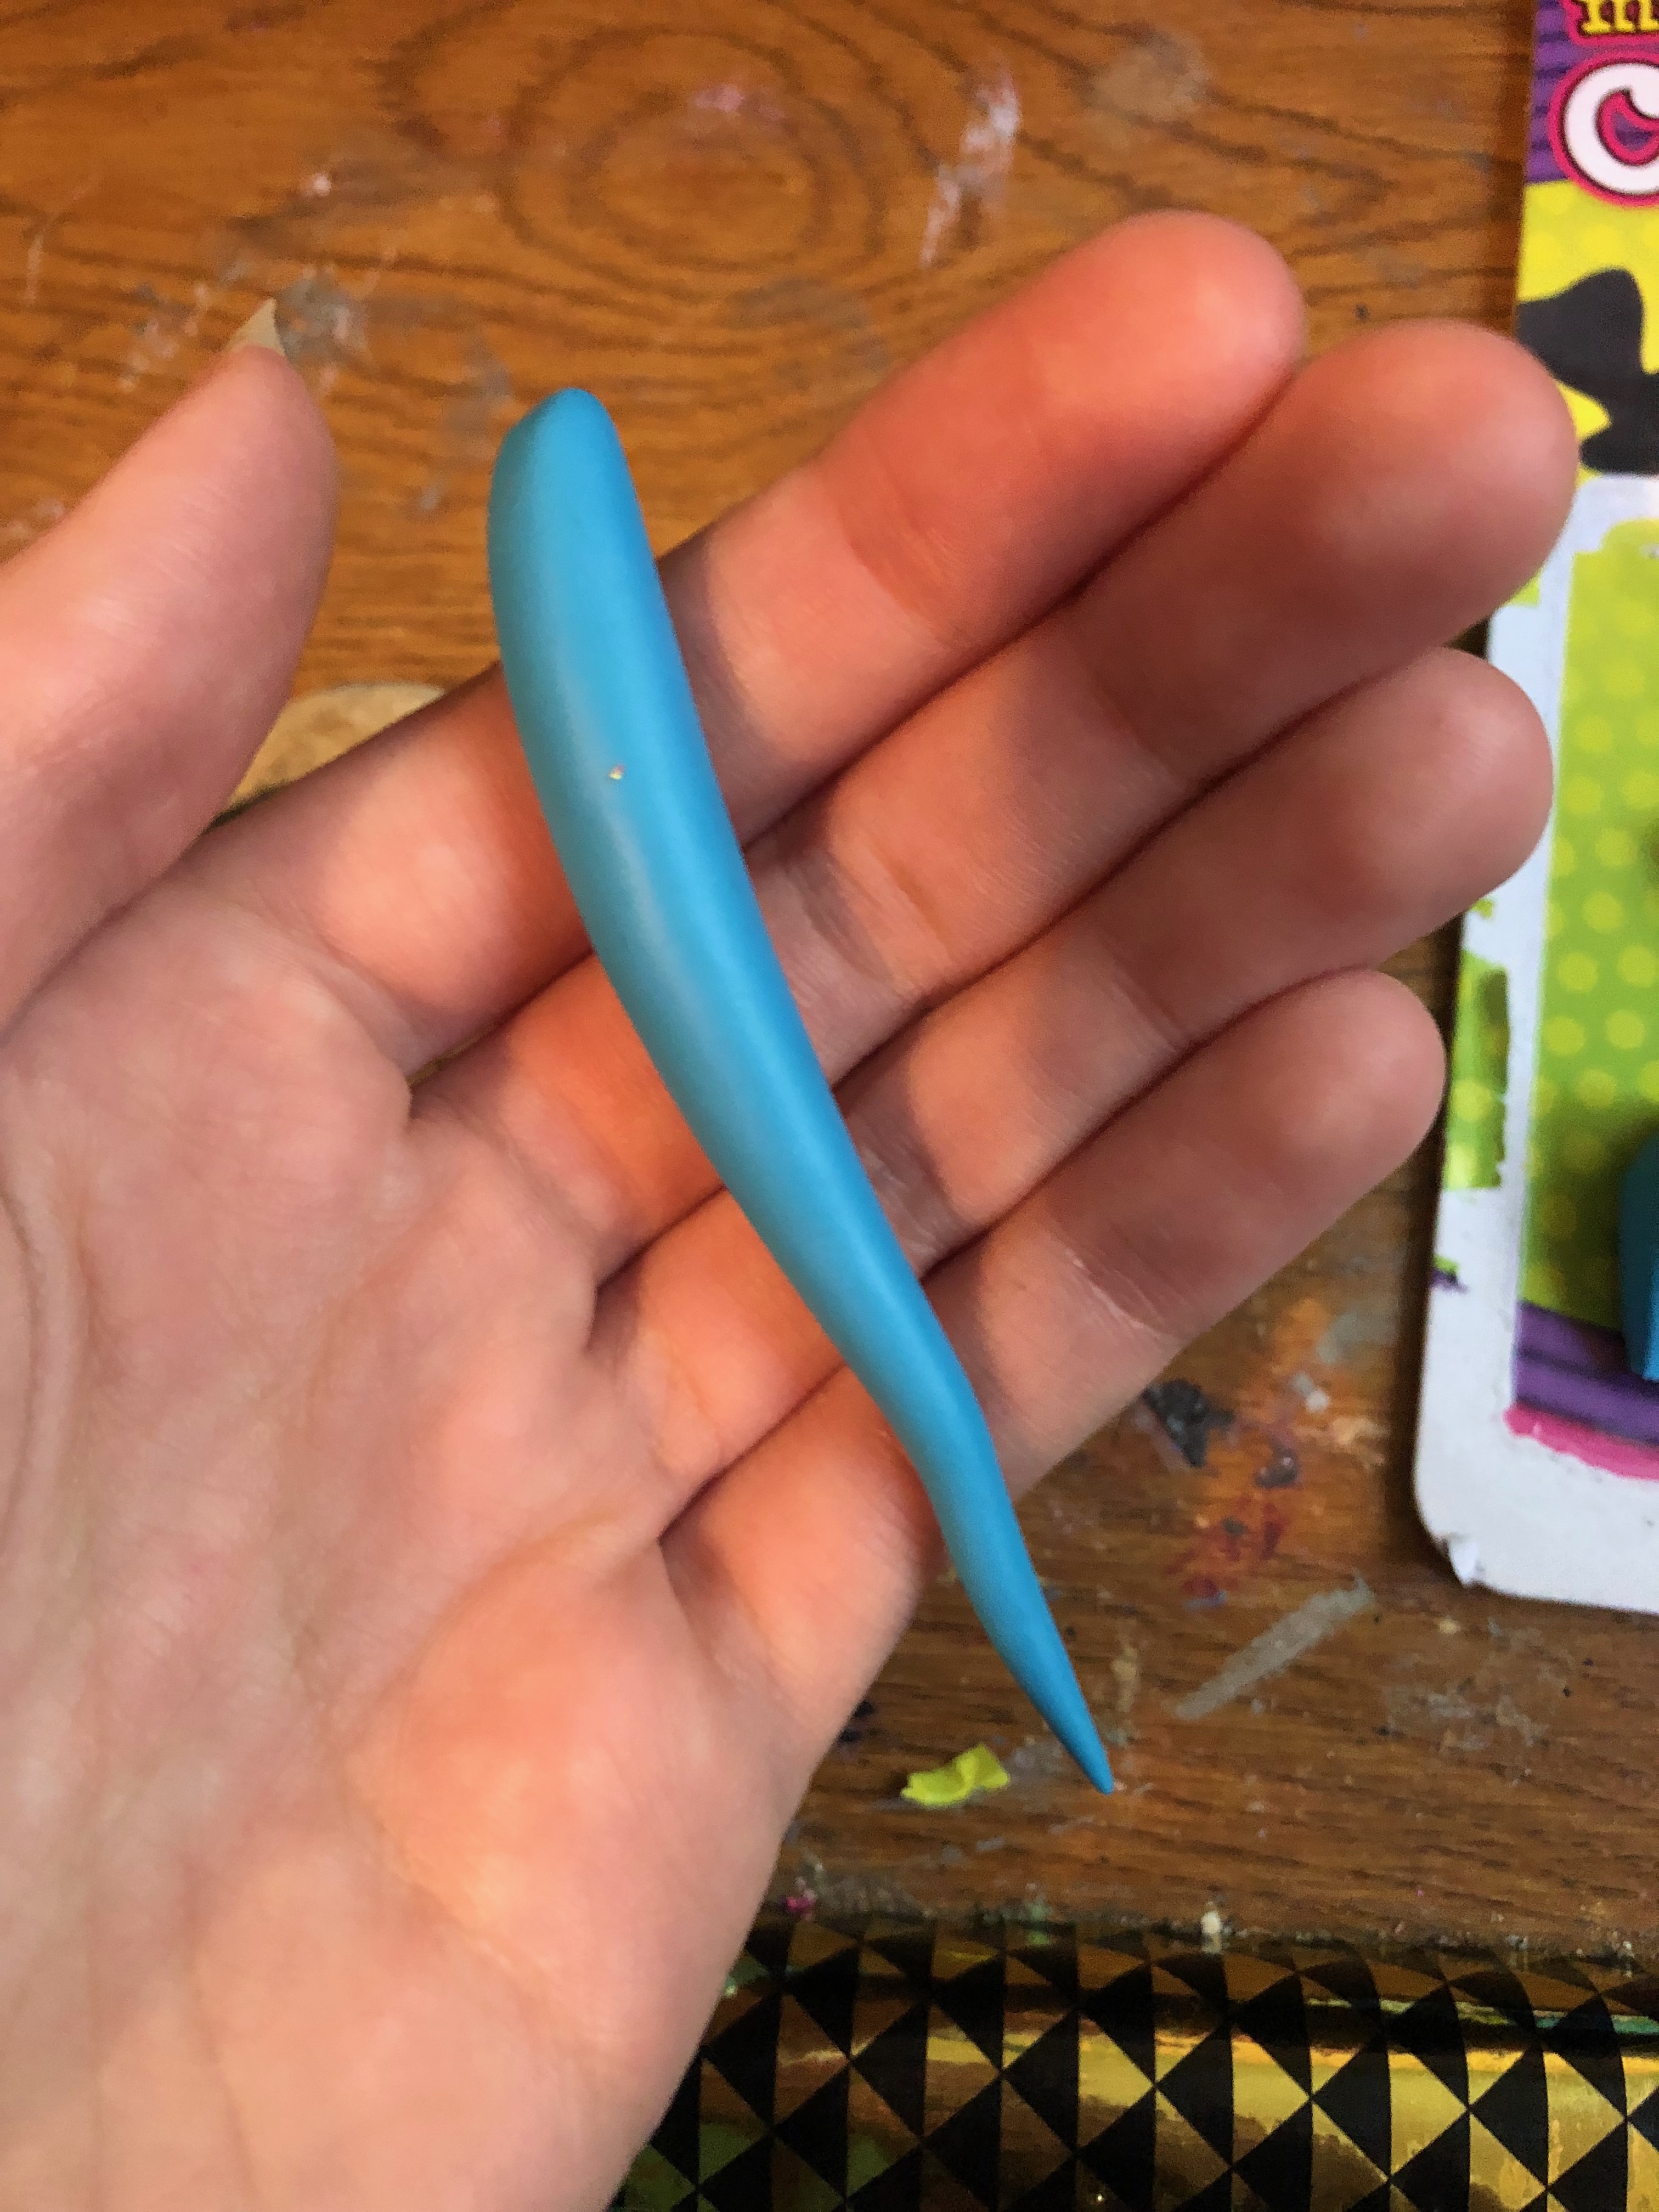
Roll out a light blue clay into a log with a pointy and a blobby end. Smooth out any fingerprints.
Sculpting the Tiny Feet
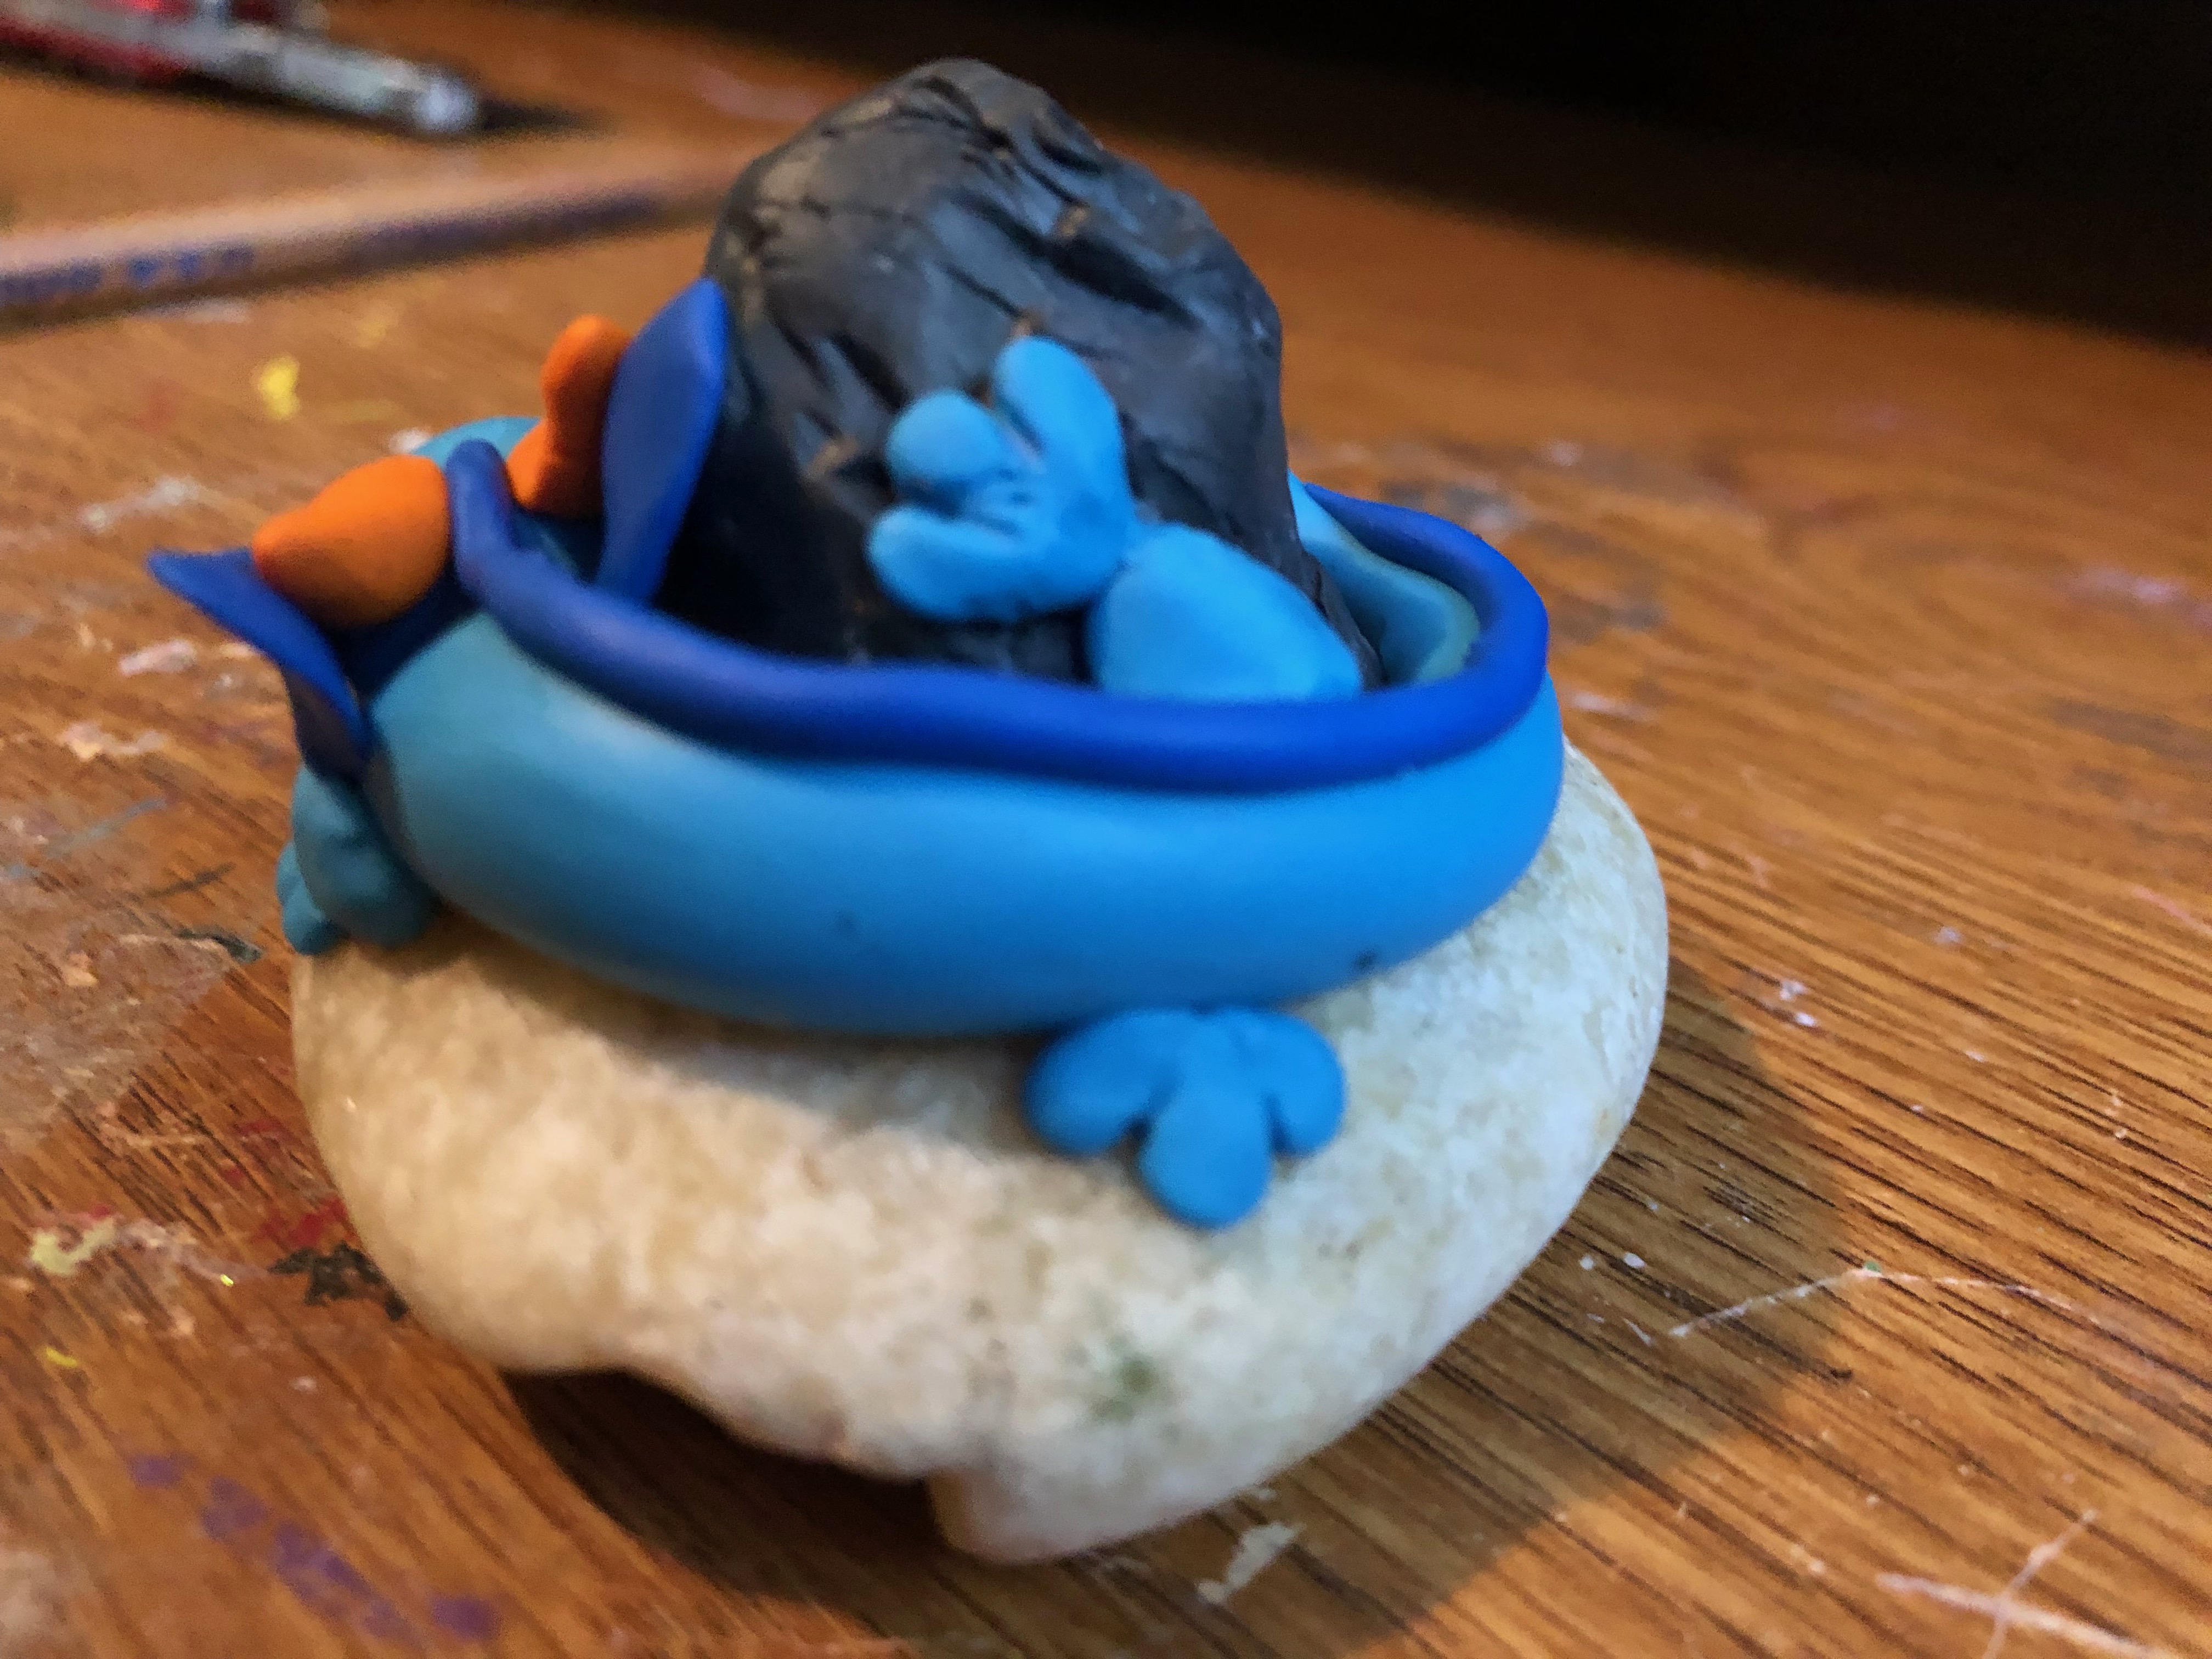
Make four tear drop shapes out of light blue clay, and use a toothpick to mash and sculpt the toes. Make sure to define all the way to the end of the foot, separating each toe completely for an almost cat paw look.
Making the Dragon’s face
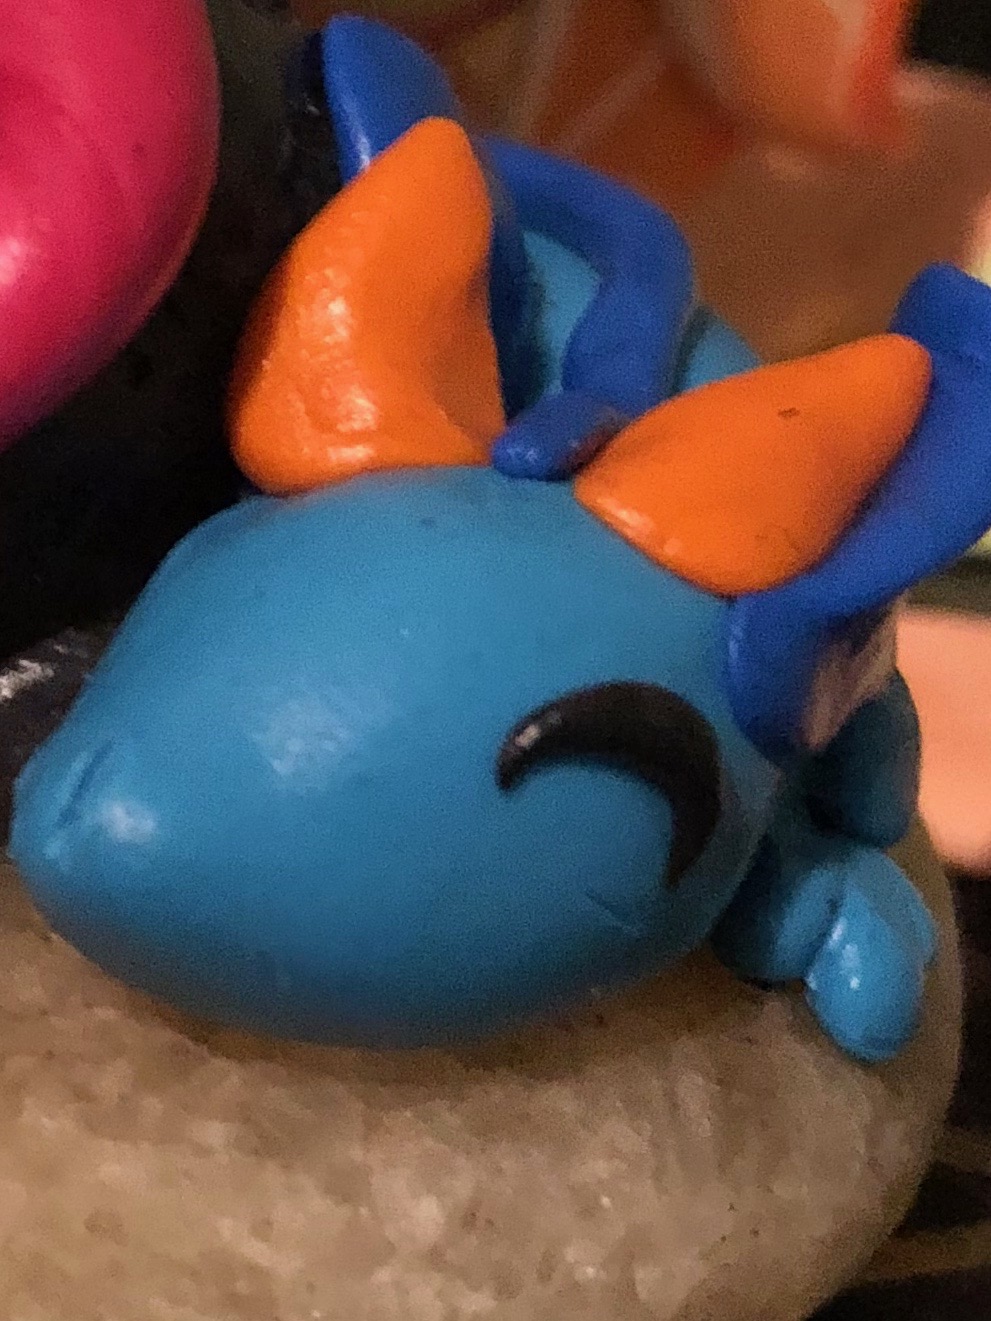
Roll some black clay super thin and make two tiny curved things. Put them aside for now, but do not forget them.
Scupting the Dragon’s back
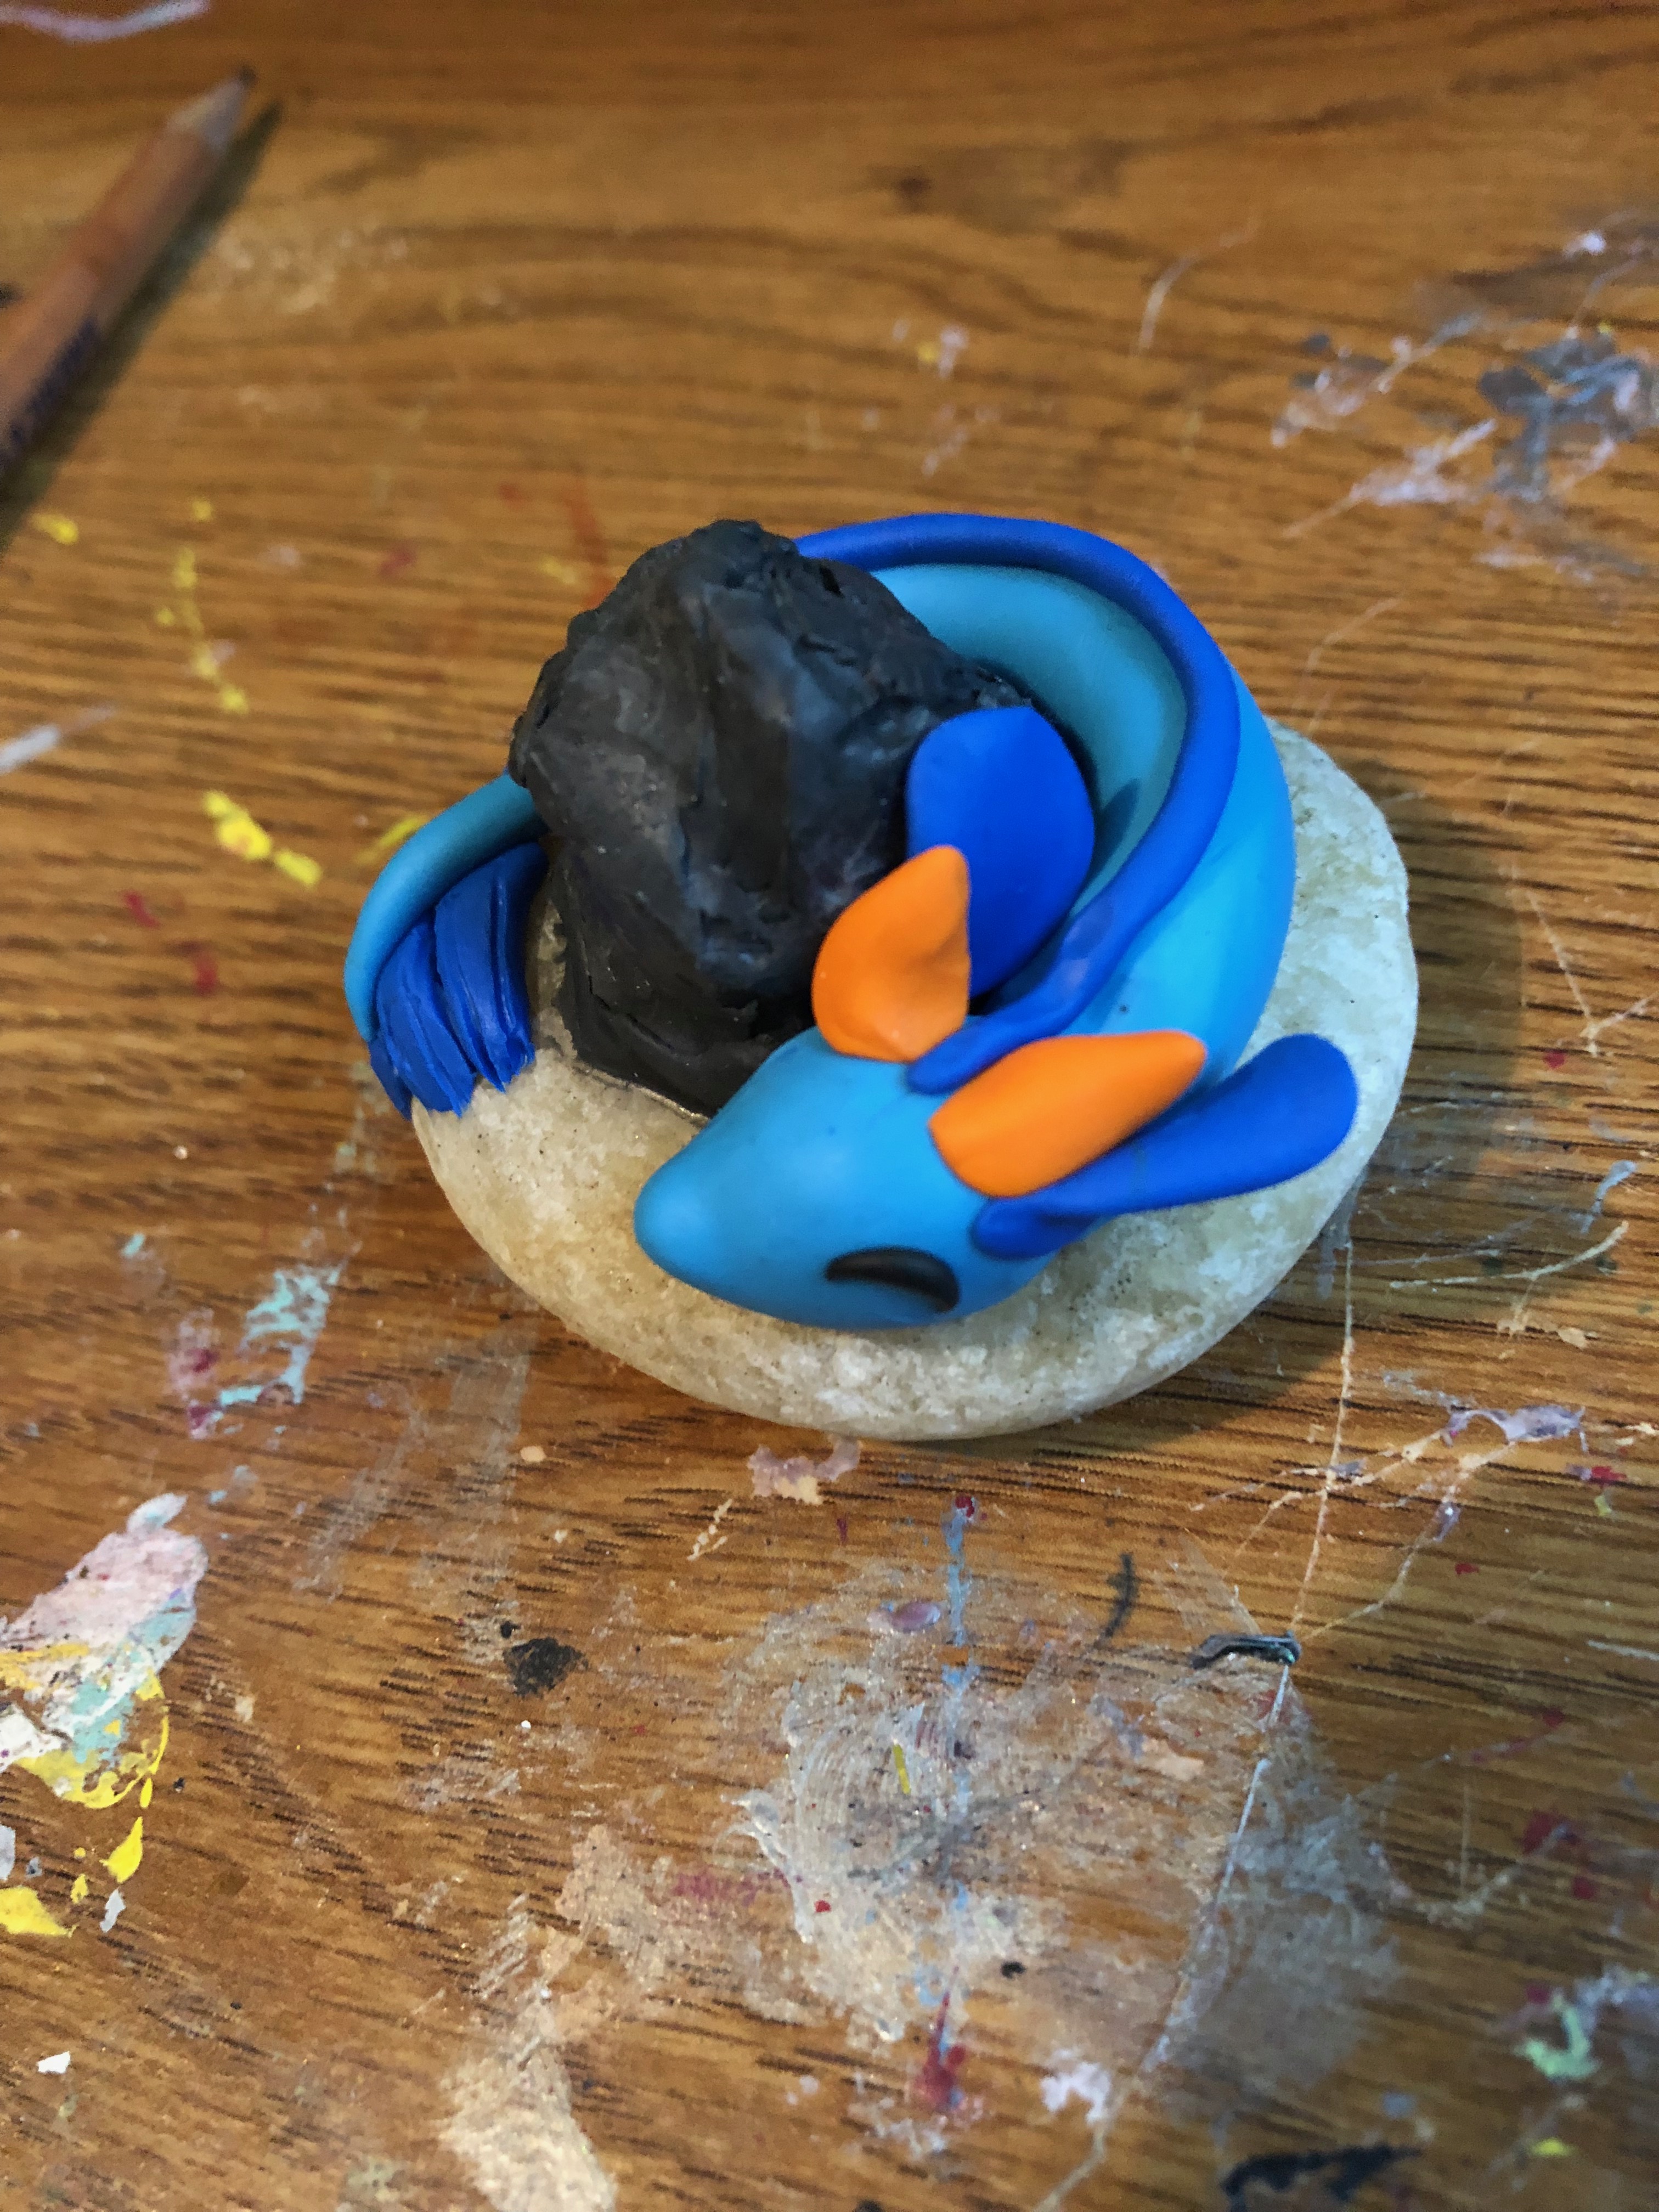
Roll out dark blue clay and use your fingers to pinch the clay into a straight, long spike. Wind it on the body of the dragon all the way down the back to the tip of the tail. Narrow to stay proportional towards the tip.
Shaping the Face
Add a blob of clay to the front of the snake body where the head goes. Shape it like a curved diamond, and make the cheeks much less pointy than the nose.
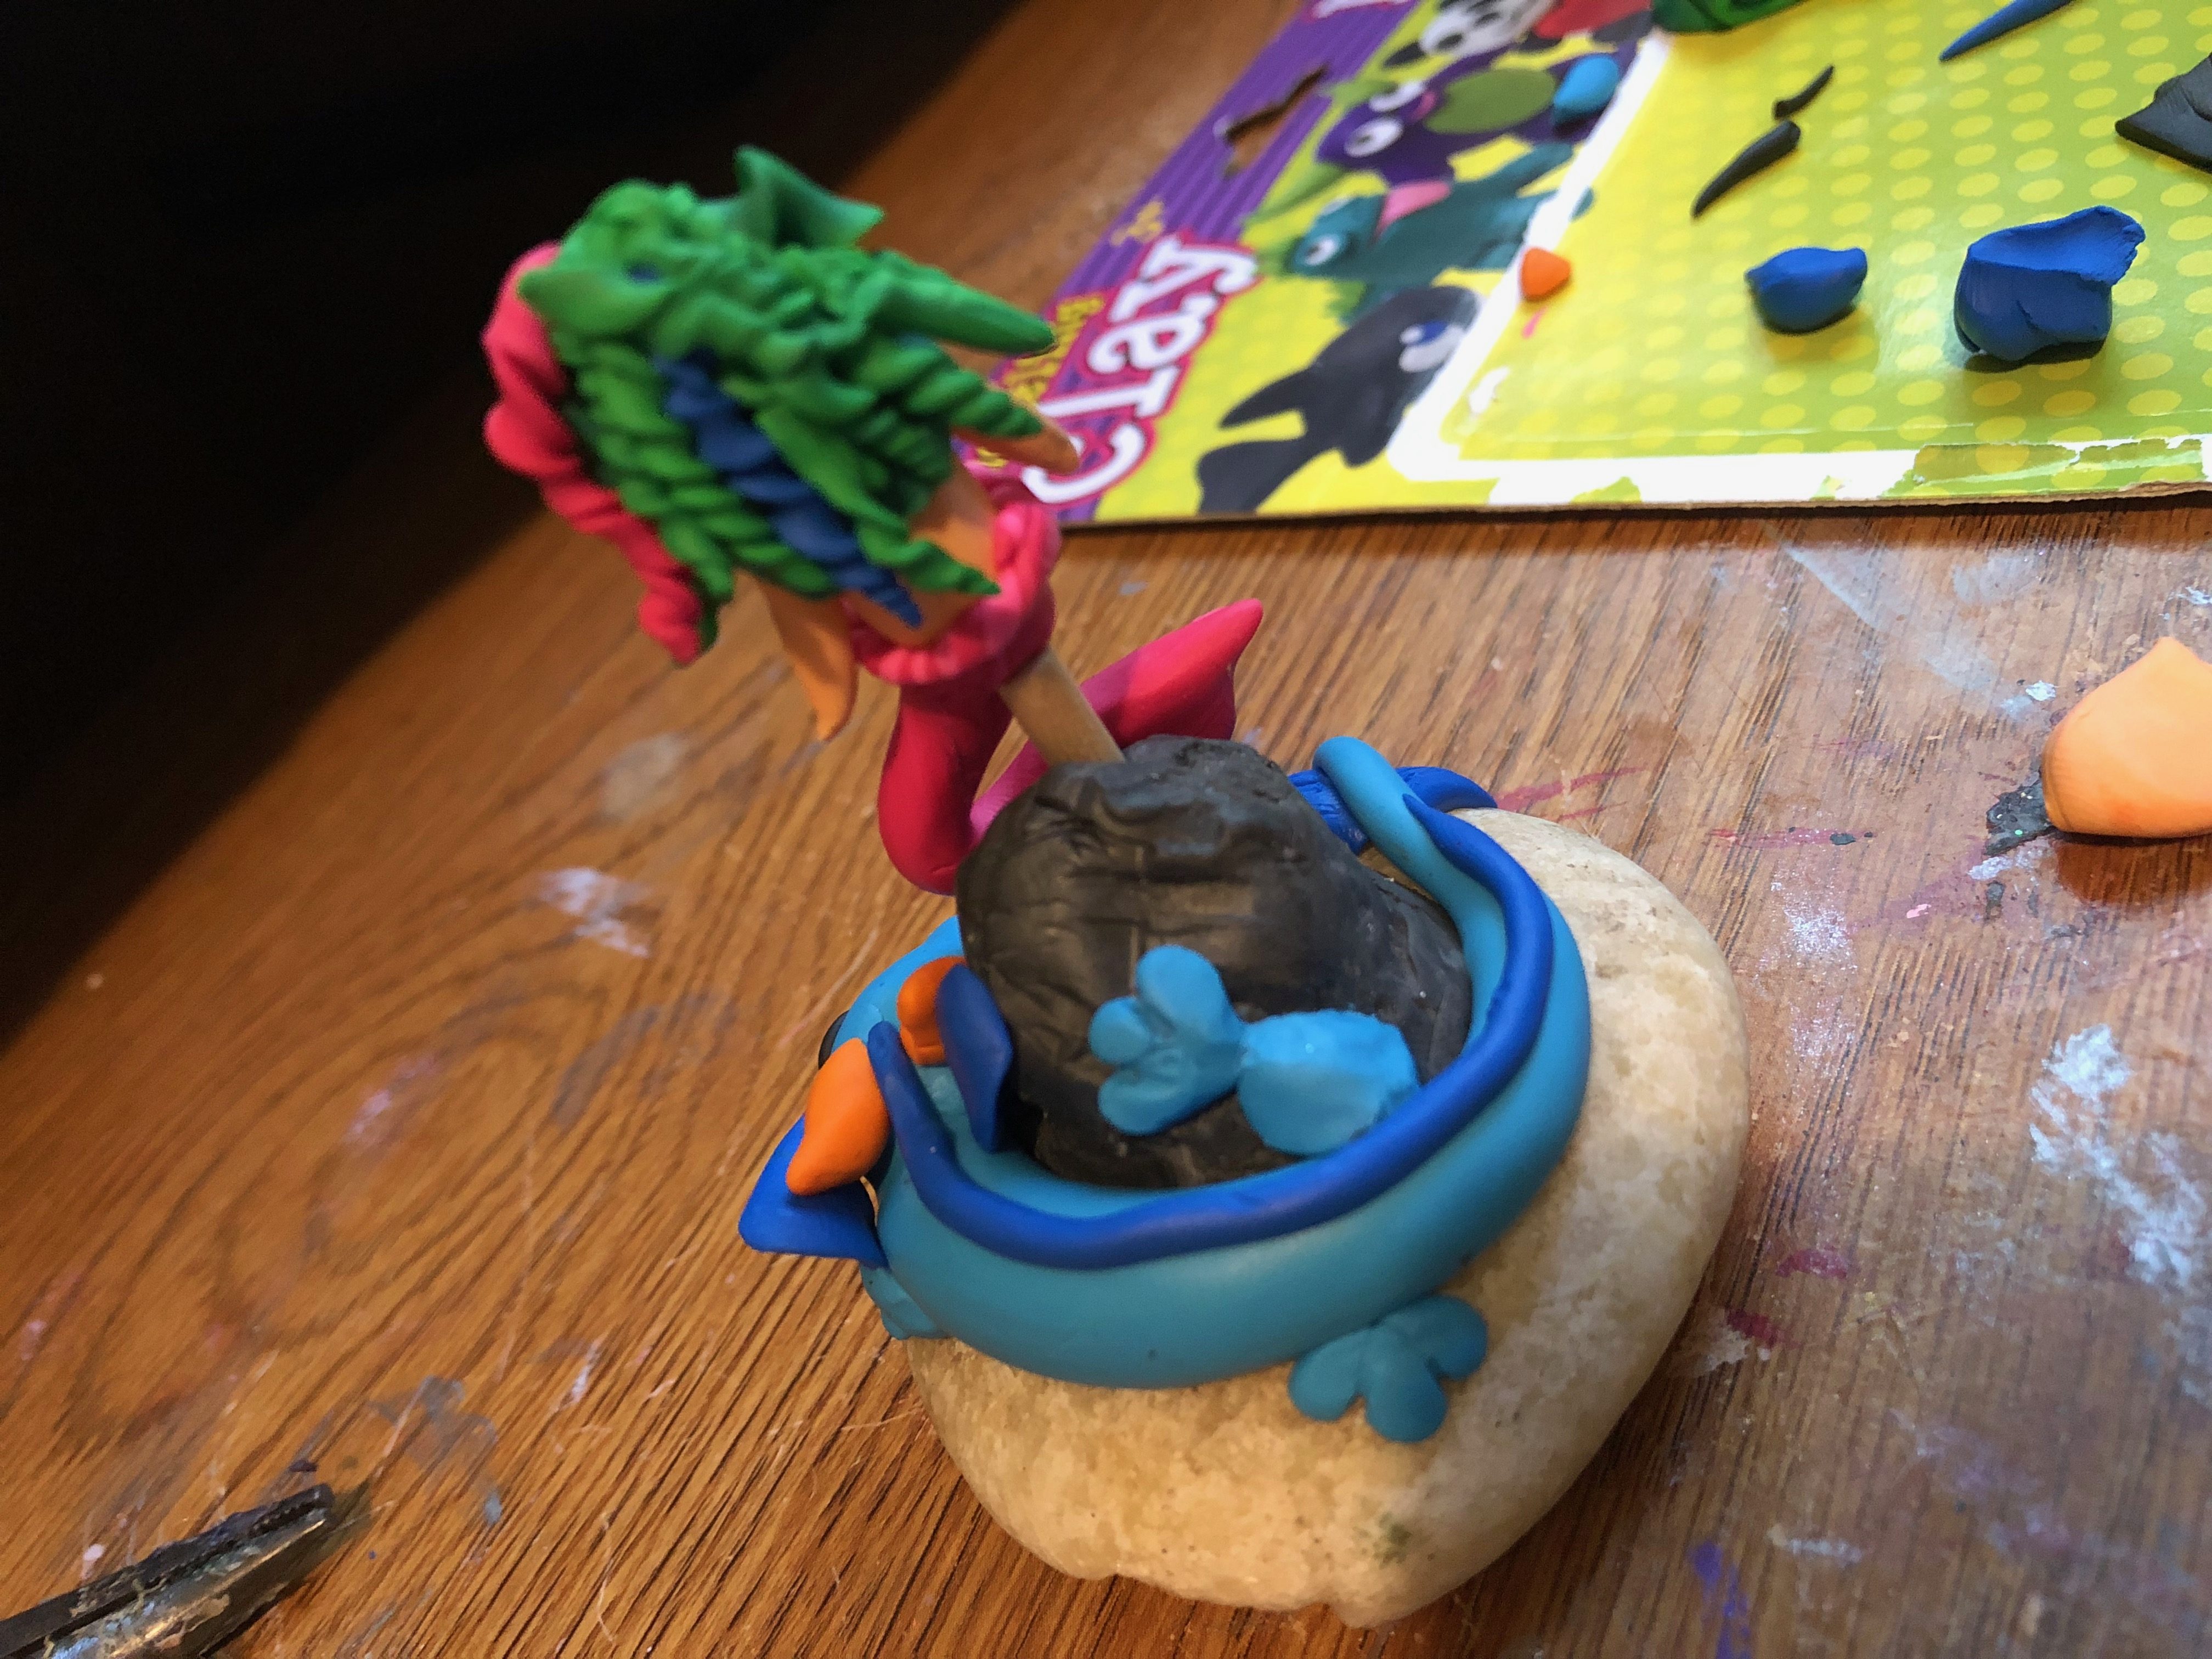
Curling the Dragon around the Polymer Clay Sculpture
Wrap the dragon around the mermaid on the rock, and put one foot on the back of the rock, one foot off on the real rock, and the other two up front by his face. Press everything together gently to secure it.
Making Horns
Use a pop of color with some orange clay and make some cone shapes. Bend the end of the cone shapes and stick them on the head, and add two small flat circles for ears. Add the eyes to the face to make him look happy and sleepy.
Adding Tail Fluff
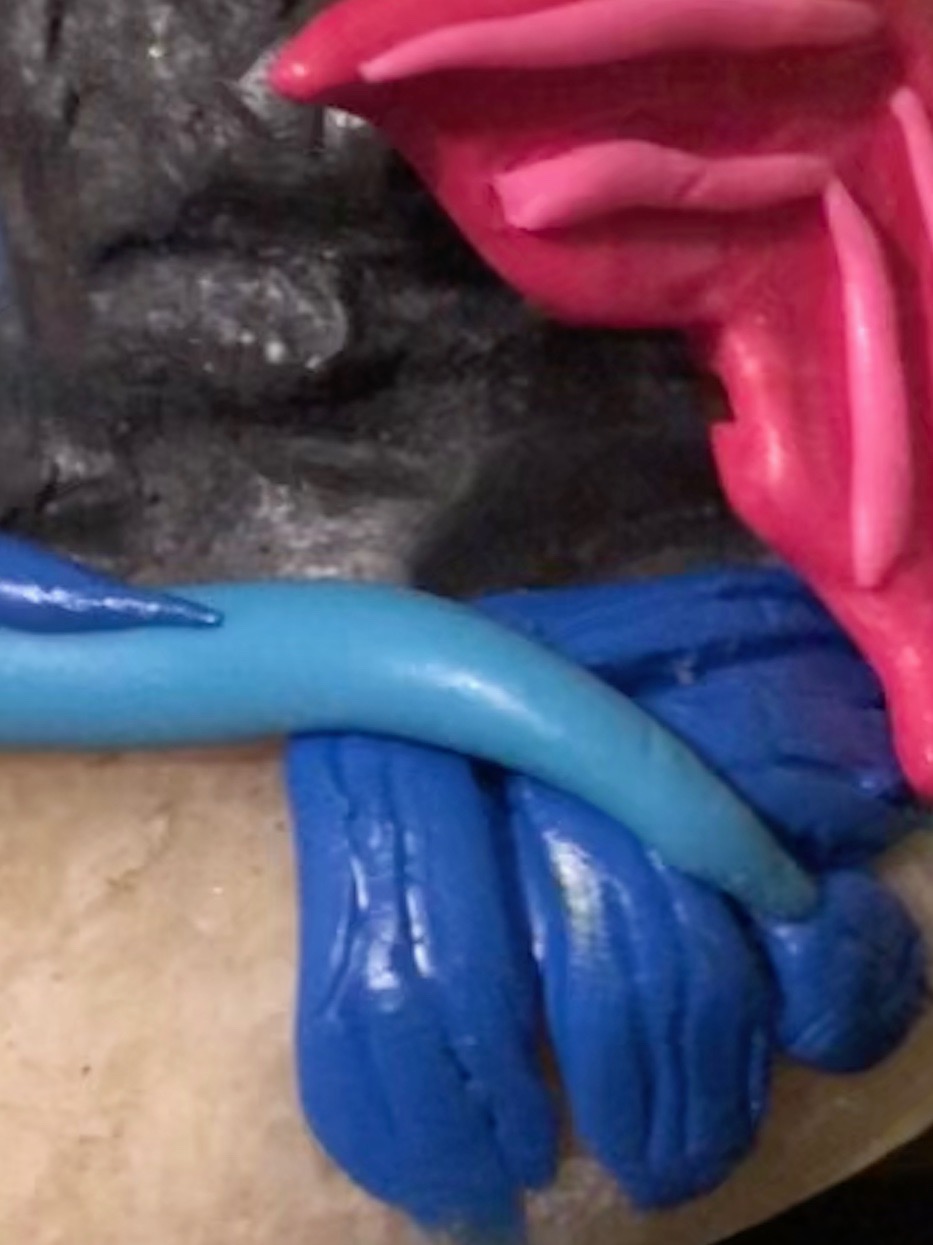
Make several long teardrops and flatten them around the tip of the tail on the real rock. Sculpt the feathers out with a toothpick gently, so as not to dig up pieces of clay on the edges that will not look pretty.
Finish
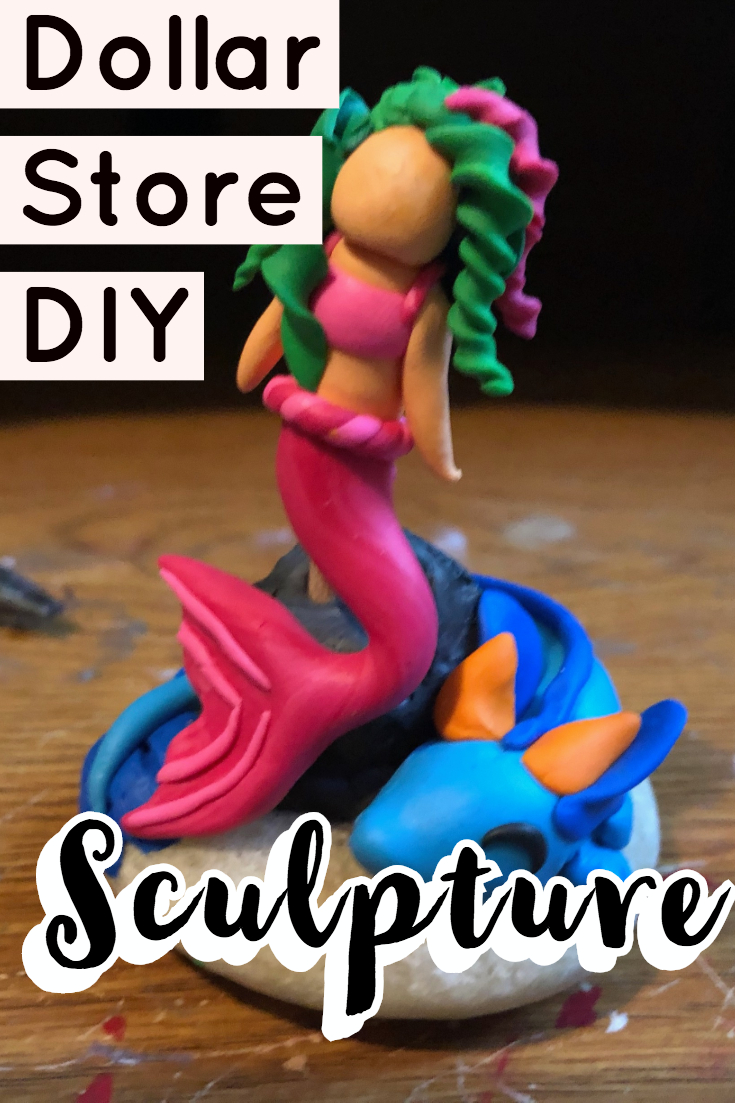
Smooth your fingerprints off as best as you can and your little project is done. See? No big fancy clays required. Happy Crafting!
I love all the wonderful crafts !
Great job on the cute crafts
these are great ideas