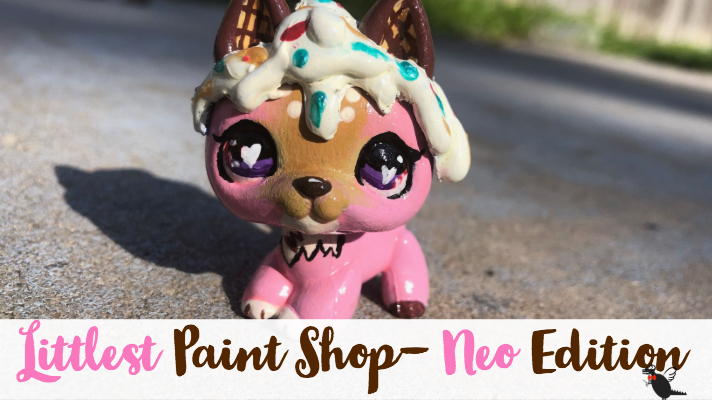
Last time we worked on this adorable little ice cream puppy LPS Custom, he had his base color, his eyes, and his ears ready to go. Even with all of these improvements, this little puppy still has a long way to go. In this second part, we will finish him and make him an adorable little accessory.
What you will need next
- White paint
- Brown paint
- Paintbrush
- Puffy paints
- Another German Shepherd
- Press n seal, NOT clingwrap
- Hot glue
Setting up a Hot Glue Station to finish Neo the Ice Cream Puppy
For hot glue, I always set up on a plate or something that will catch hot glue if it drips out when set down. If you choose to use a paper plate, make sure you never leave the room with it plugged in for obvious reasons.
Covering Neo’s Backup in Press N Seal
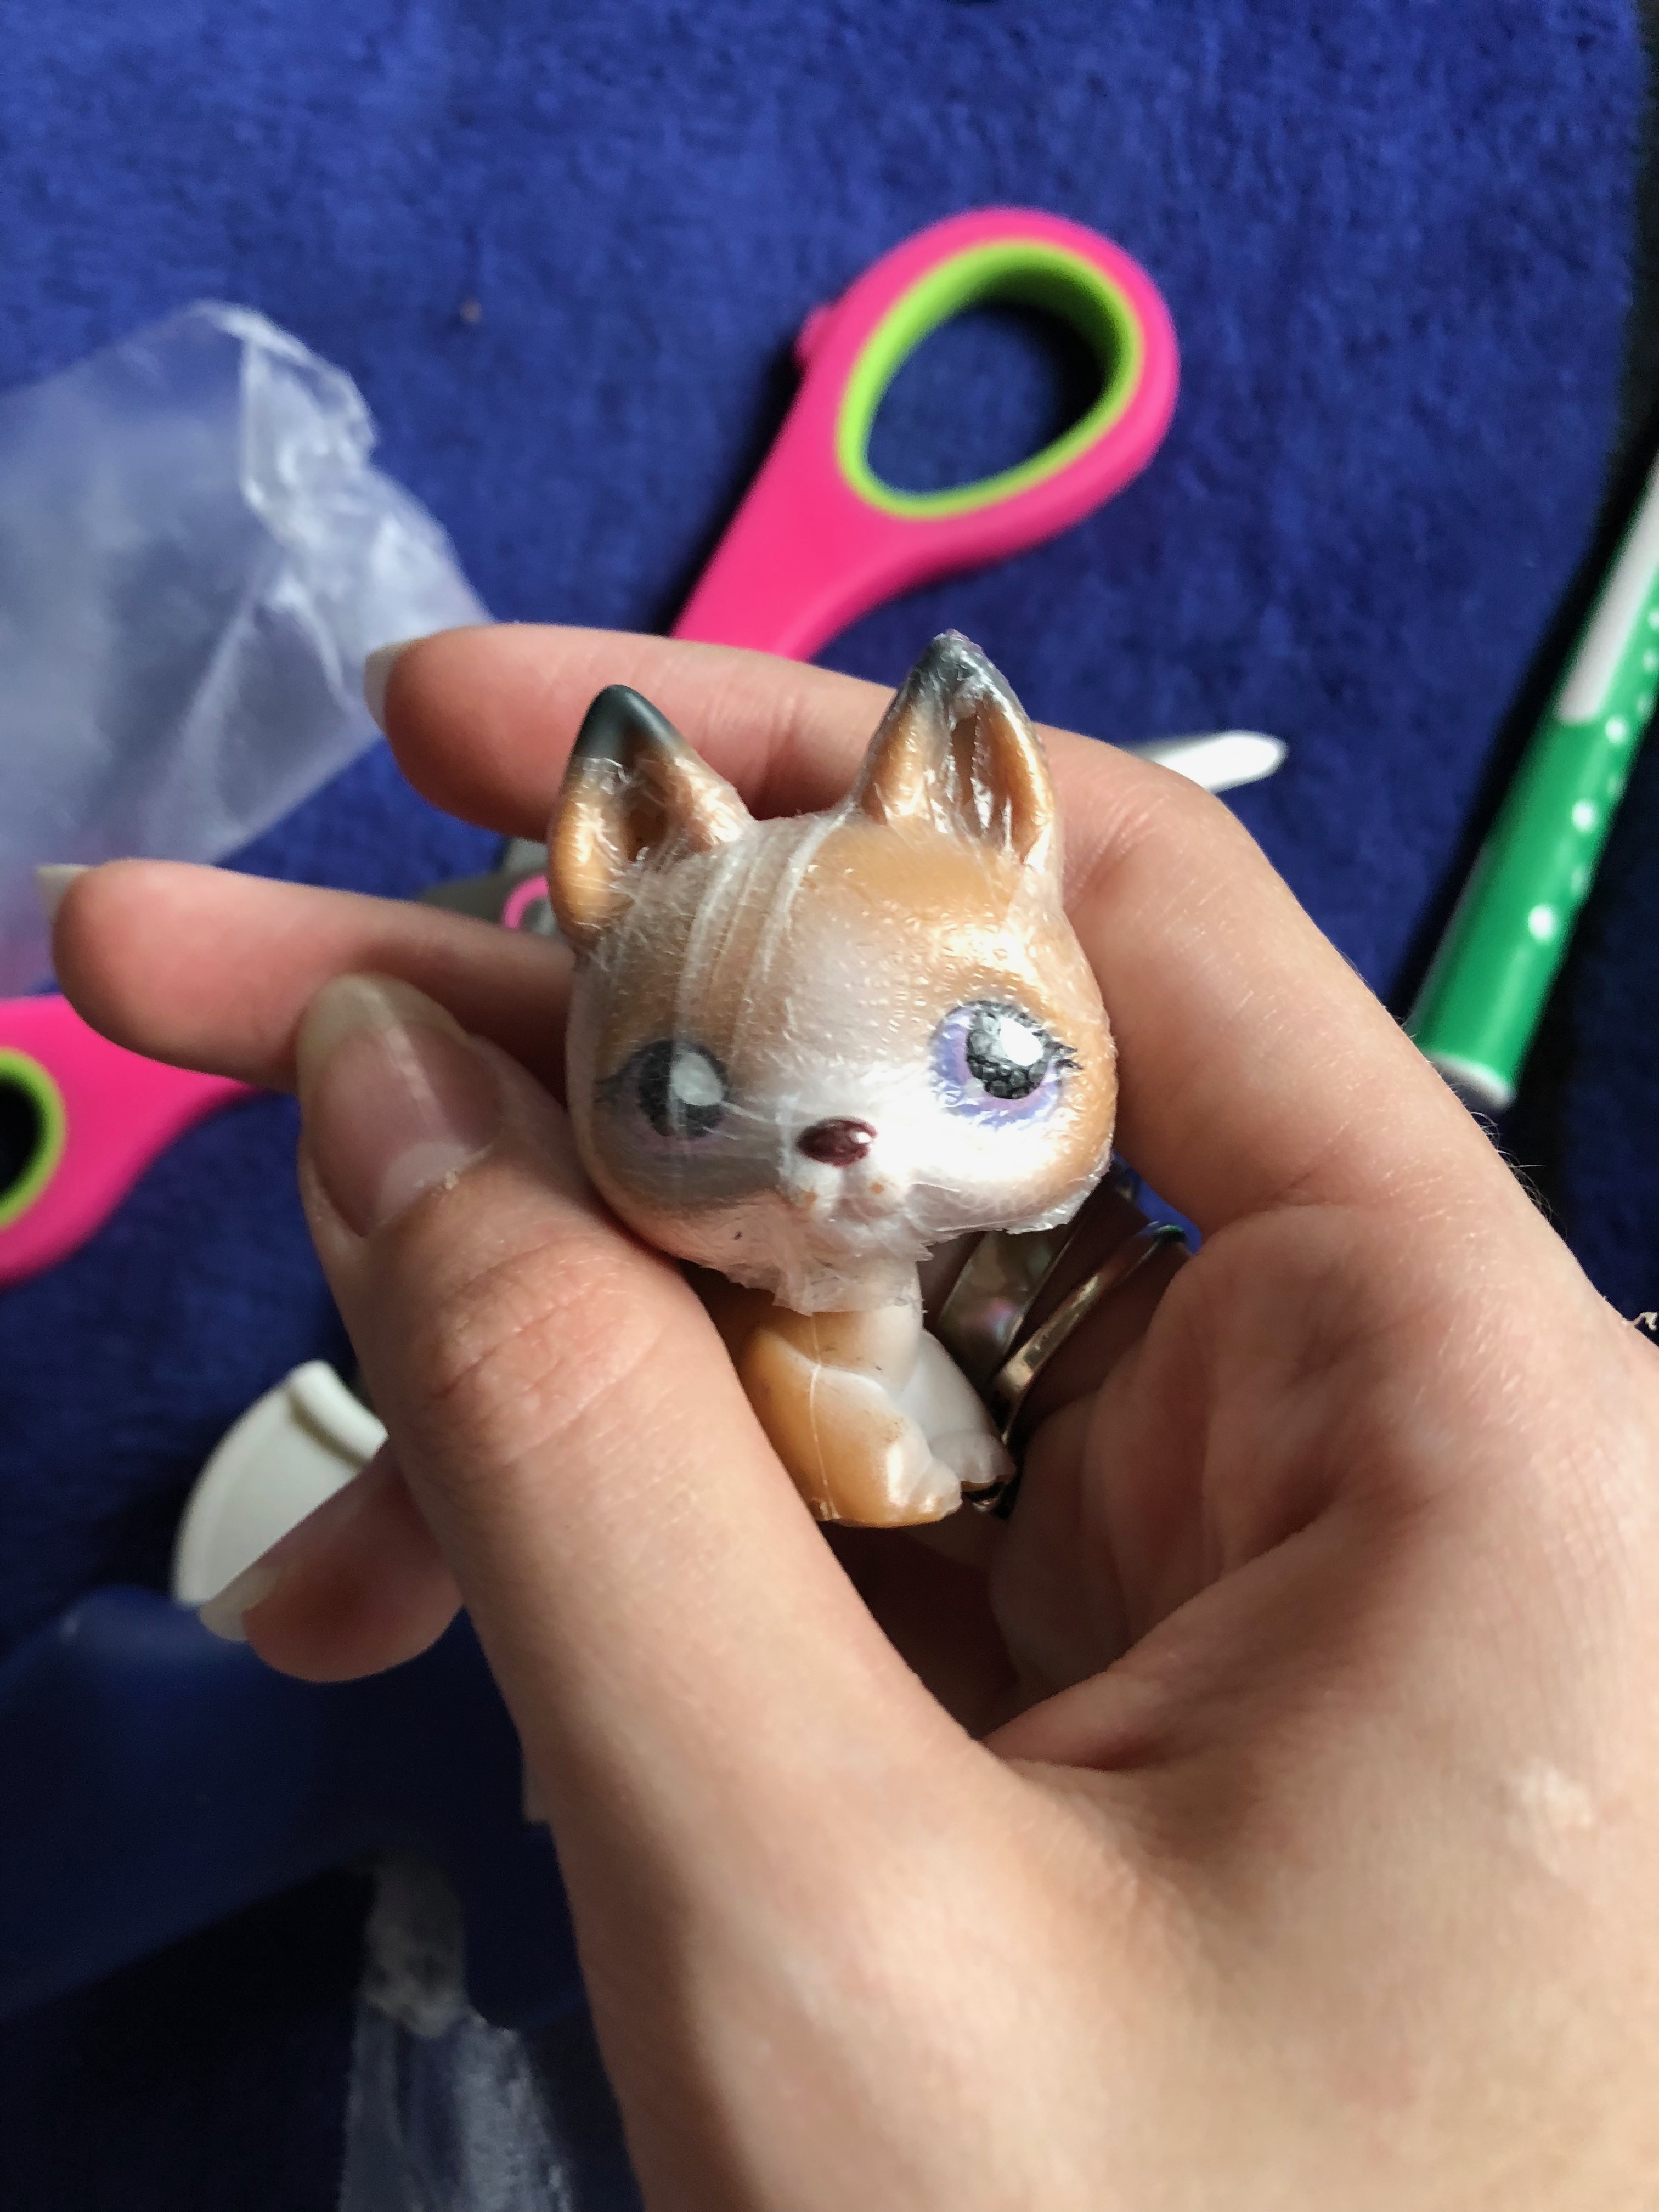 Using that backup german shepherd, cover the head completely in Press N Seal. I cut the plastic around the ears to make it seal as much as possible, as hot glue directly on the pet will stick and could ruin it if you are not careful.
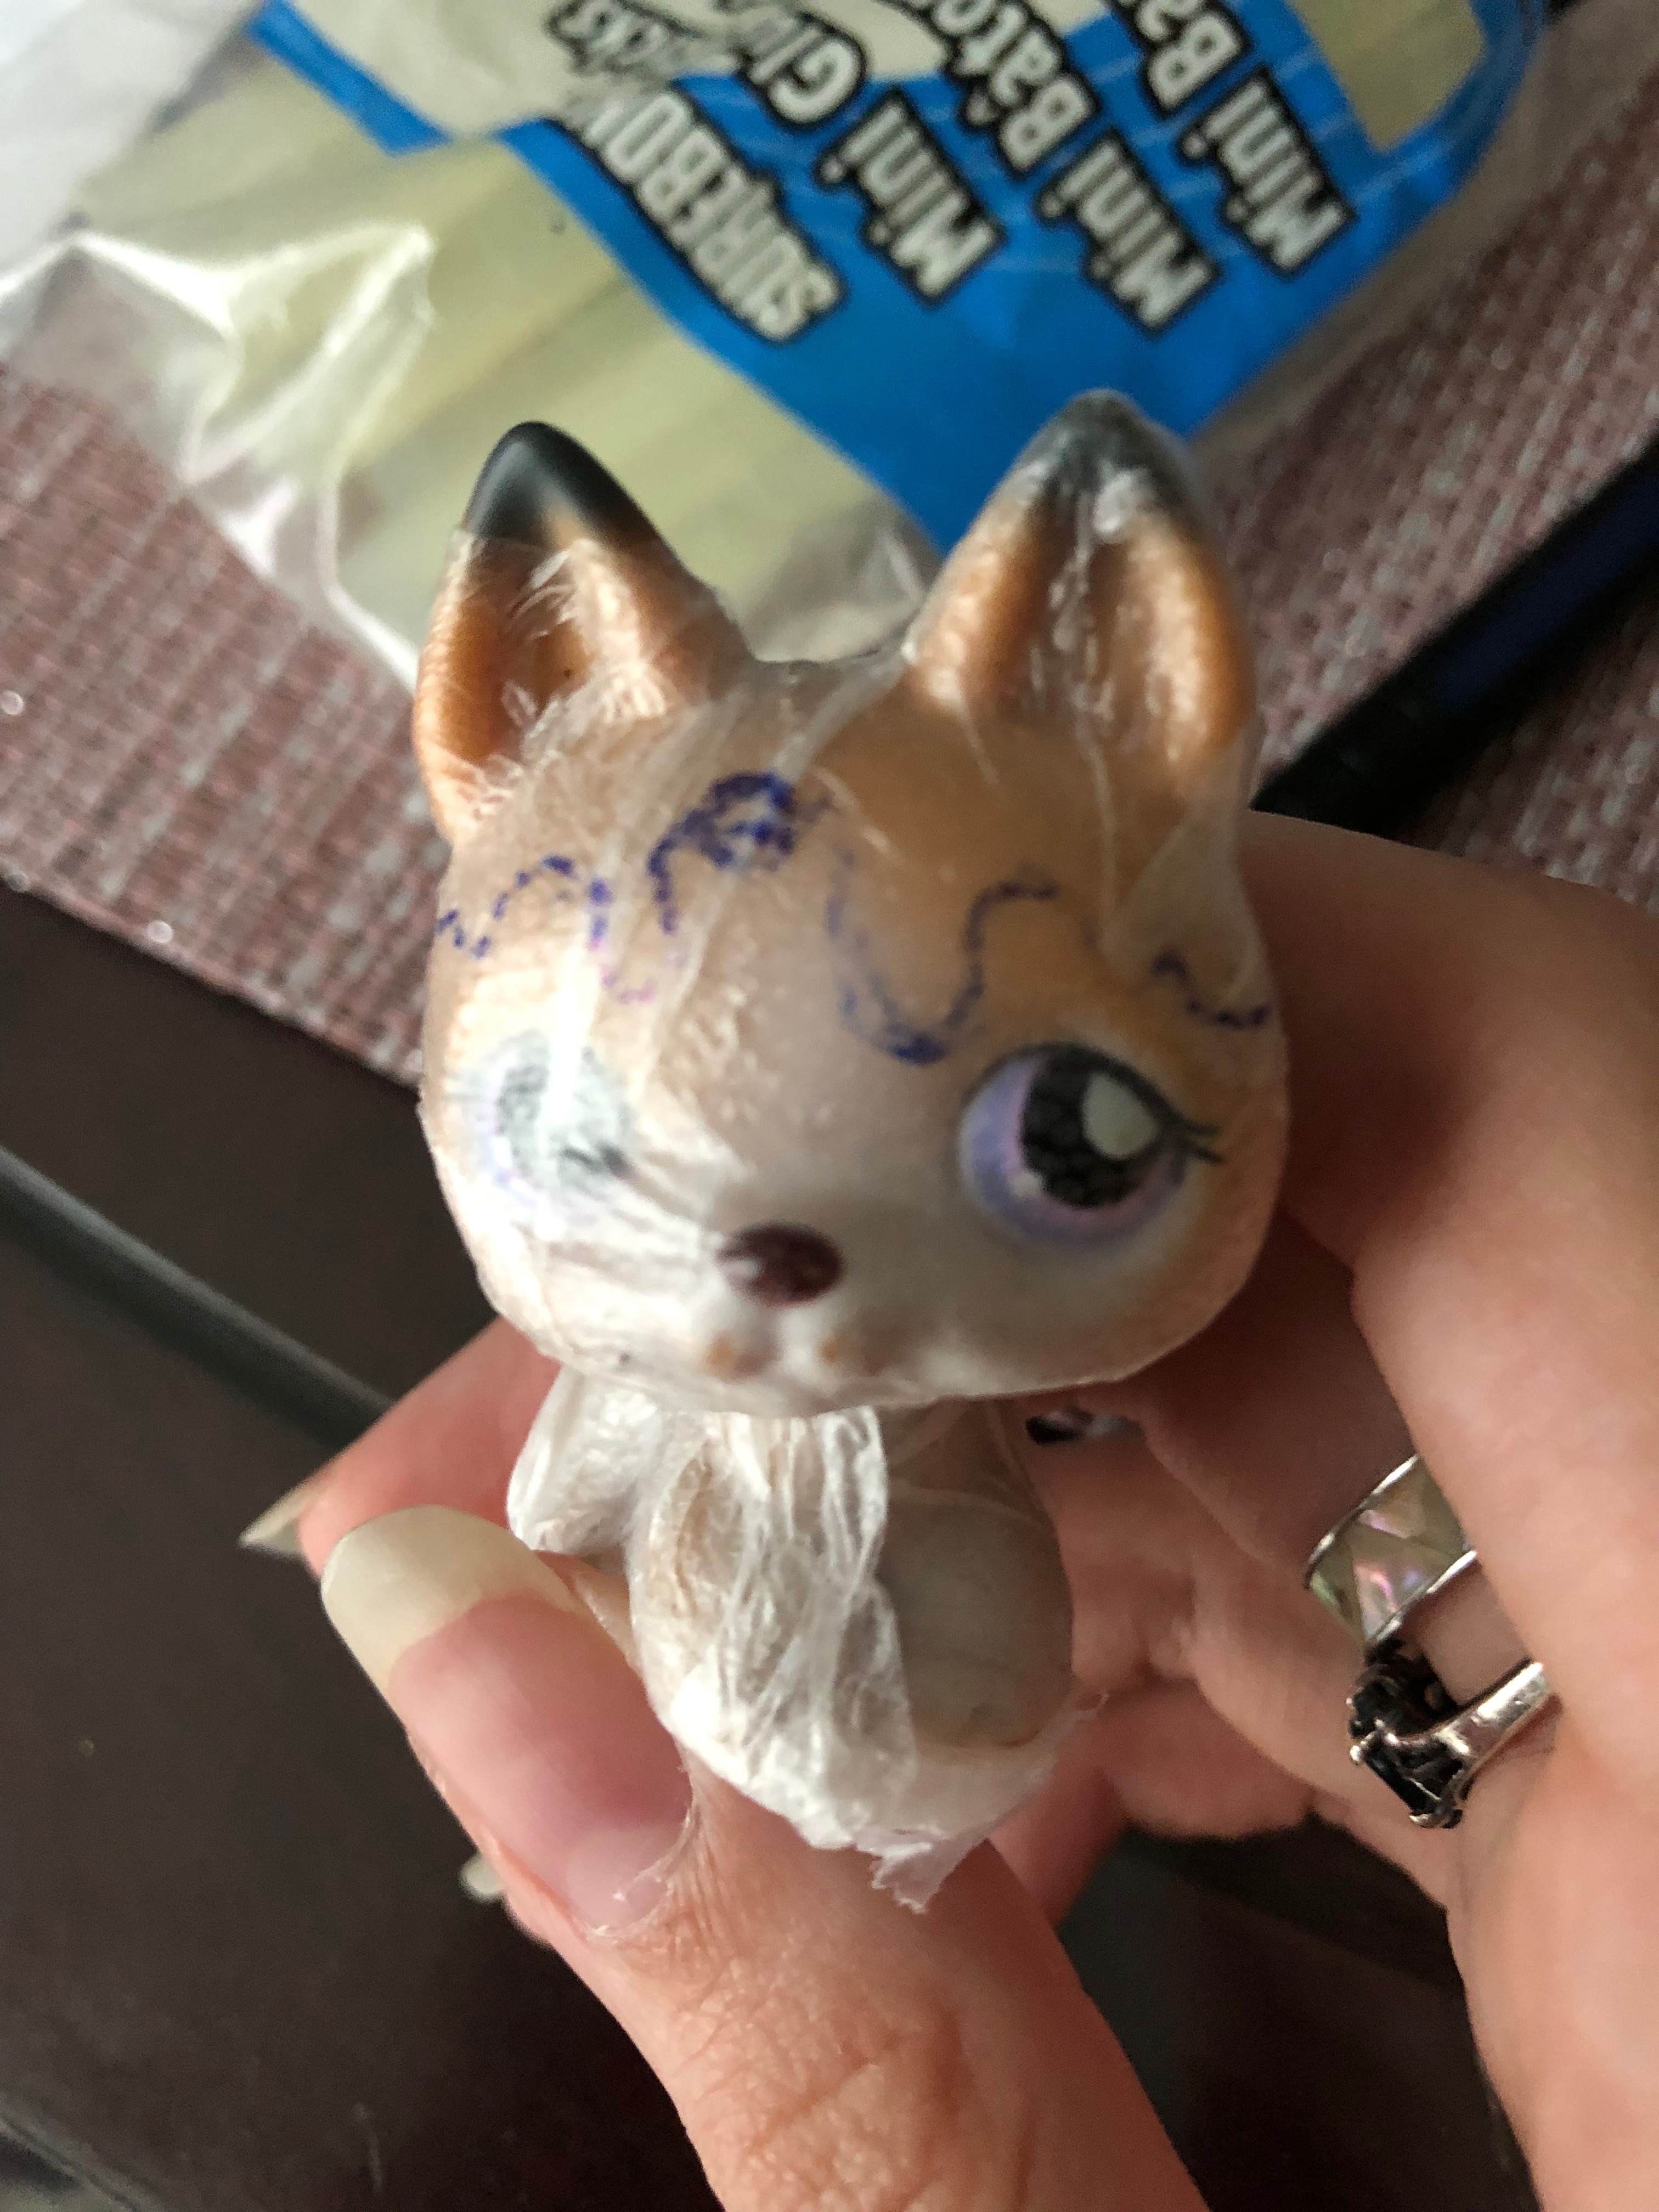
Why it is a bad Idea to put Press n Seal on your Painted LPS Customs
After this hat was ready for removal, I noticed the hot glue had melted the Press n Seal onto the LPS. This was easily cleaned up, but on a painted unfinished custom it would have been a death sentence. Always seal your customs, and always be careful to protect them even after glossing them.
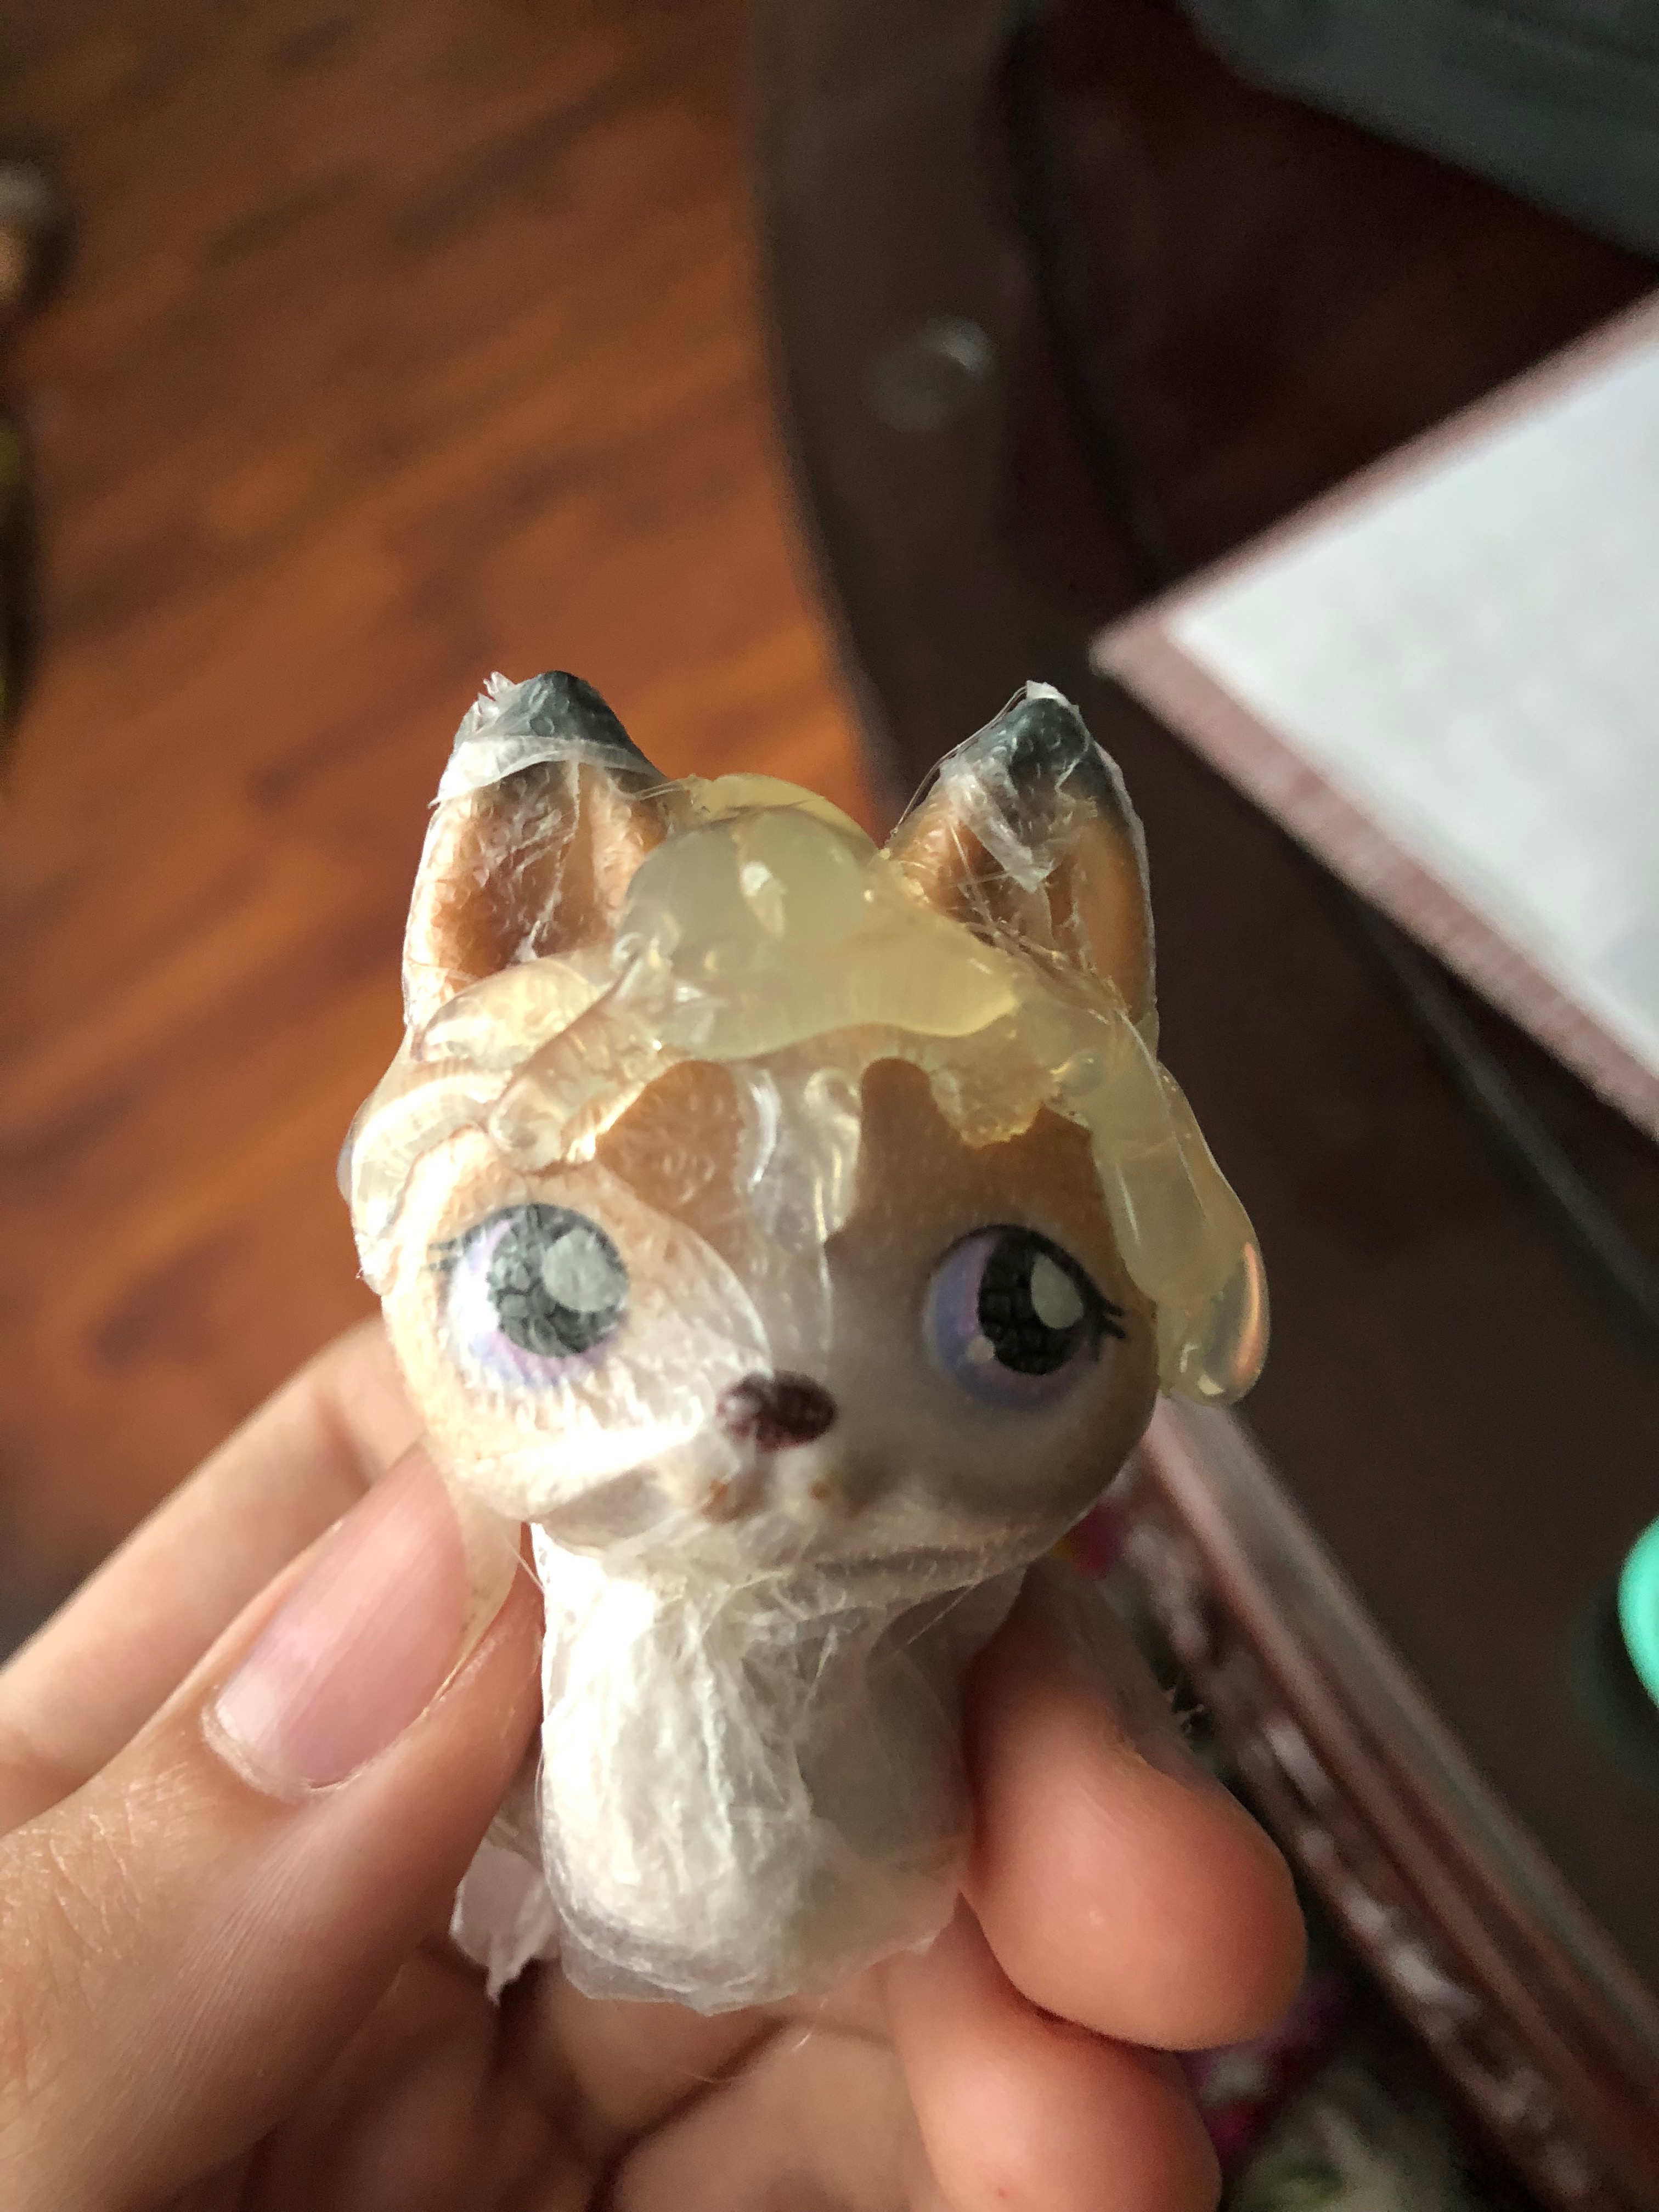
Dripping the Hot Glue
This part was super fun, but easy to over do. Make some hot glue drippings along the base of where you want the ice cream to be, and let it sit on the head for a minute or so. Then, do another row of drippings, and fill in around the ears. I made the mistake of not letting the glue sit and as a result I have a hot glue hat that is overly lumpy in the front.
Letting the Hot Glue Sit for the LPS Custom
Let the glue sit on the pet until it is completely cool to the touch, or around 15-20 minutes to be sure. In the meantime, sit down and think about things you can paint onto your own Neo to make him special to you.
Pulling off the Hot Glue
Once the glue dries, peel it off the head and cut the press n seal to the shape of the hat. Trim it as close as you dare to. If you can get the residue out of the inside of the new ice cream head piece, do so.
Coating the Underside of the LPS Custom Accessory
Since I couldn’t get my head piece completely clean, I used a cheap nail polish to coat the inside of the hat to protect my pet, and let it dry a good long time. If you don’t let it dry, your pink dog will forever have purple spots on his head.
Checking to Make Sure the LPS Custom Accessory Fits
After it dries, clean off the other dog again with alcohol and see if the hat still slides on easily. If the hat doesn’t fit, trim it or make a new one with alterations based on where it previously got stuck.
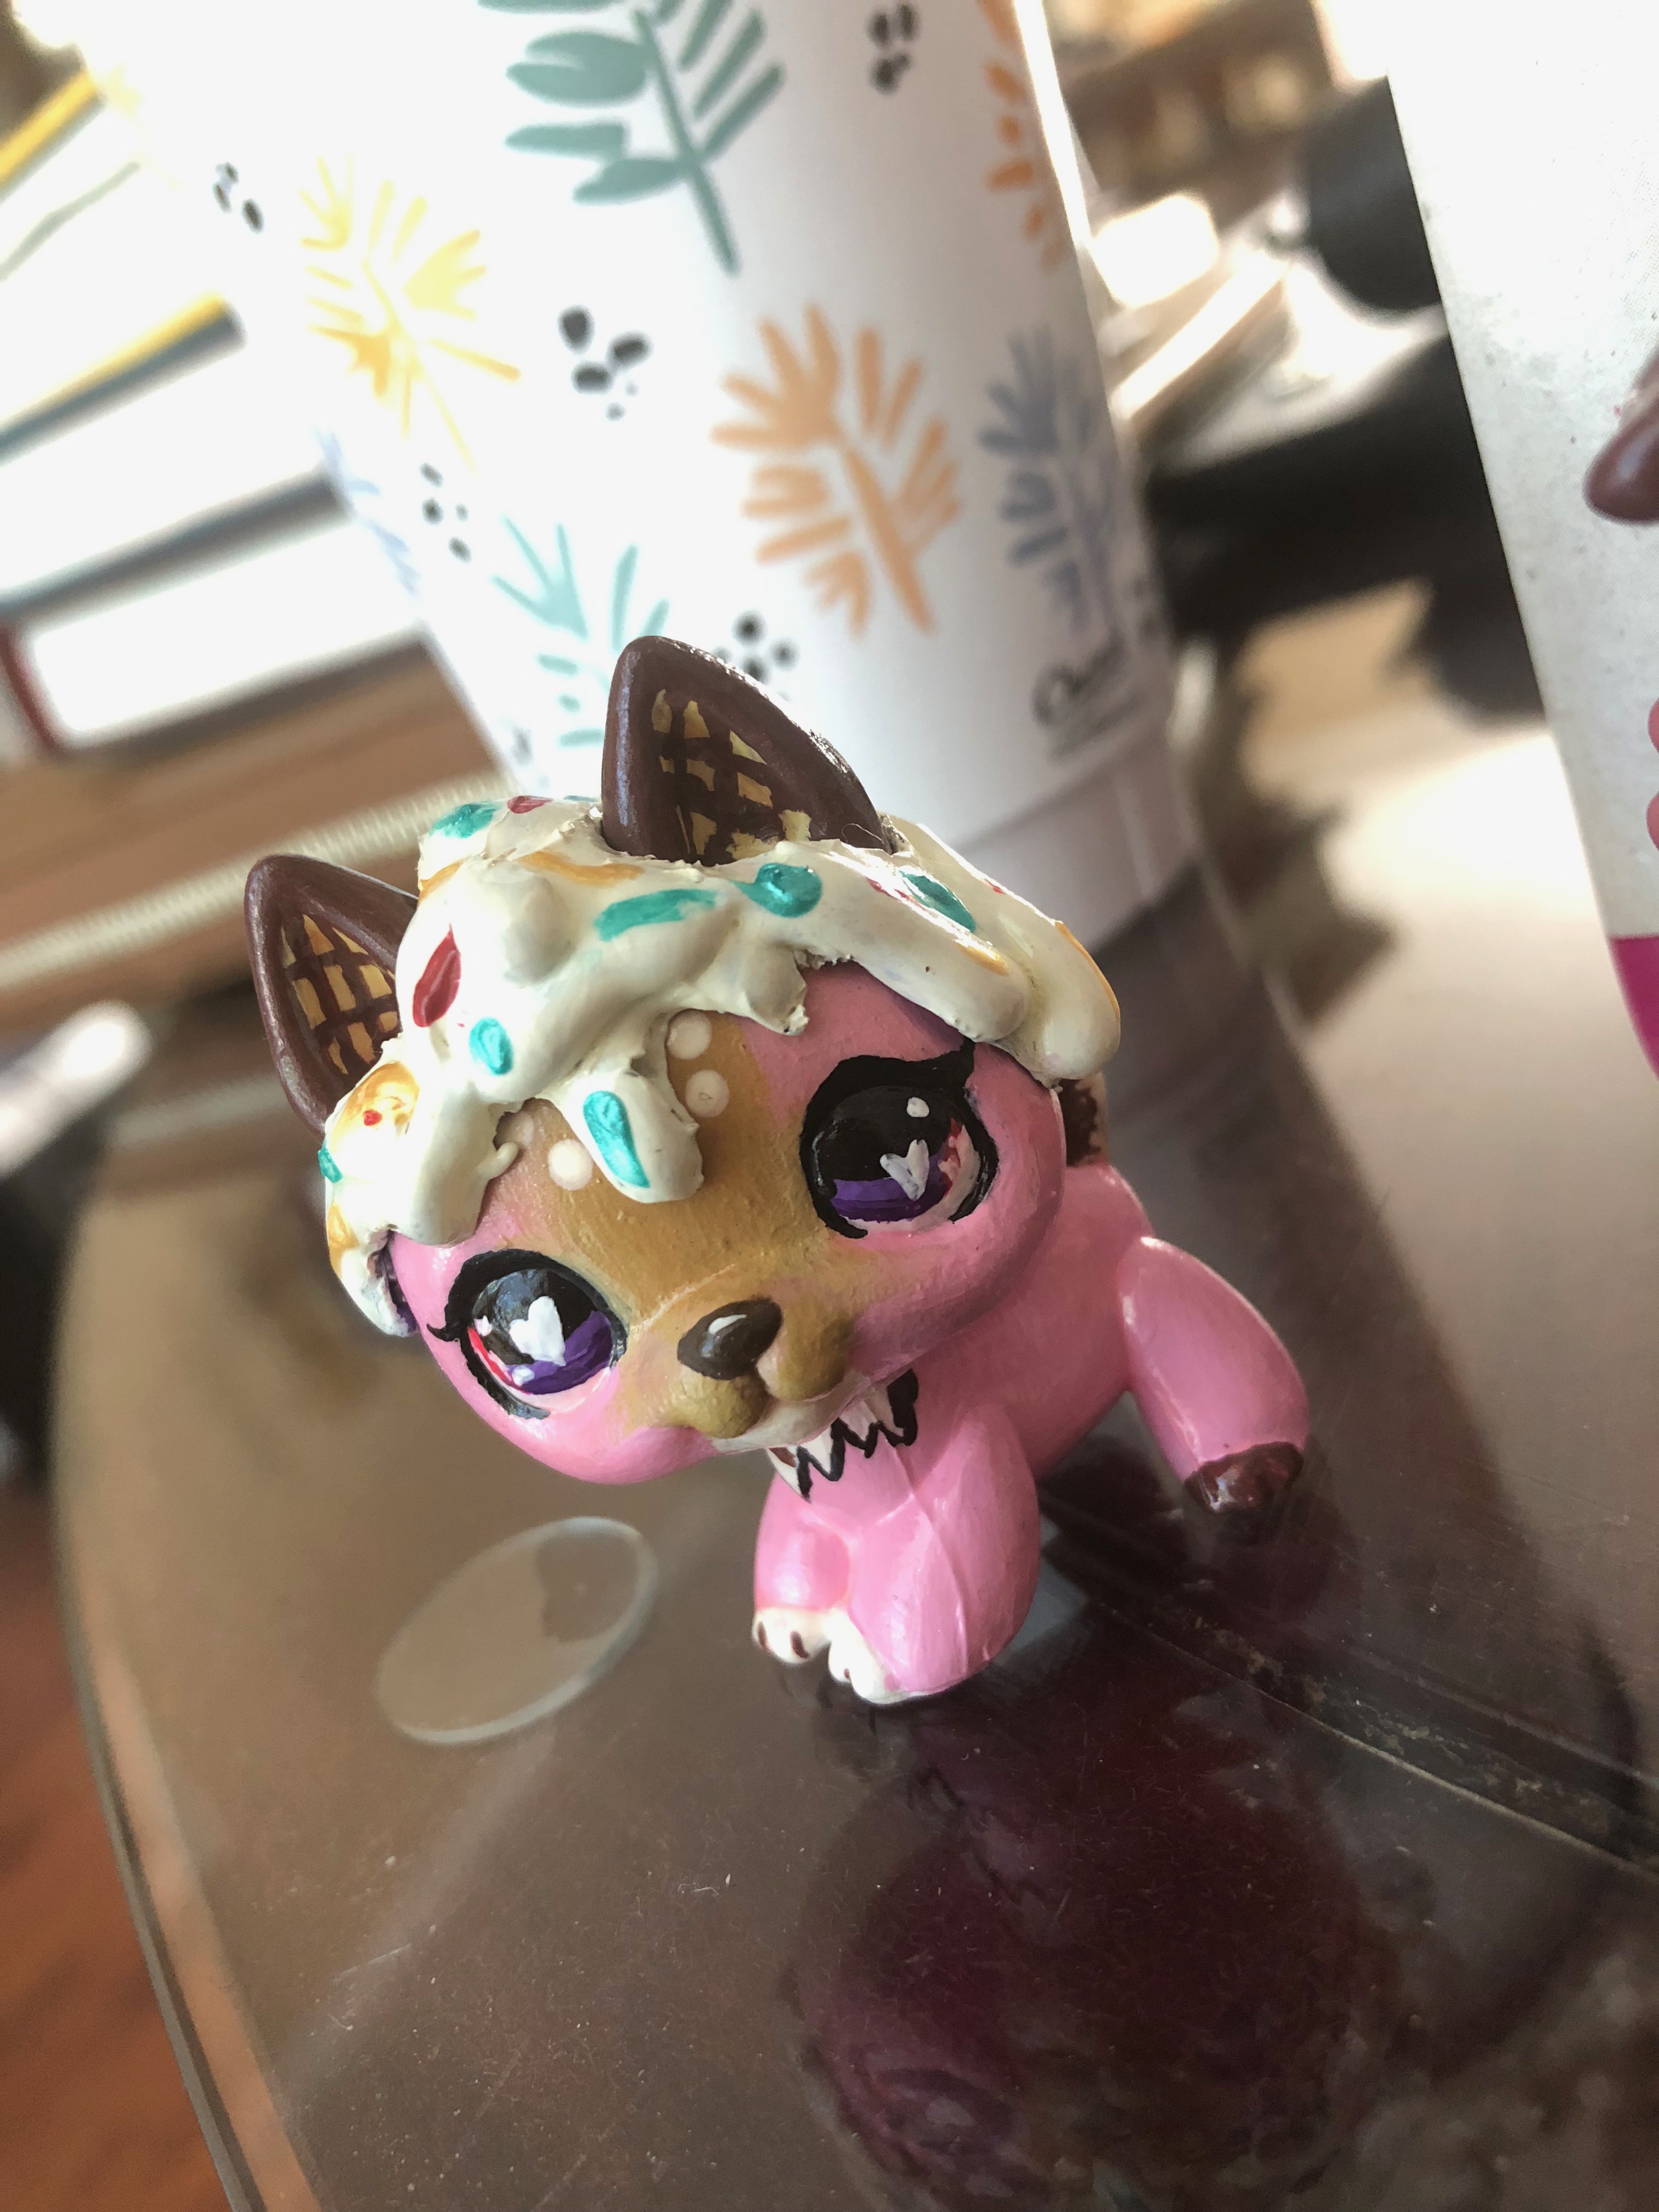
Painting the Main Color of the Ice Cream
Using yellowish white paint, coat the head piece entirely. The paint I used did not want to cooperate, so I had to do a lot of different coats. Be patient, you will get there one day.
Painting Neo’s Nose
Neo’s nose is a nice chocolate brown with a little bit of off white and tiny sprinkles on his head. Paint the nose with the dripping ice cream to look like it fell off his head and onto his nose.
Adding Sprinkles to the LPS Custom Accessory
Using several colors of puffy paint, add some colorful sprinkles to the head piece of the LPS. If you can do the sprinkles without hurting the pet, leave the hat on Neo to dry.
Clear Coating the LPS Custom
A good spray of a matte or glossy clear coat will keep him from getting hurt. Make sure to get all the places on his body and touch up any gaps you missed.
Finish
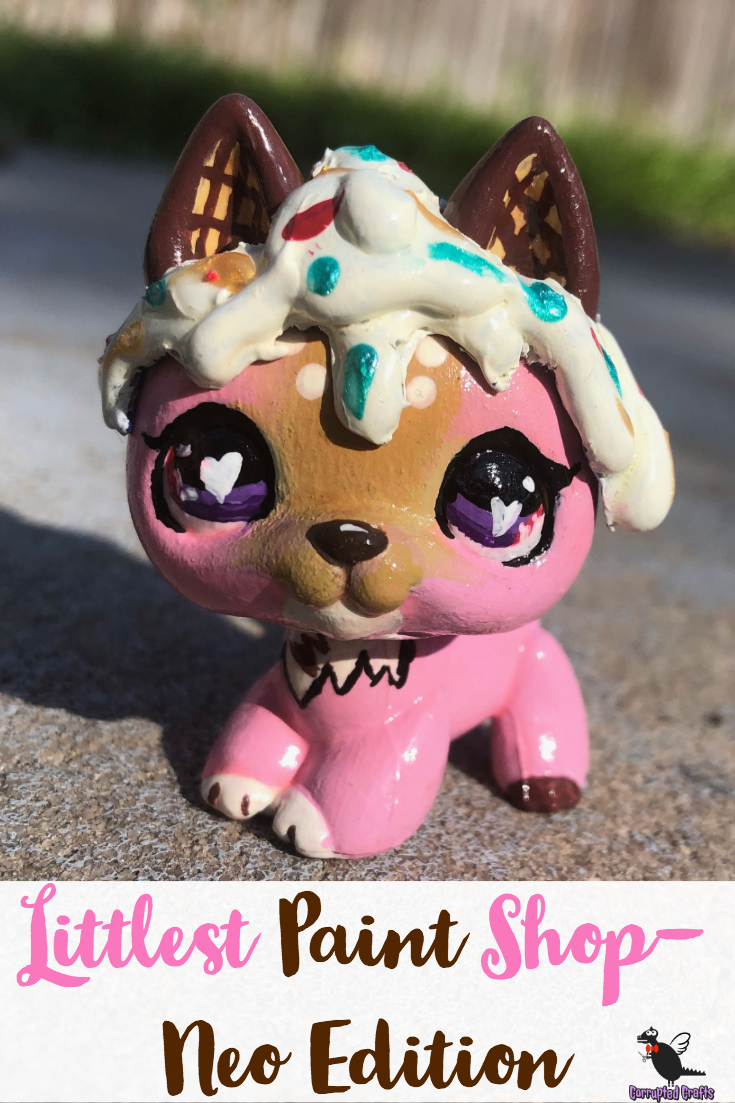
And your new Neo is ready to go. Good luck and happy crafting! If you tried this craft, let me know how yours turned out, I’d love to see it!