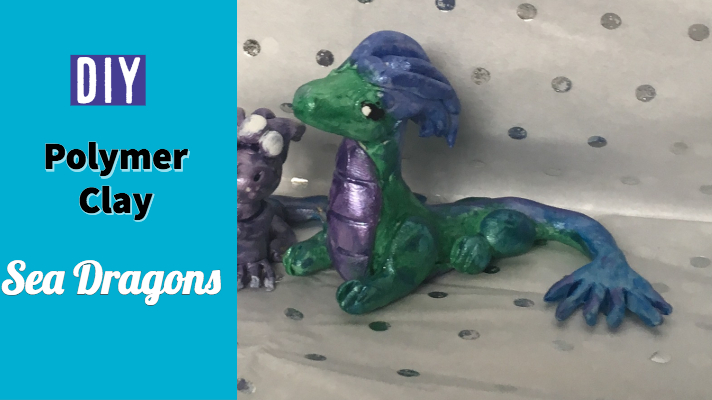
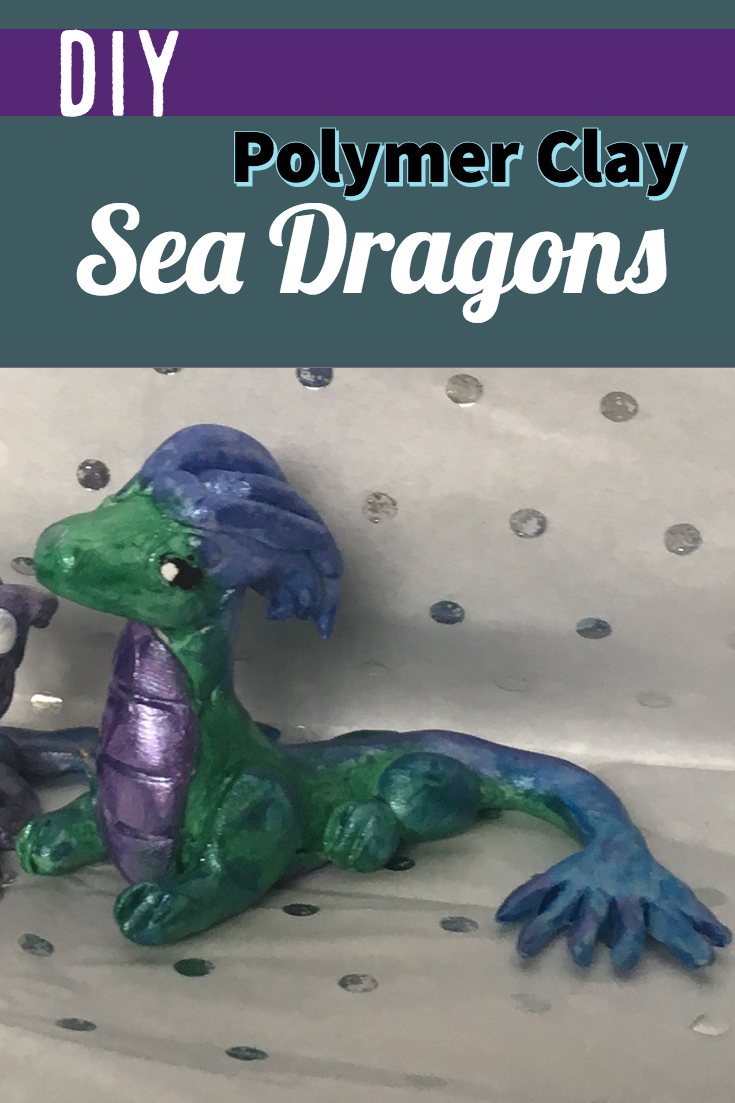
Sculpey sea dragons are adorable and creepy at the same time. You can make them with their paws out to hold a pencil or other small objects, too! They are easier to make than they look.
You will need:
- Sculpey
- Wire
- Pliers
- Green paint
- Blue paint
- Pink paint
- A sky blue non metallic for a base coat
- A toothpick
Prepare the Wire Base
Start by using your pliers to bend out and cut some wire and curve it to the shape of the neck, chest and length of the face. This will be your dragon base. If you want, you can extend it all the way to the tip of the tail if you feel it is needed to hold up the tail fins.
Cover the Wire Base

Next, cover the body of the wire in the clay. Leave the part that supports your head uncovered. Do not worry if it is not thick enough, you can thicken it by laying more clay on top of the wire in sheets and wrapping it around, blending it with your fingers as best as you can. Sculpt the body and tail. Make sure not to leave fingerprints if you can help it! They tend to stay there unless they are buffed out with a file, which can damage your dragon.
Making the Shape
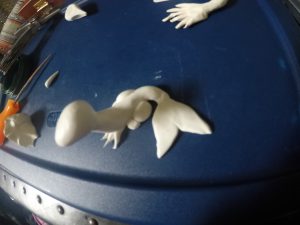
Next you will take some clay and sculpt it to make the head of your dragon, I made a sort of teardrop shape with a rounded nose. Put it onto the dragon and blend it with the neck. It’s okay that the head looks small right now, because we will be adding spiky tentacle things to the head to make it look bigger. Your dragon probably has bad balance right now, but that’s okay. Make some front paws from teardrop shapes and put them on the front of the dragon, that should make it more stable. Then take the pointy tool and basically cut each paw into three pieces, or toes. Shape them with your toothpick.
Make the Legs and Tentacles
To Make the back legs, take a small ball of clay and a large ball of clay and stick them together and then to the dragon. Mark the toes on the paw and do the same to the other side.
For the tentacles, roll some thin spaghetti like noodles and cut them in about half inch pieces, making them pointed at the tip. Attach many of these of slightly varying lengths to the head of your dragon.
Finish the Fins
The tail fin can be made from two curved tear drop shapes pushed together and attached to the tip of the tail. Feel free to go crazy here though, the tail fin is the part of the dragon that can be customized into your own shape if you want! Bake your dragon for the time it says on the package, and then paint him up as shown in the picture. Use the sky blue first and the metallic over it or it will look too sheer and a little ugly. Then do a clear coat to preserve your design and you are finished!