
This notebook looks almost good to eat, and is much easier to make than normal chocolate. This fun and easy DIY notebook cover is sure to make all your friends question your sanity.
Materials
- Cheap notebook
- Puffy paint in:
- Red
- Yellow
- Light brown
- Black
- Paint brush
- White acrylic paint
- Sponge brush
- Cardboard which you can get when you buy something from Amazon
- Shot glass for mixing paint
Step 1: Prime the DIY Notebook Cover
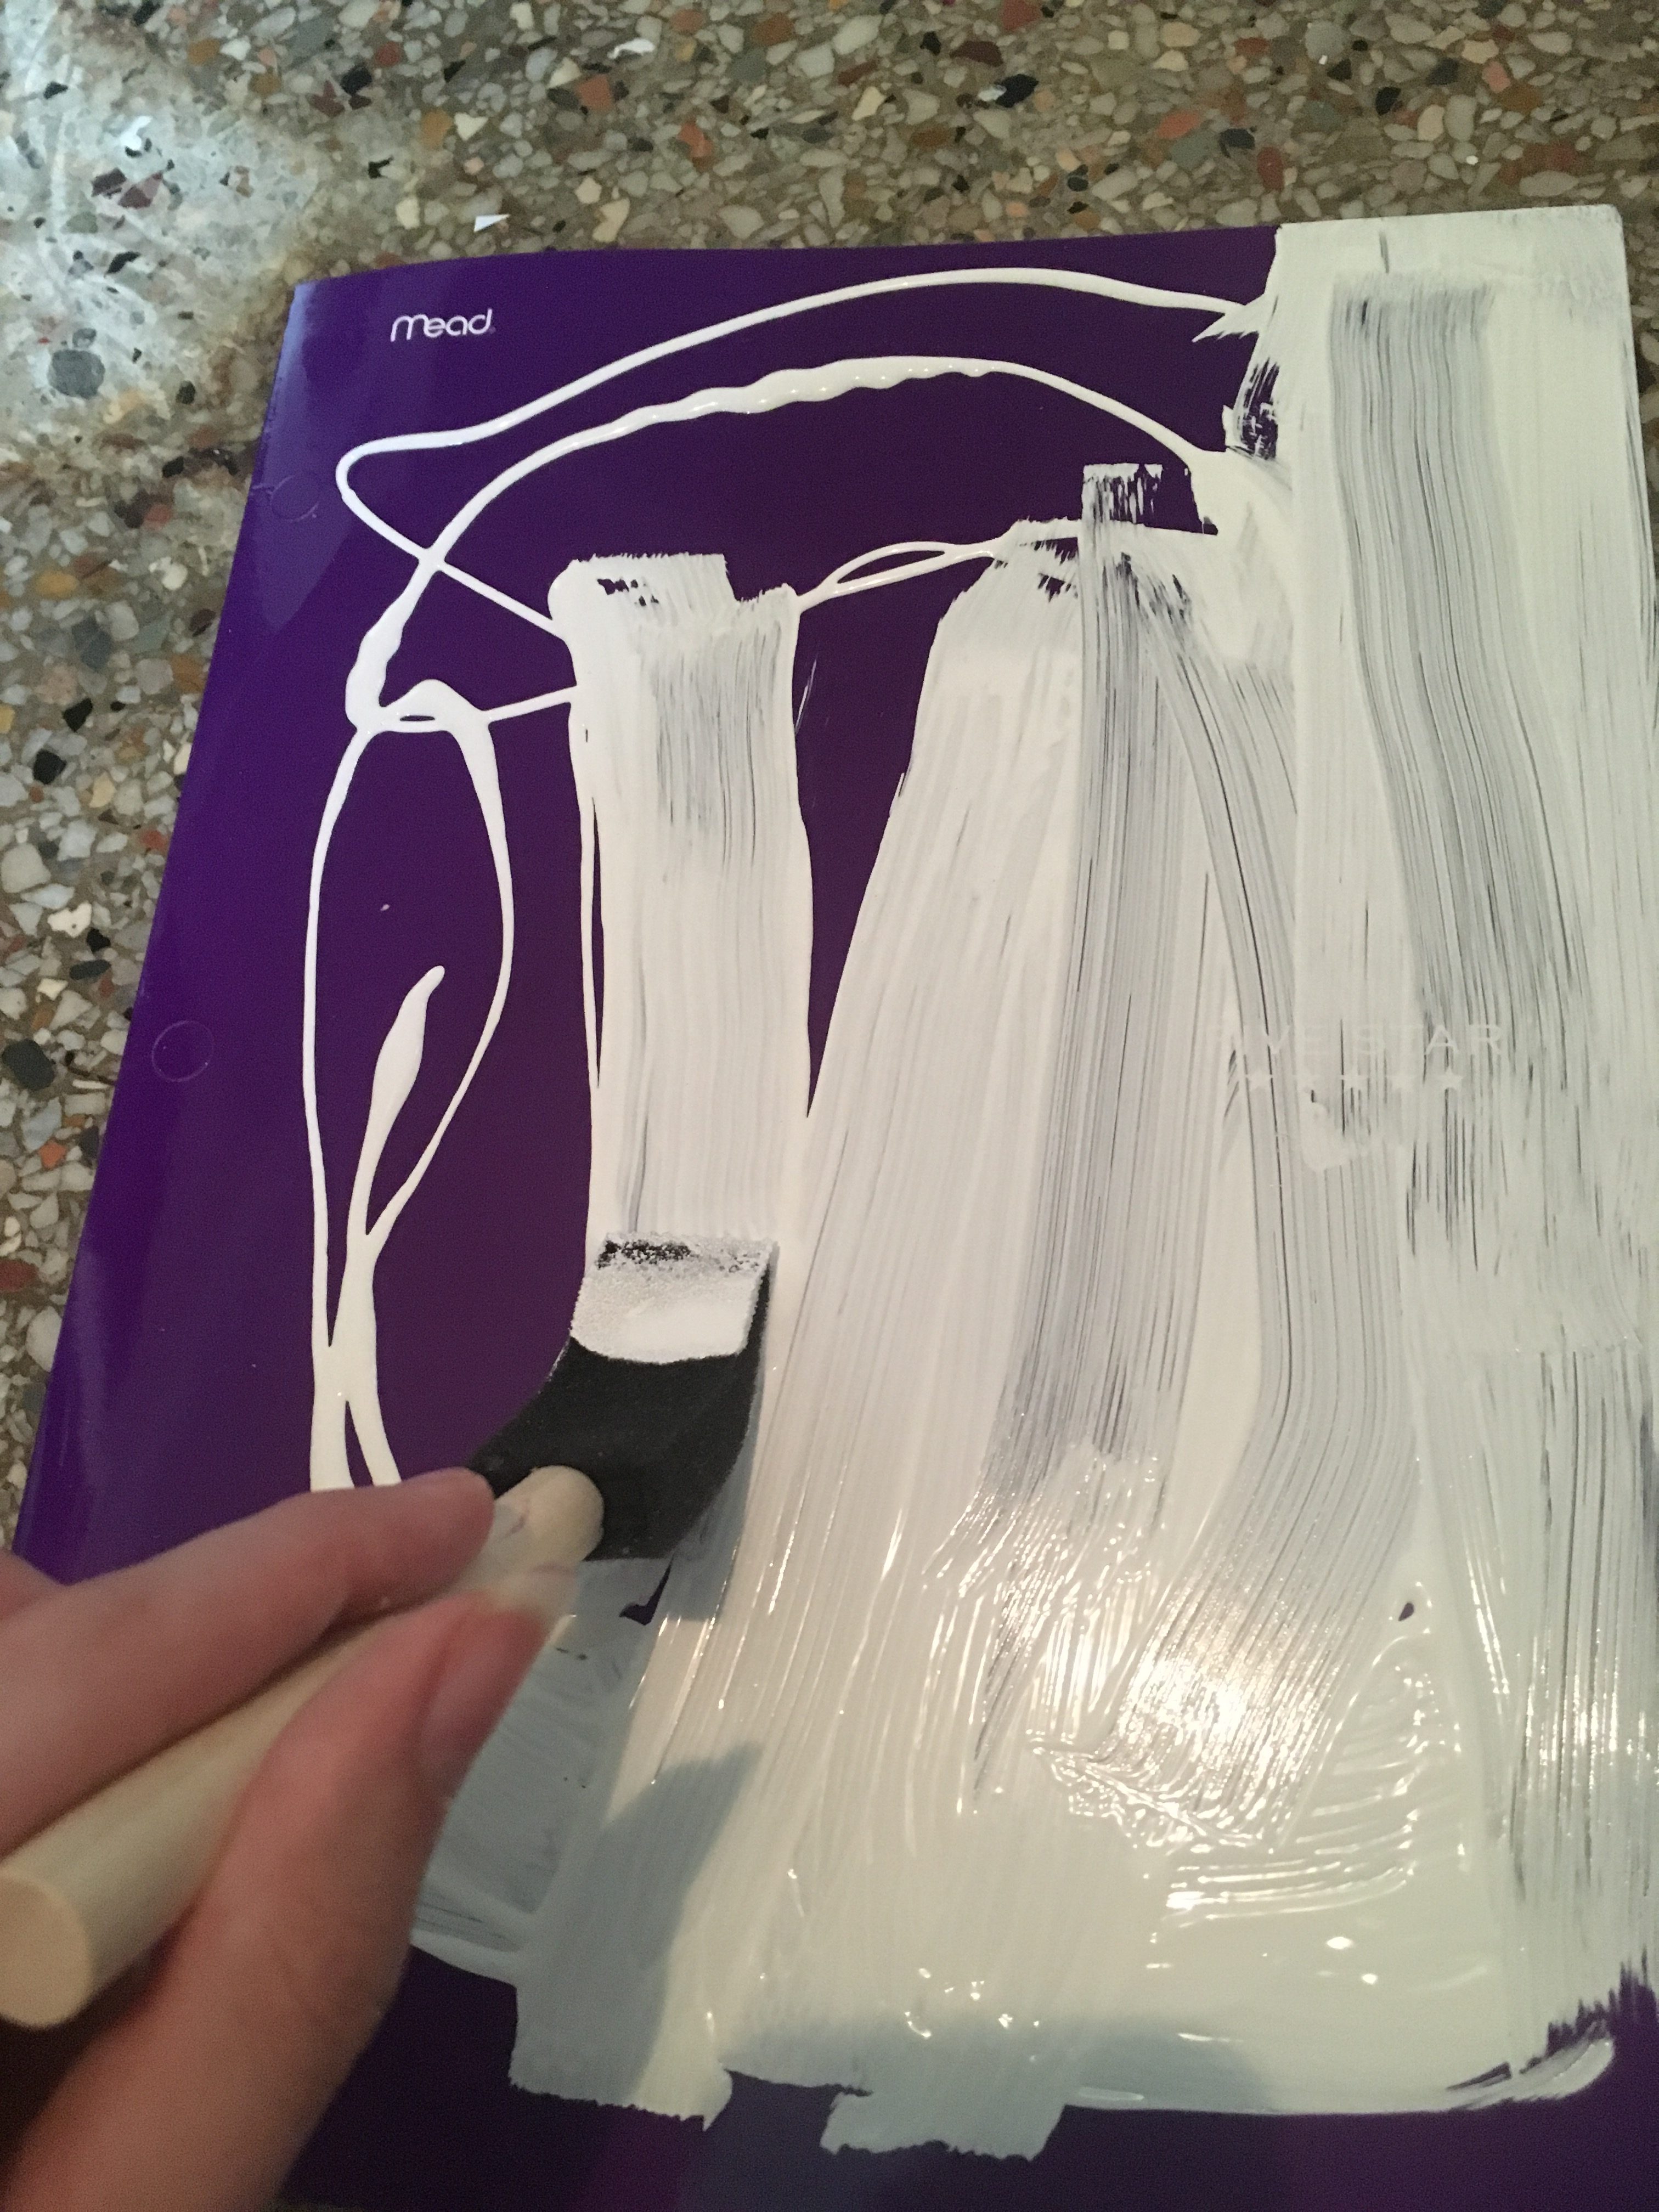
Start by using a sponge brush and thick white acrylic paint to cover the front of the notebook. Set it aside to dry.
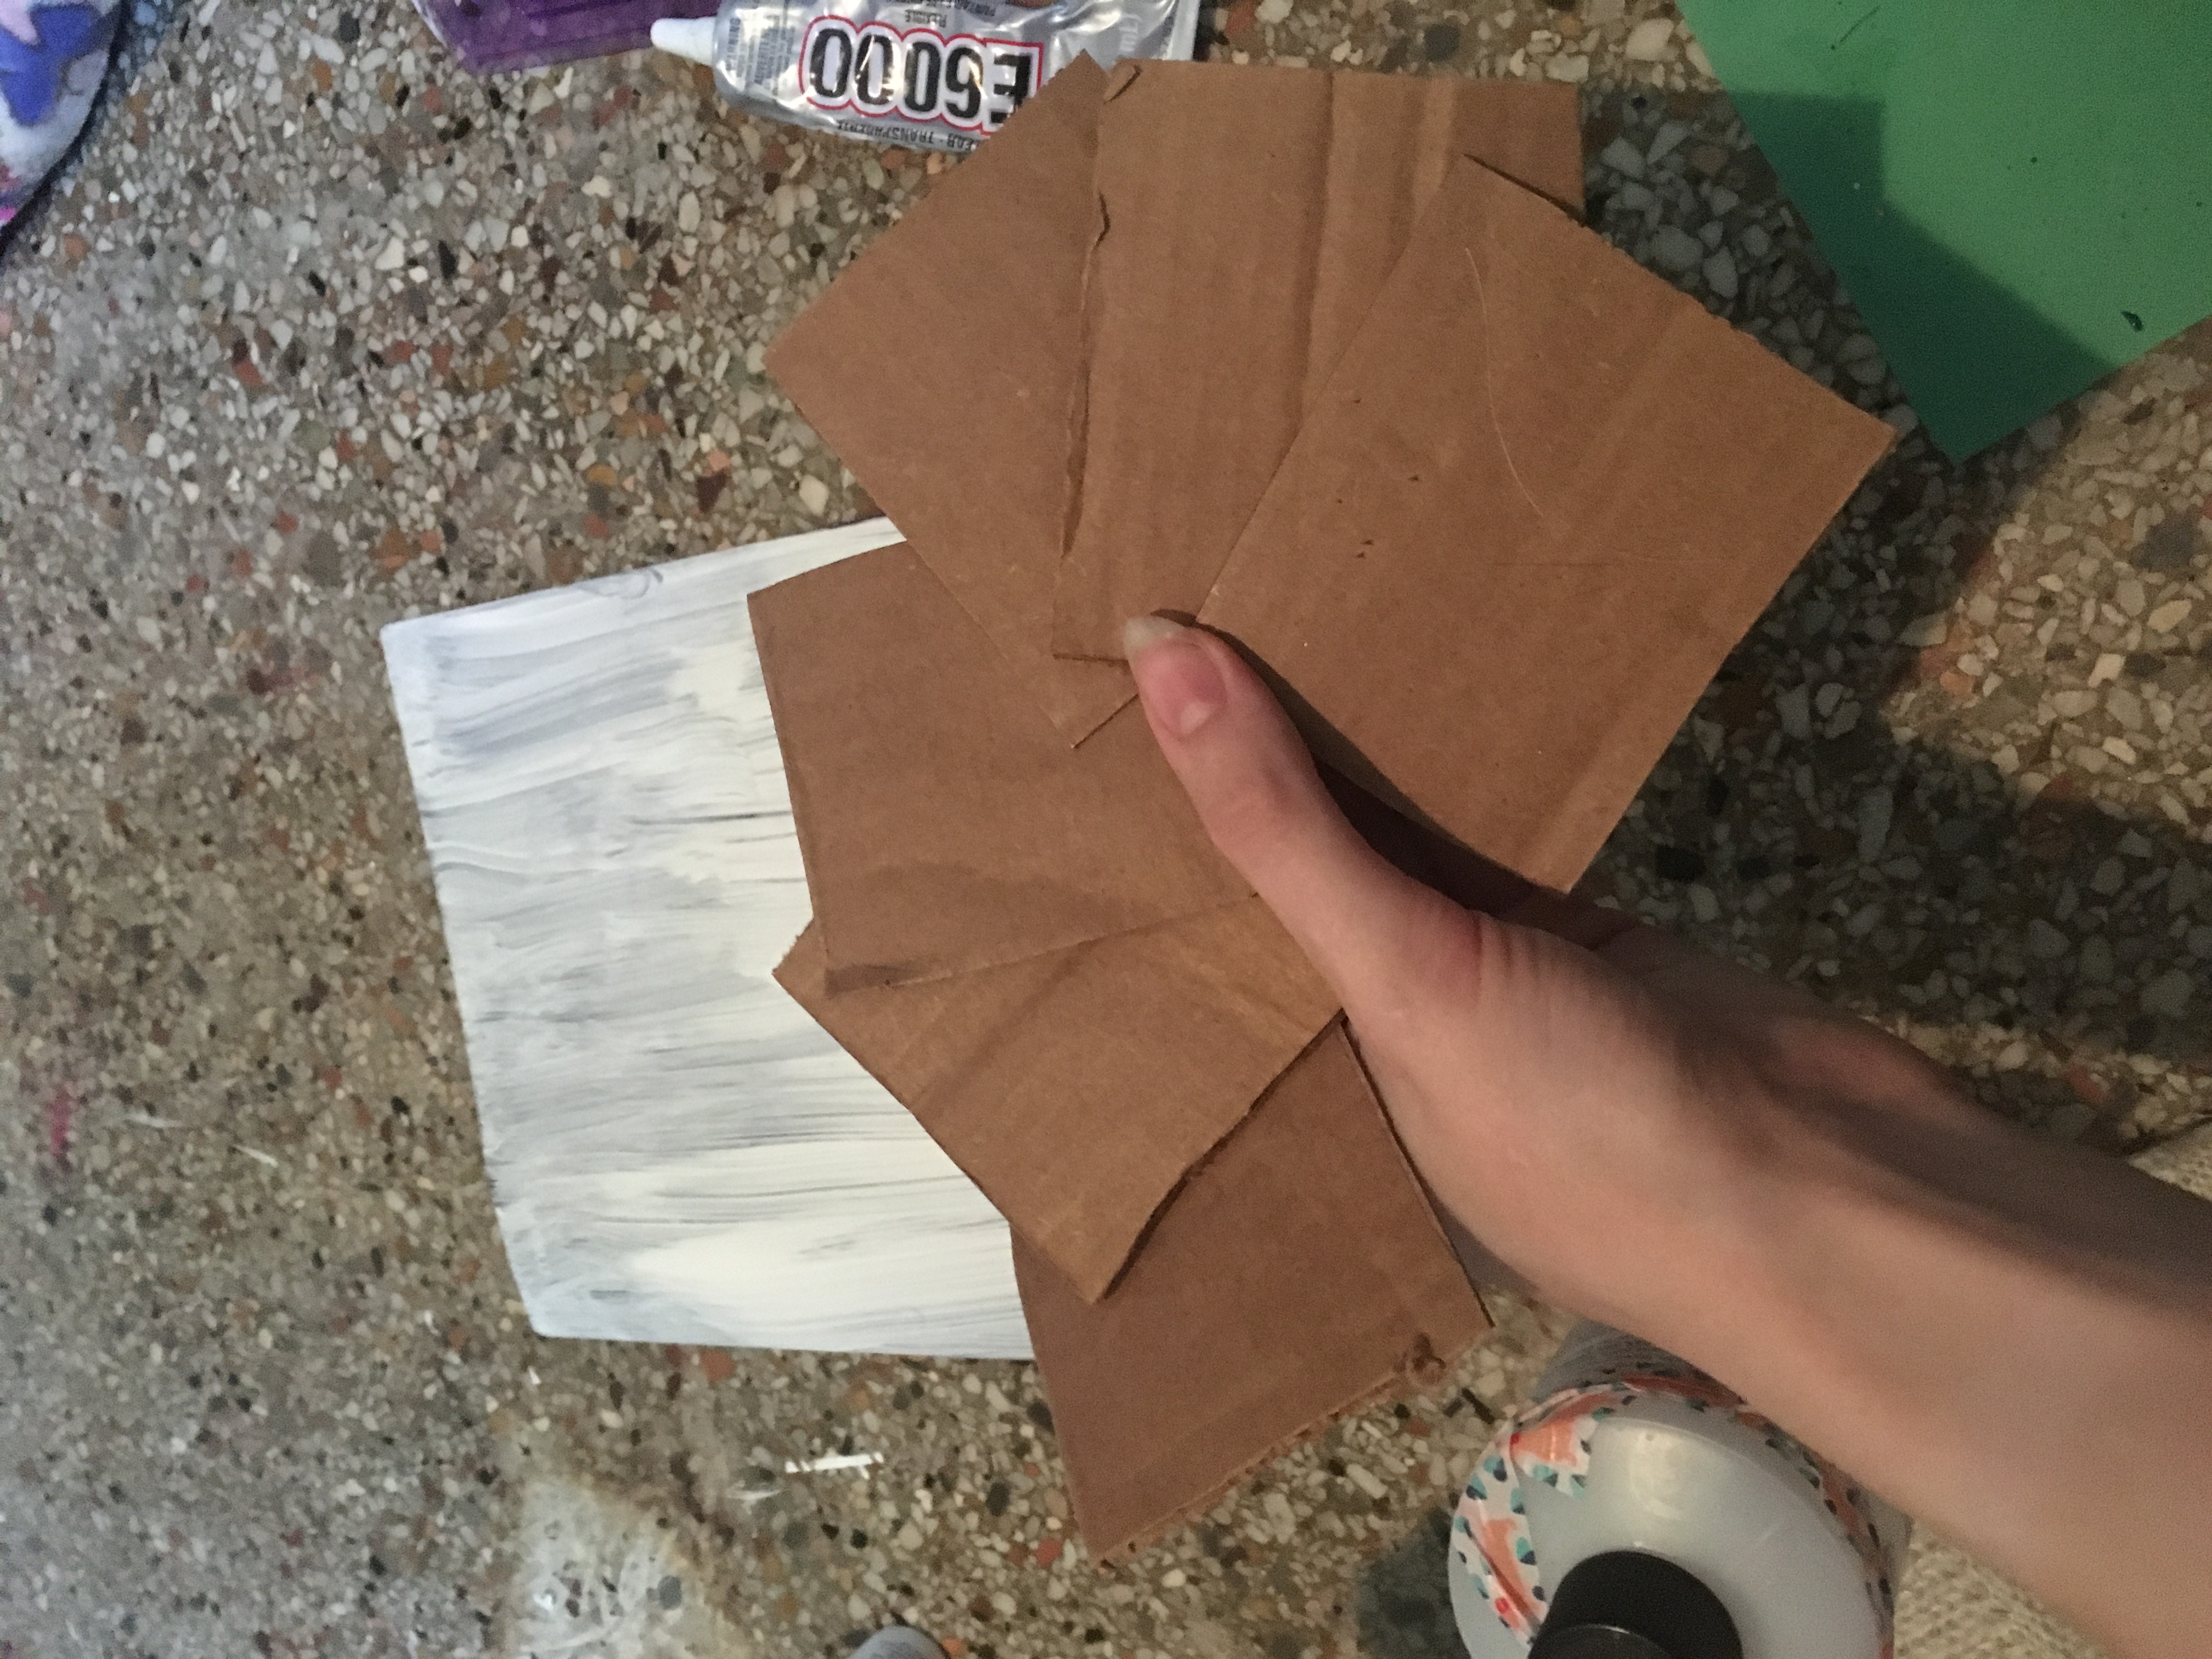
Step 2: Measure your Chocolate Blocks
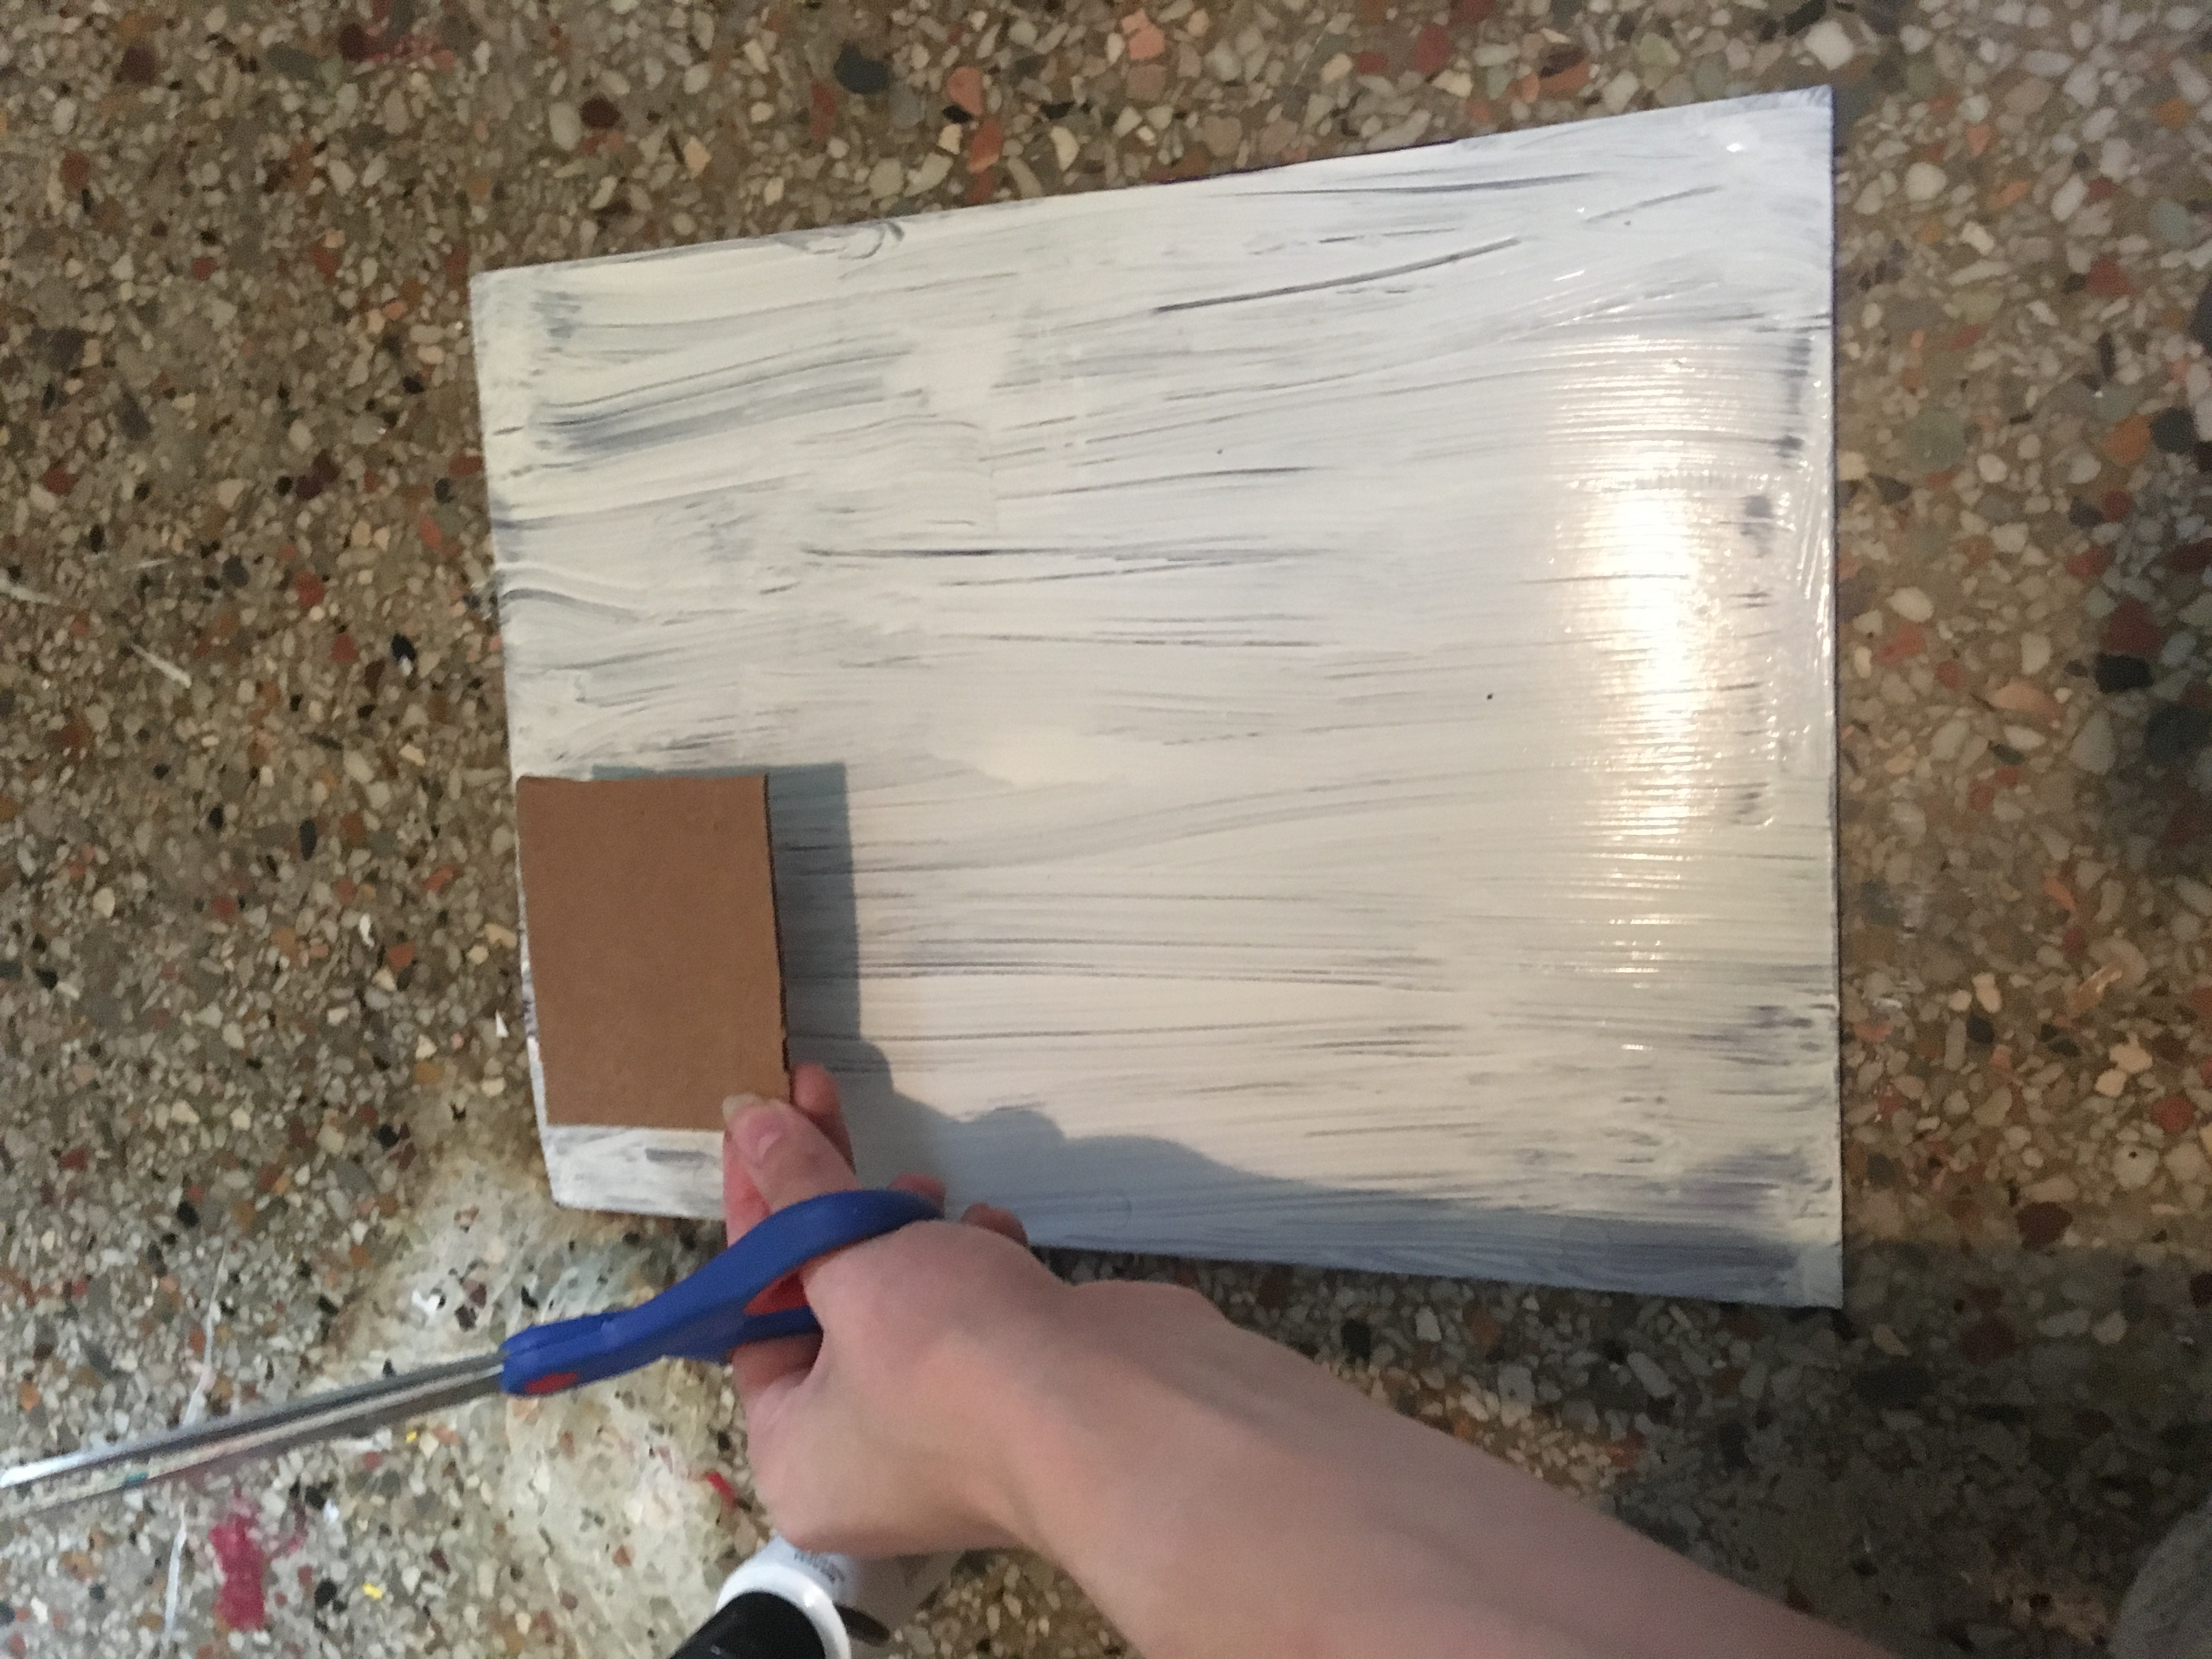
Roughly measure out the size you would like your chocolate to be, and hold it up to the notebook to see if it looks okay. If it does, cut out 6-8 more of these pieces roughly the same size.
Step 3: Ajust your Chocolate on the DIY Notebook Cover
Trim the chocolate pieces down to make them look better with a pair of scissors or a box cutter. Basically kill time while the paint dries.
Step 4: Second Prime Coat
If your first coat was not thick enough, add a second coat once the first one is completely dry. I mean absolutely bone dry. The paint will come up if the paint is not fully dried and it will make a mess and the world will burn and people will cry. Don’t be the person to cause that.
Step 5: Round the Corners of your Chocolate Pieces
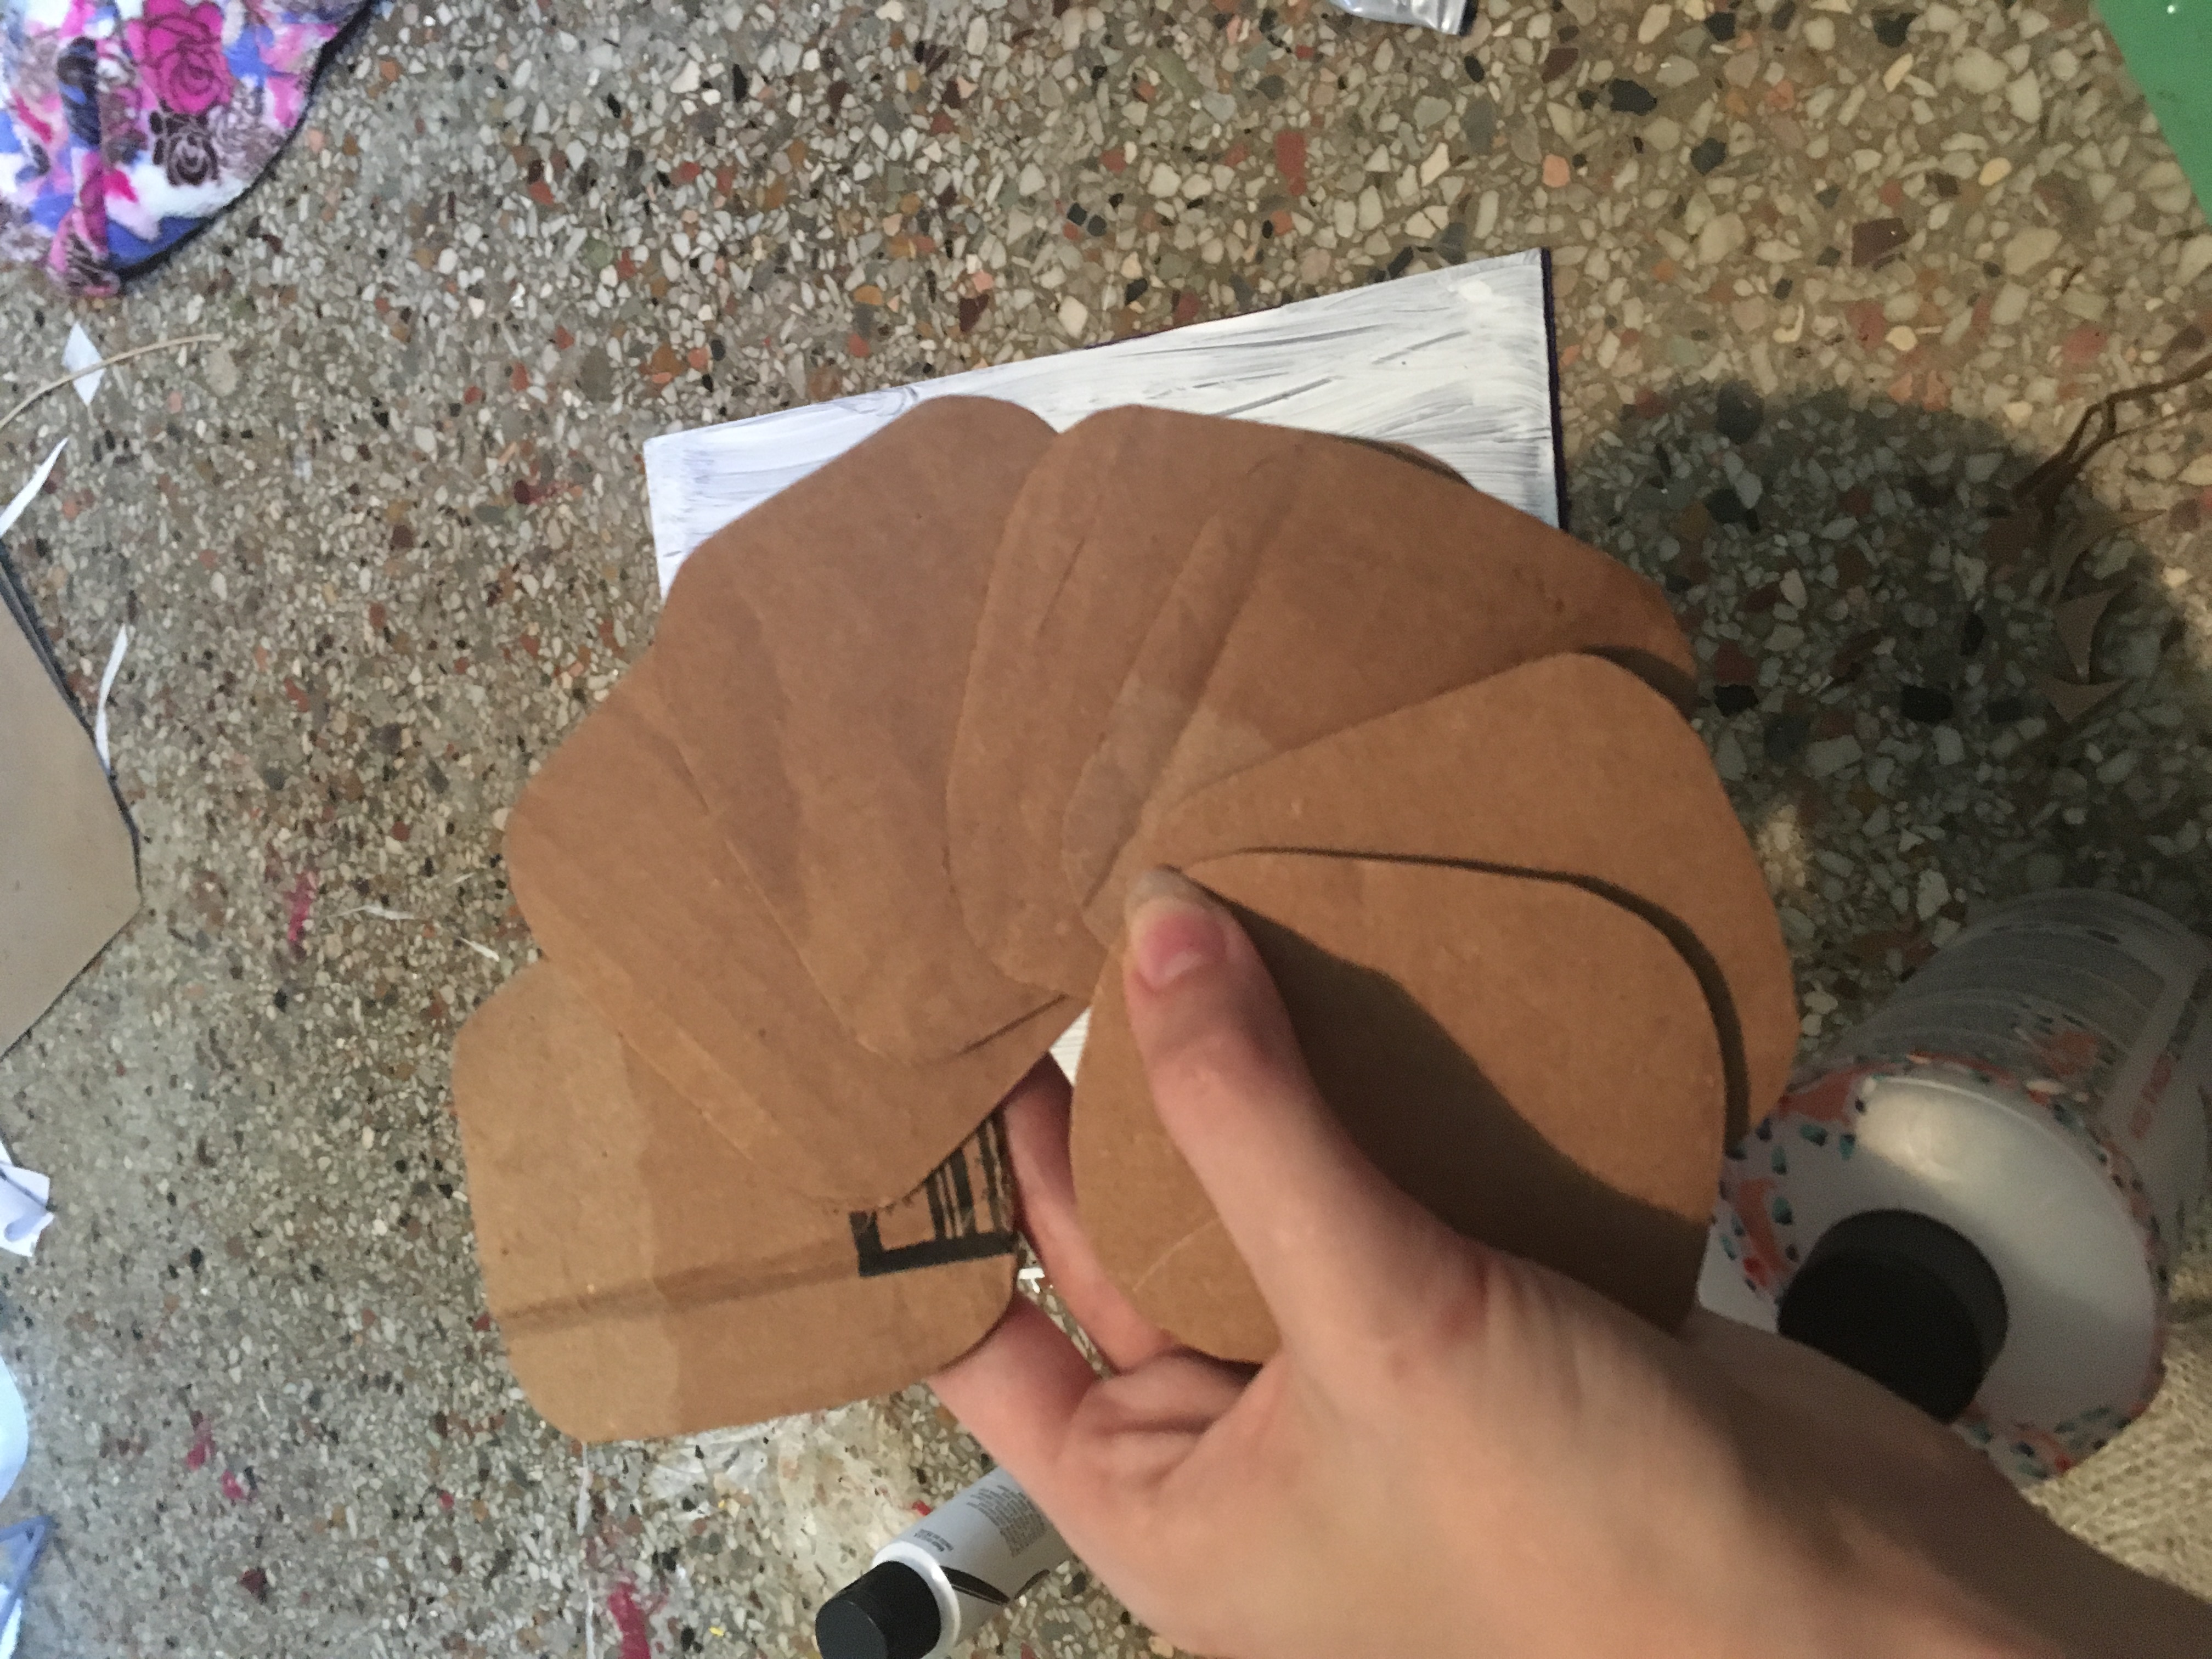
While you wait for the second coat to dry, cut the sharp corners off the chocolate pieces, making all of the pieces roughly the same. Set them carefully aside.
Step 6: Paint Mixing
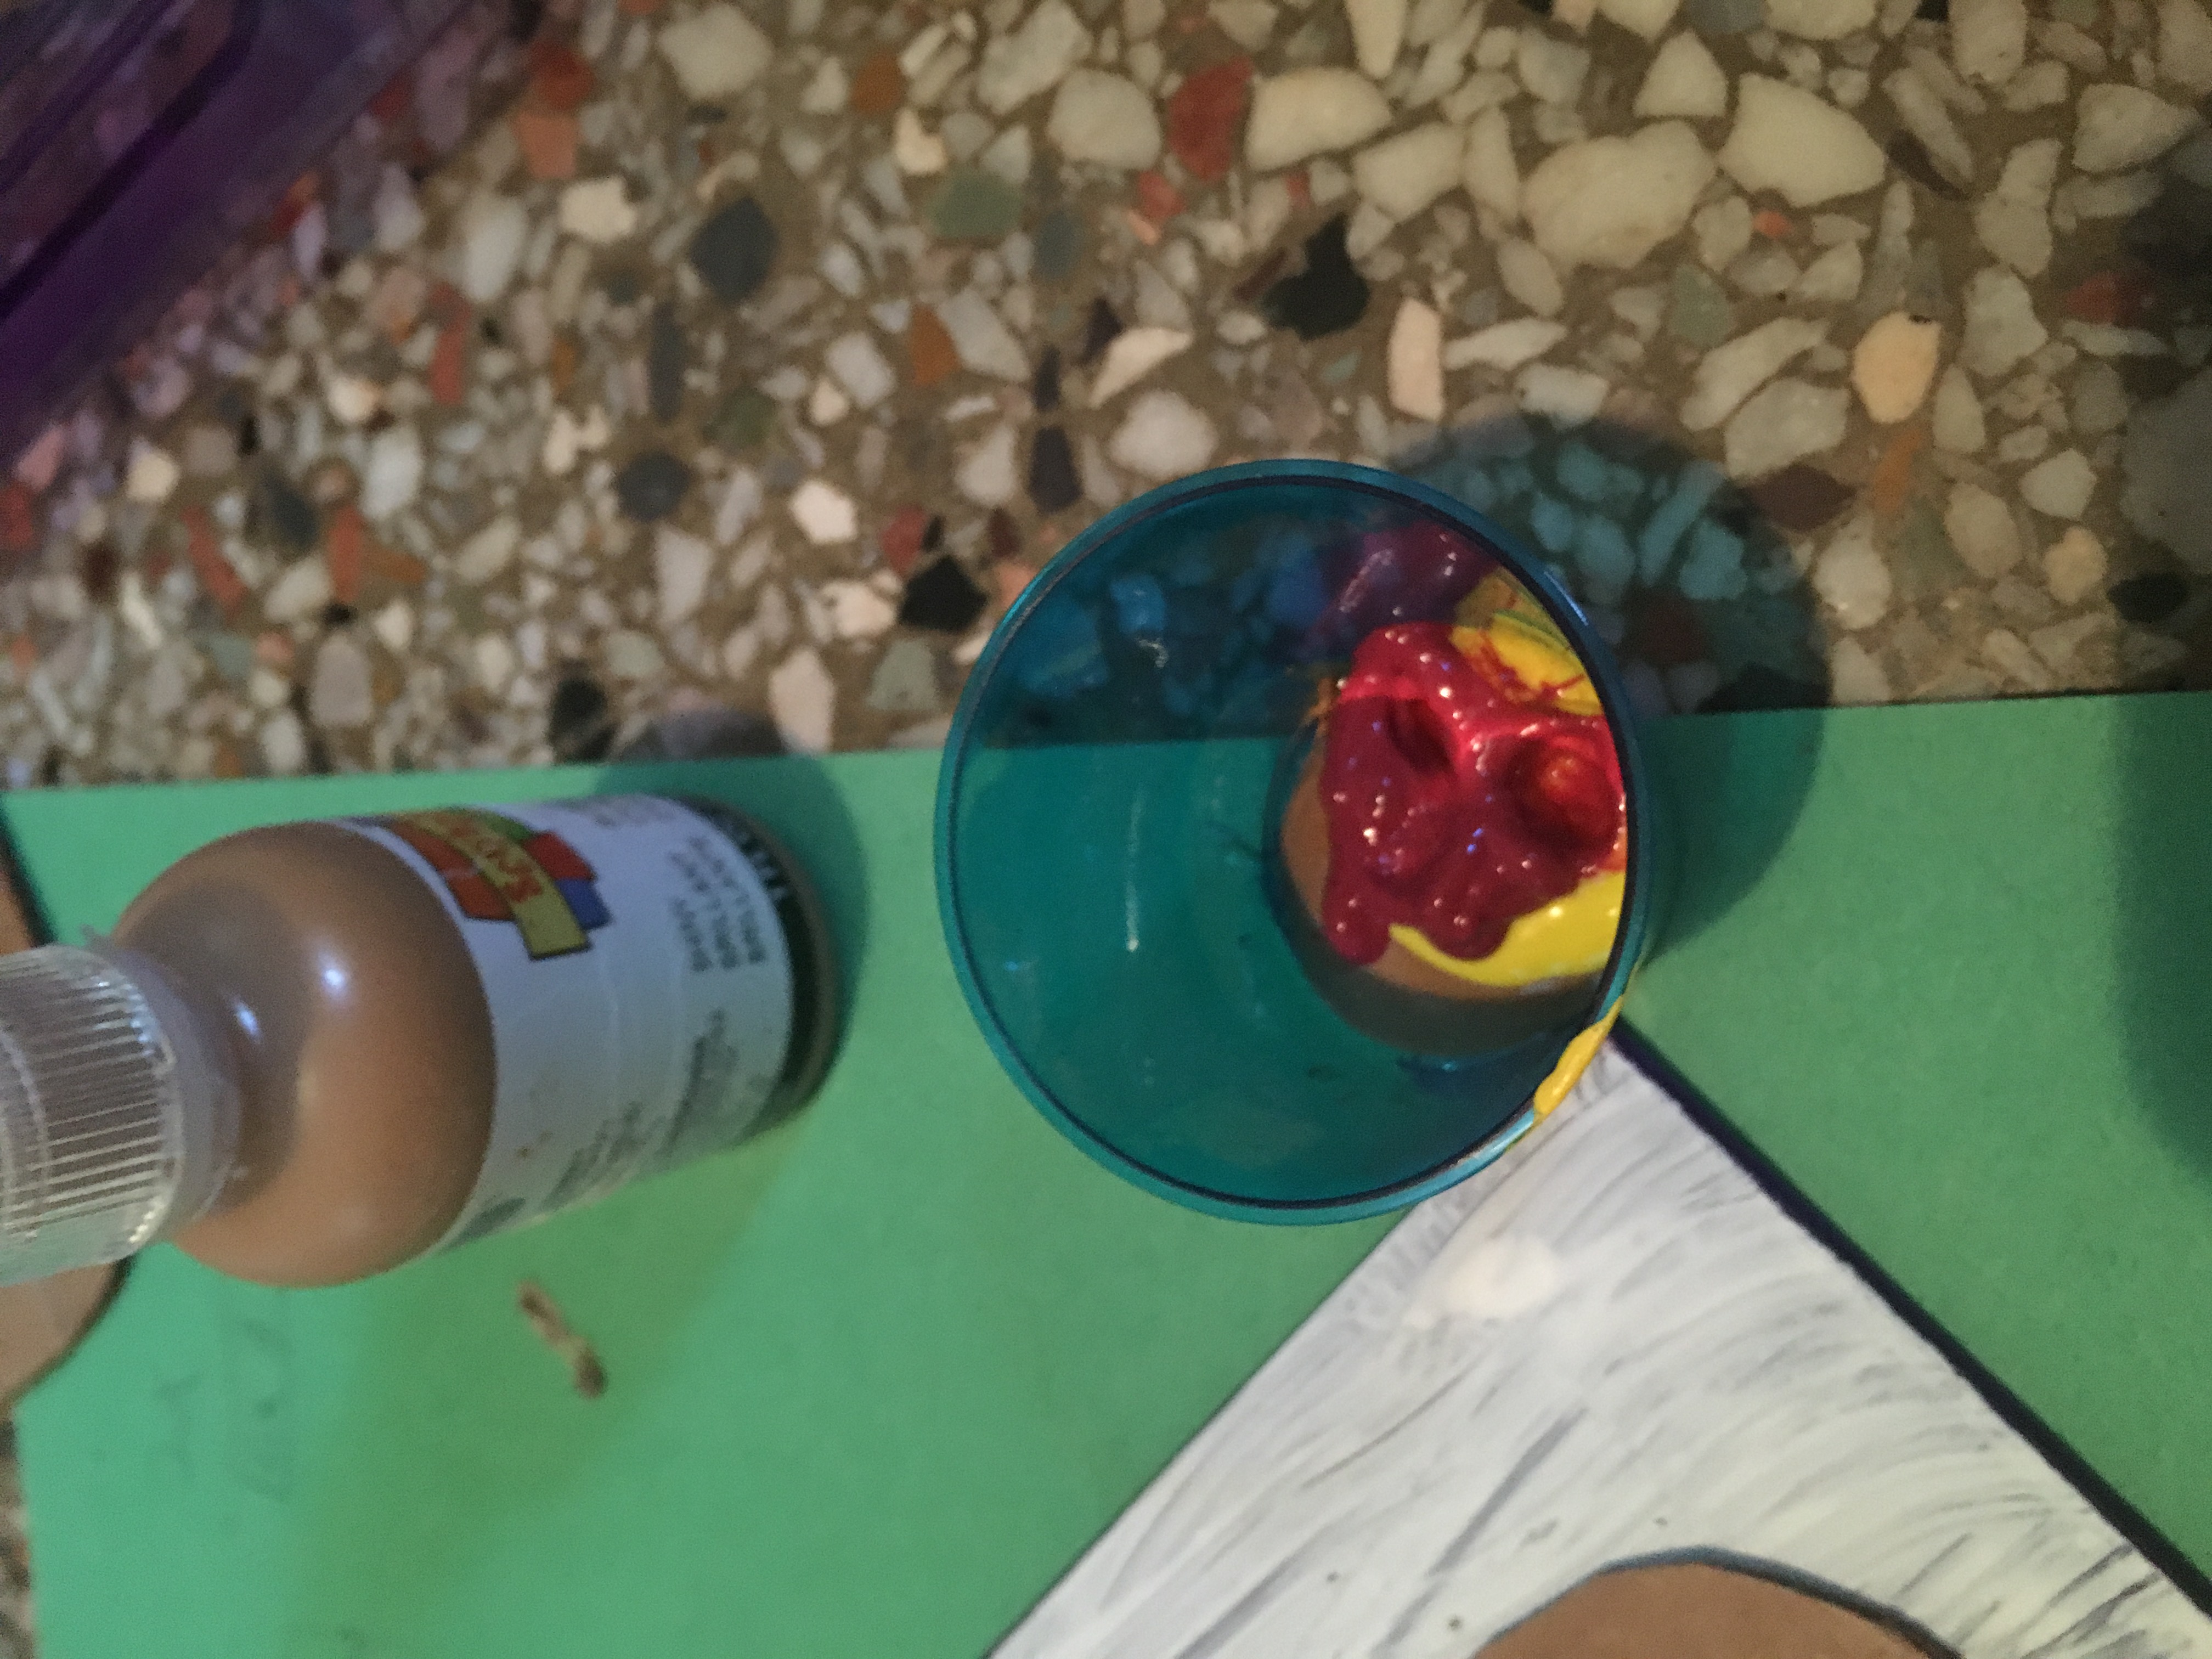
Next, put light brown, yellow, and red puffy paint into a shot glass and mix it with your brush, adding more colors until you get the perfect color.
Step 7: Give up and add Acrylic Paint
If it fails, just add a bit of dark brown acrylic paint to the mixture. Seems good enough, nobody needs to know it even happened.
Step 8: Glue the Chocolate on
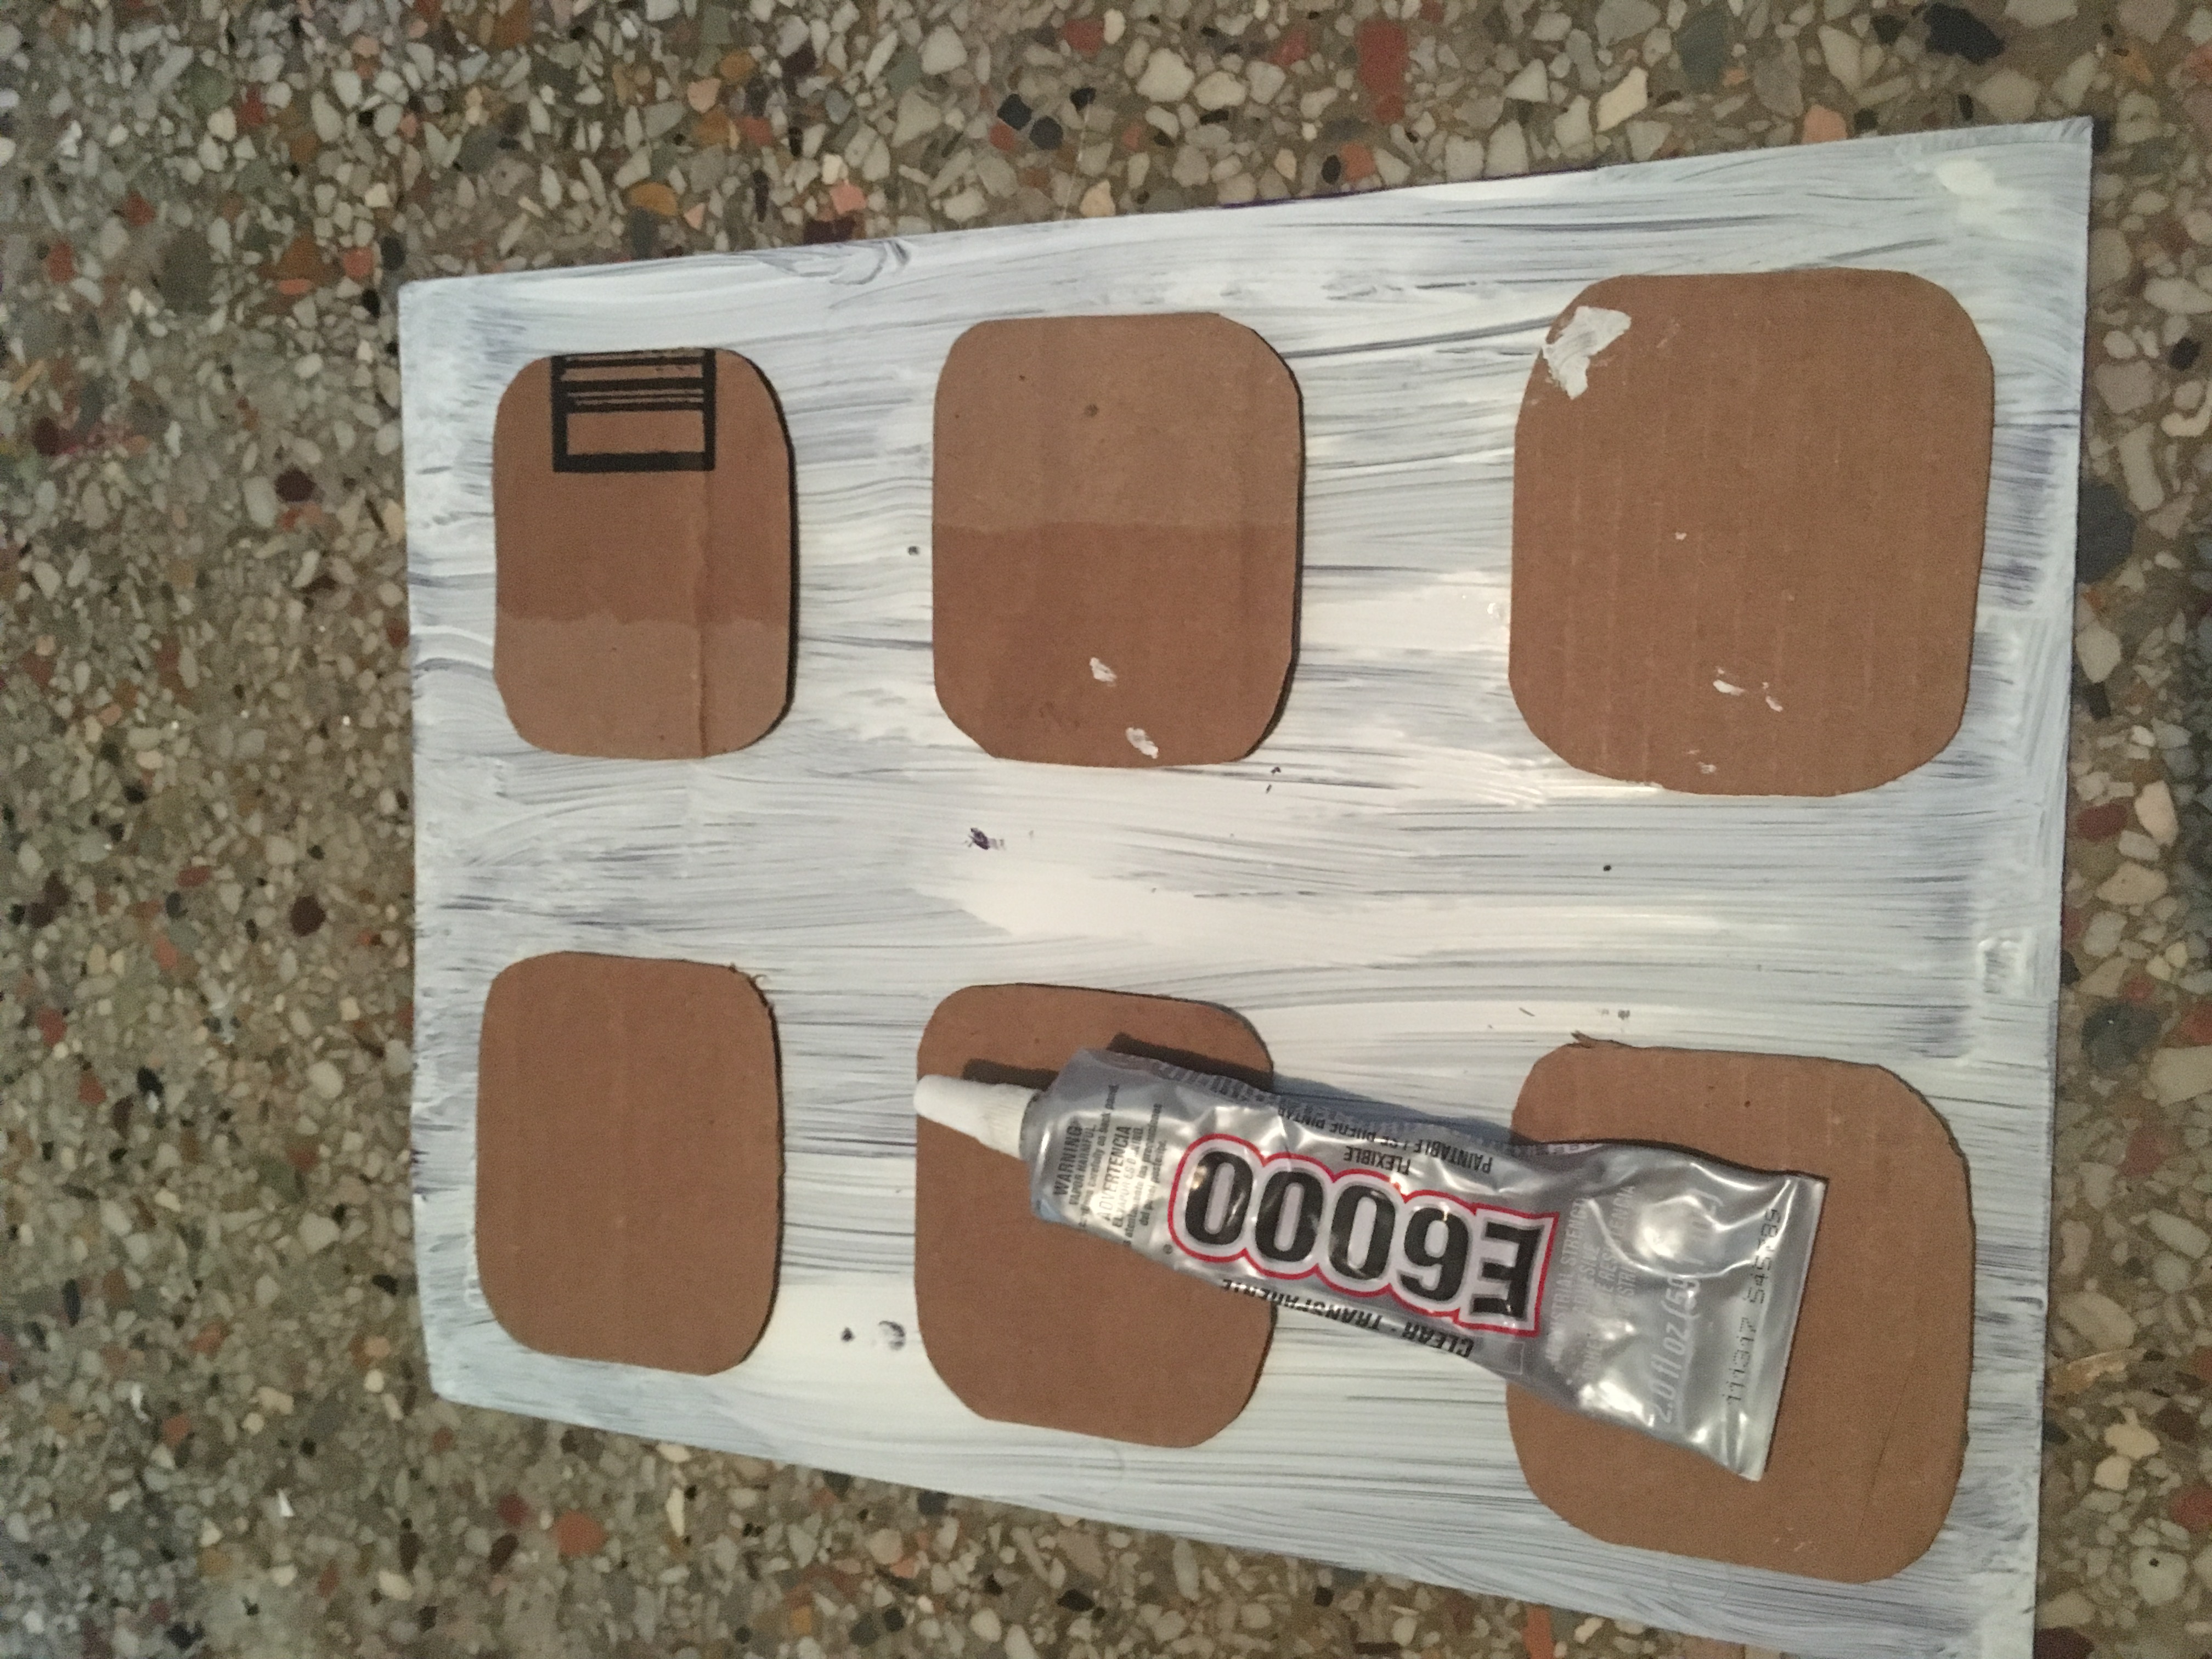
Using elmer’s or E-6000, glue the chocolate cardboard to the front of the notebook, making sure to space them correctly.
Step 9: Painting on that Perfect Chocolate Shade
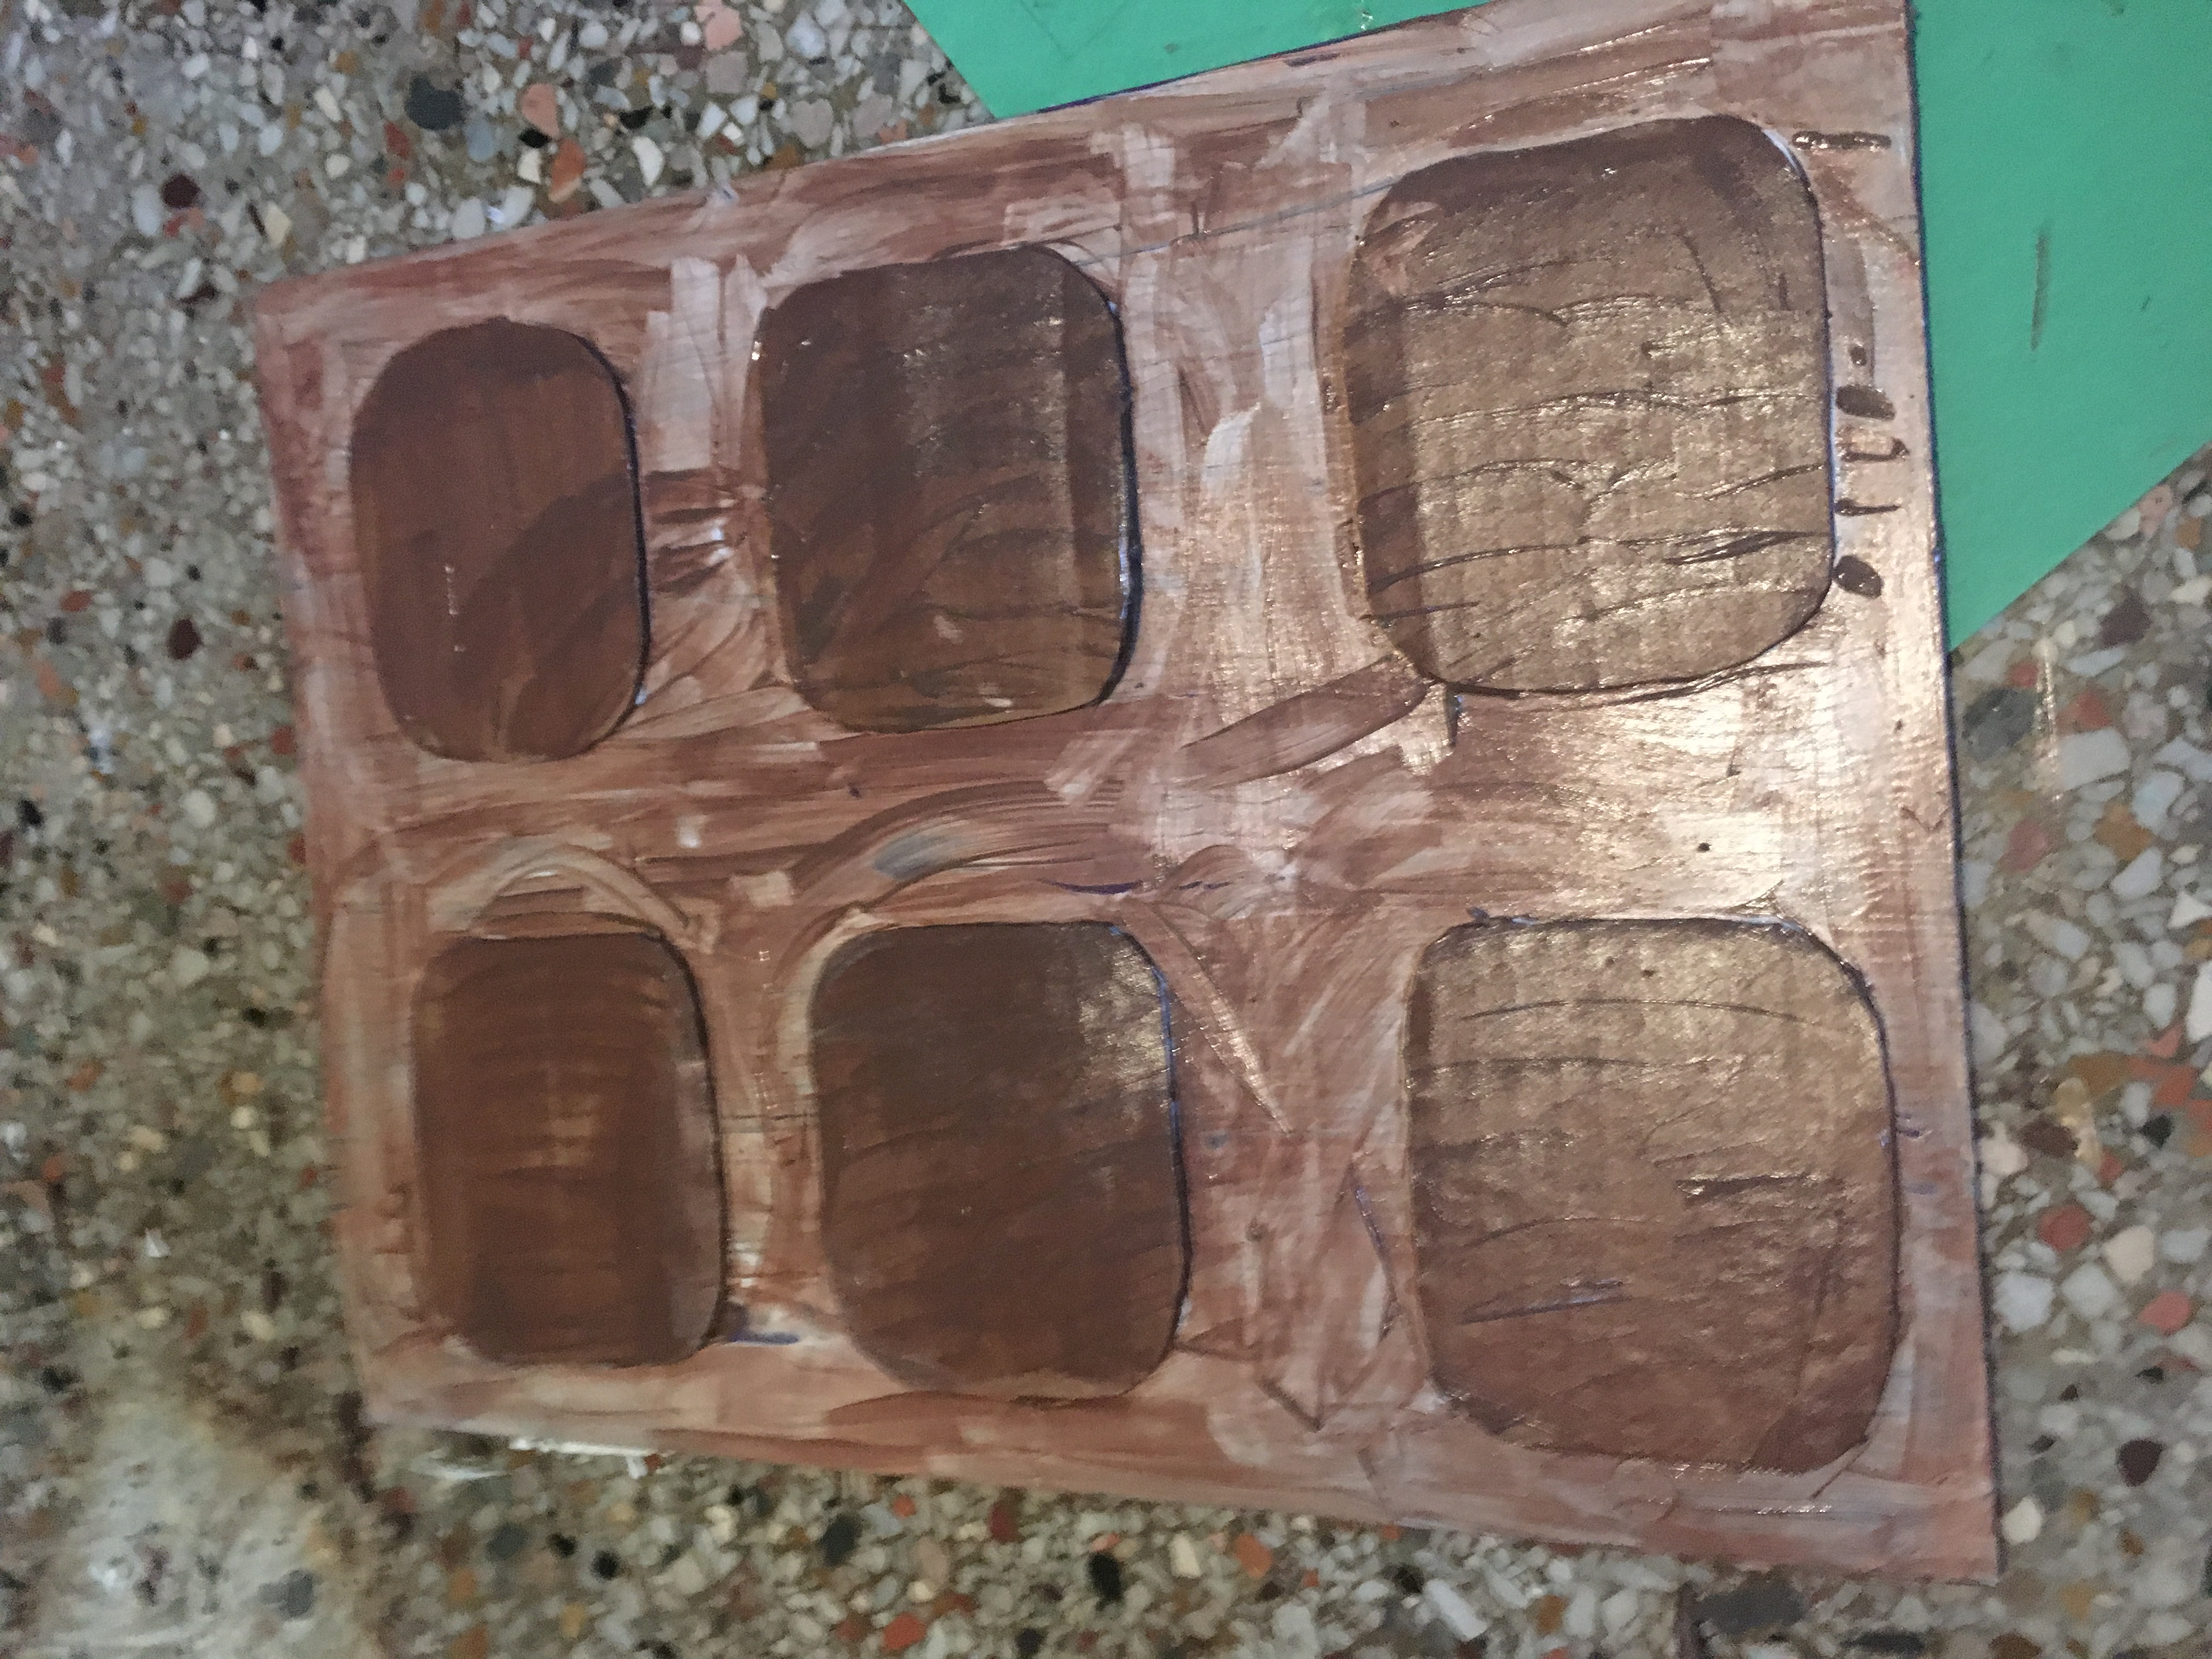
Now that you have a glamorous shade of chocolate brown, use a paint brush to make a thin base coat over the front of your note book. It will not look very good at this stage.
Step 10: Dry the Paint on your DIY Notebook Cover
Using a hair dryer on warm- not hot- dry the front of your binder. This may take a few minutes.
Step 11: Second Coat
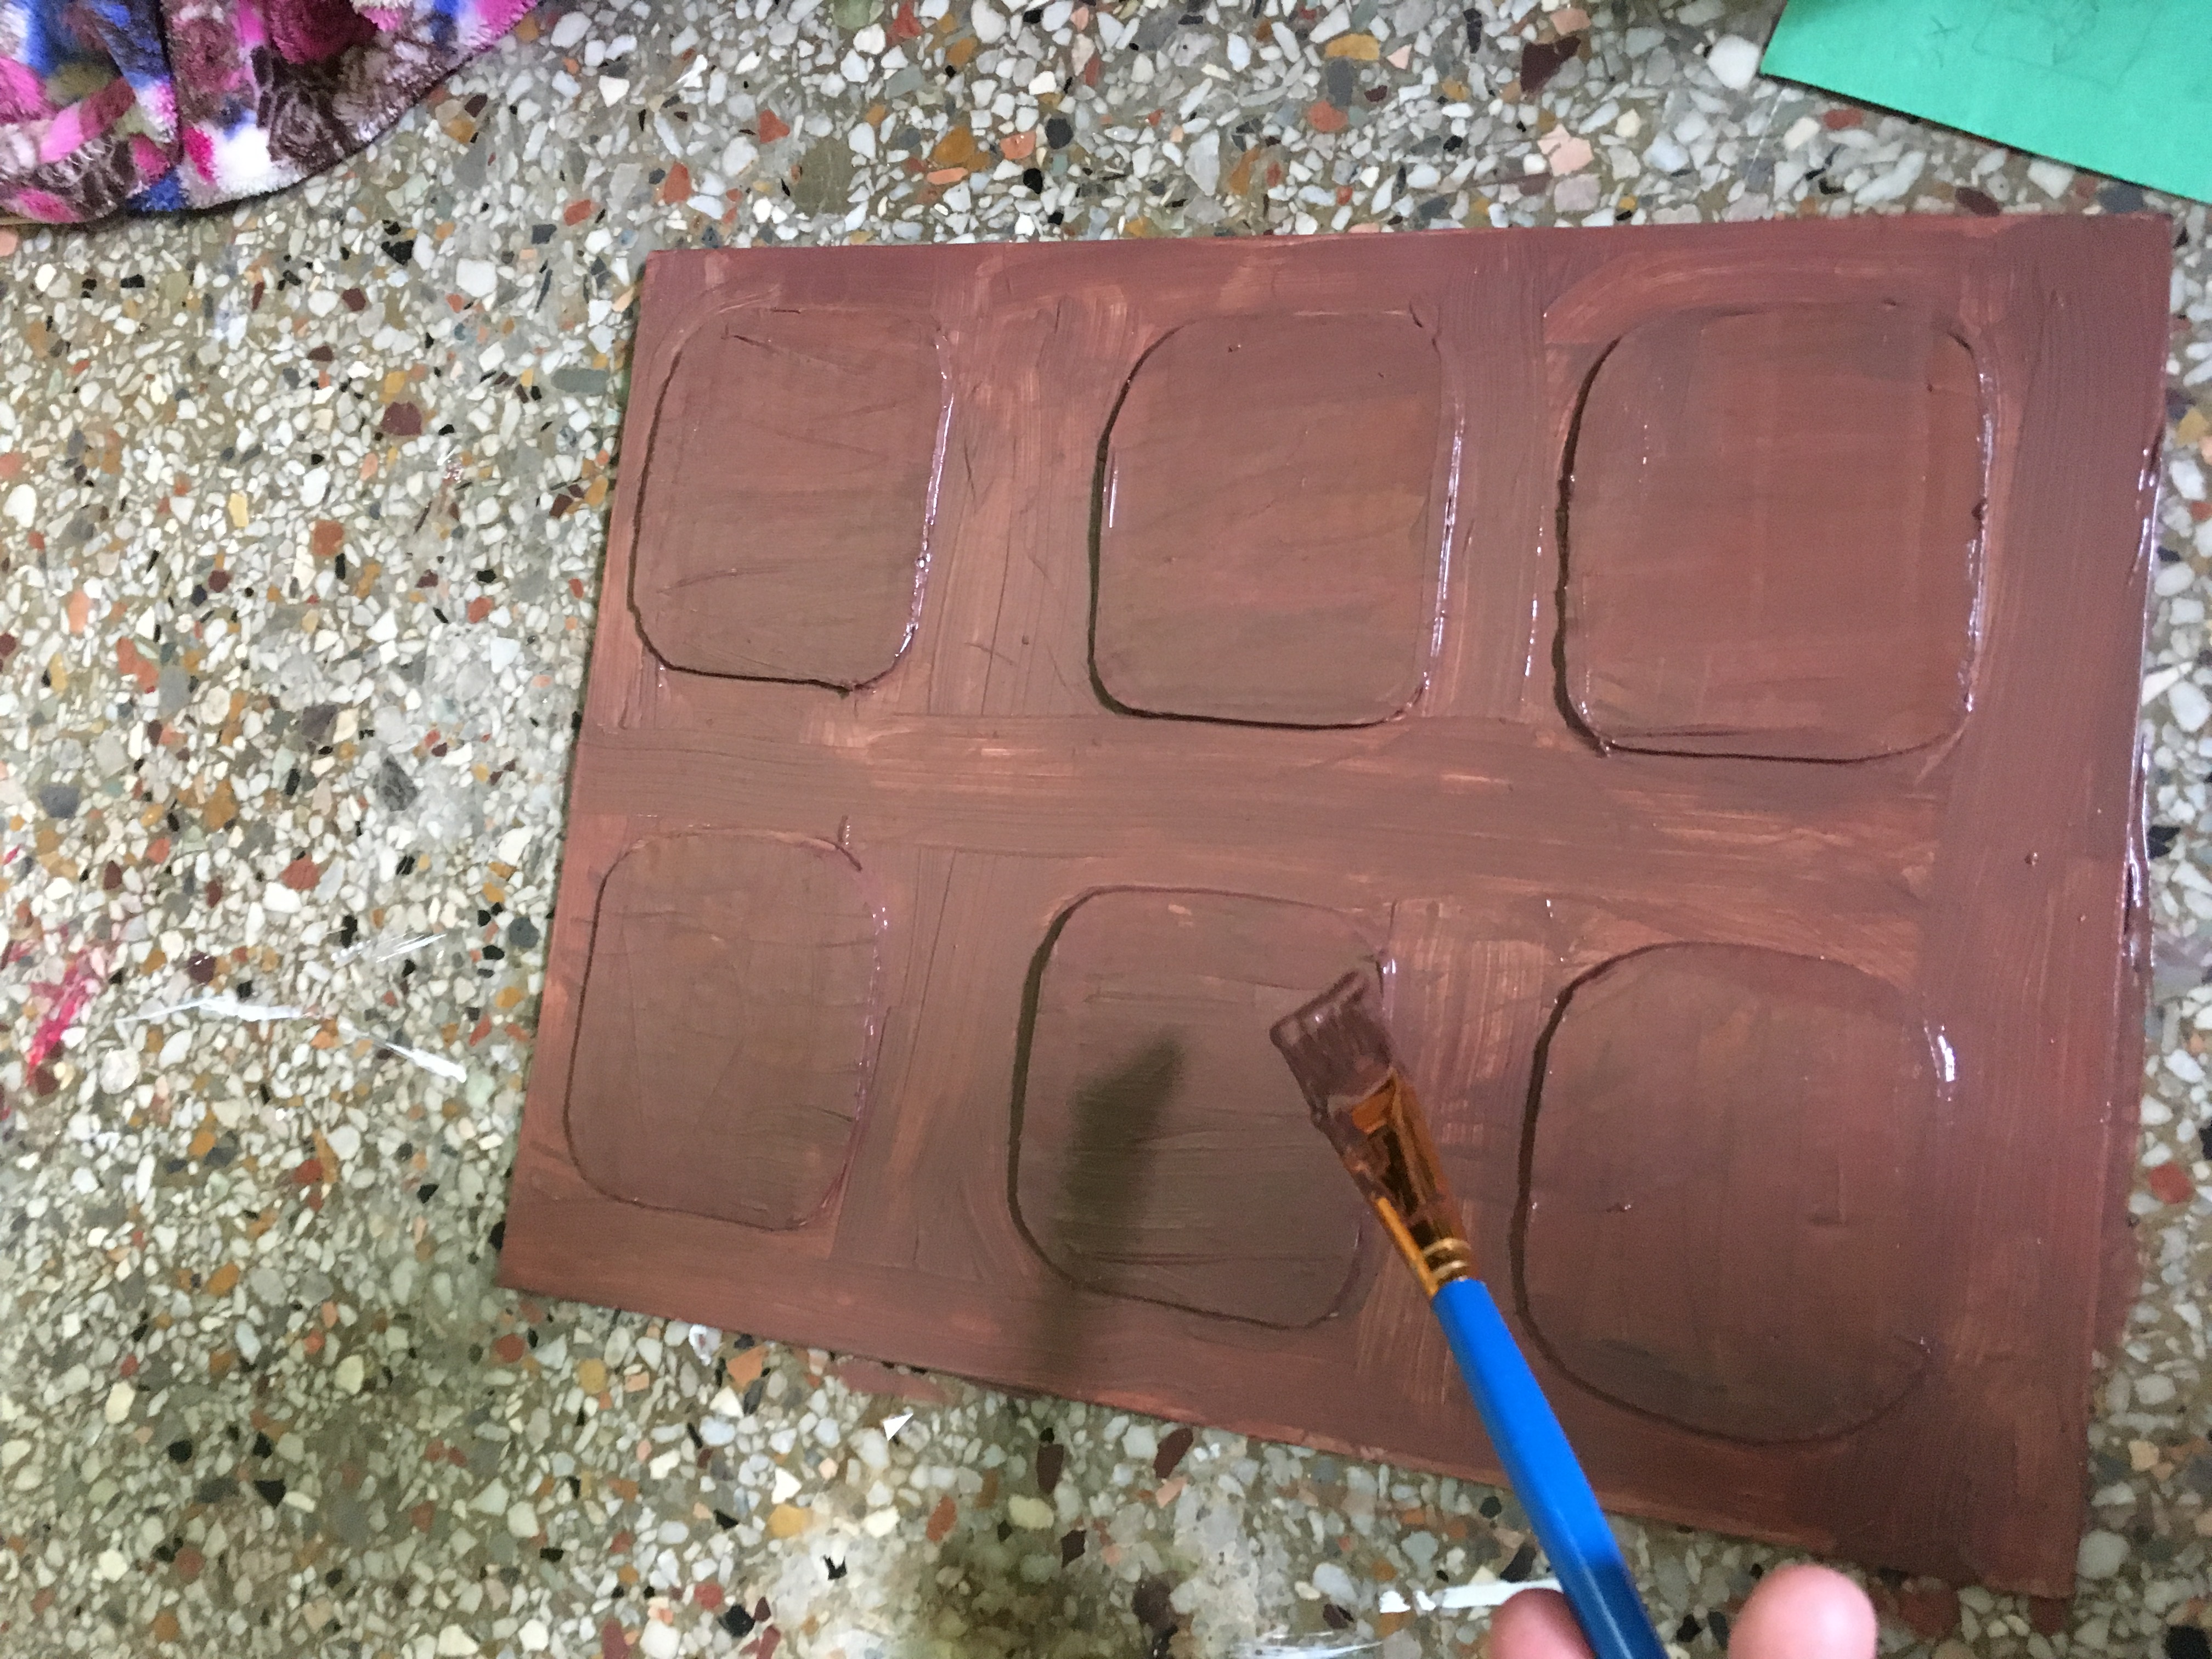
Add a second, much thicker coat of brown paint this time. This will fix the ugliness your notebook picked up from step 9.
Step 12: Writing on the DIY Notebook Cover in Puffy Paint
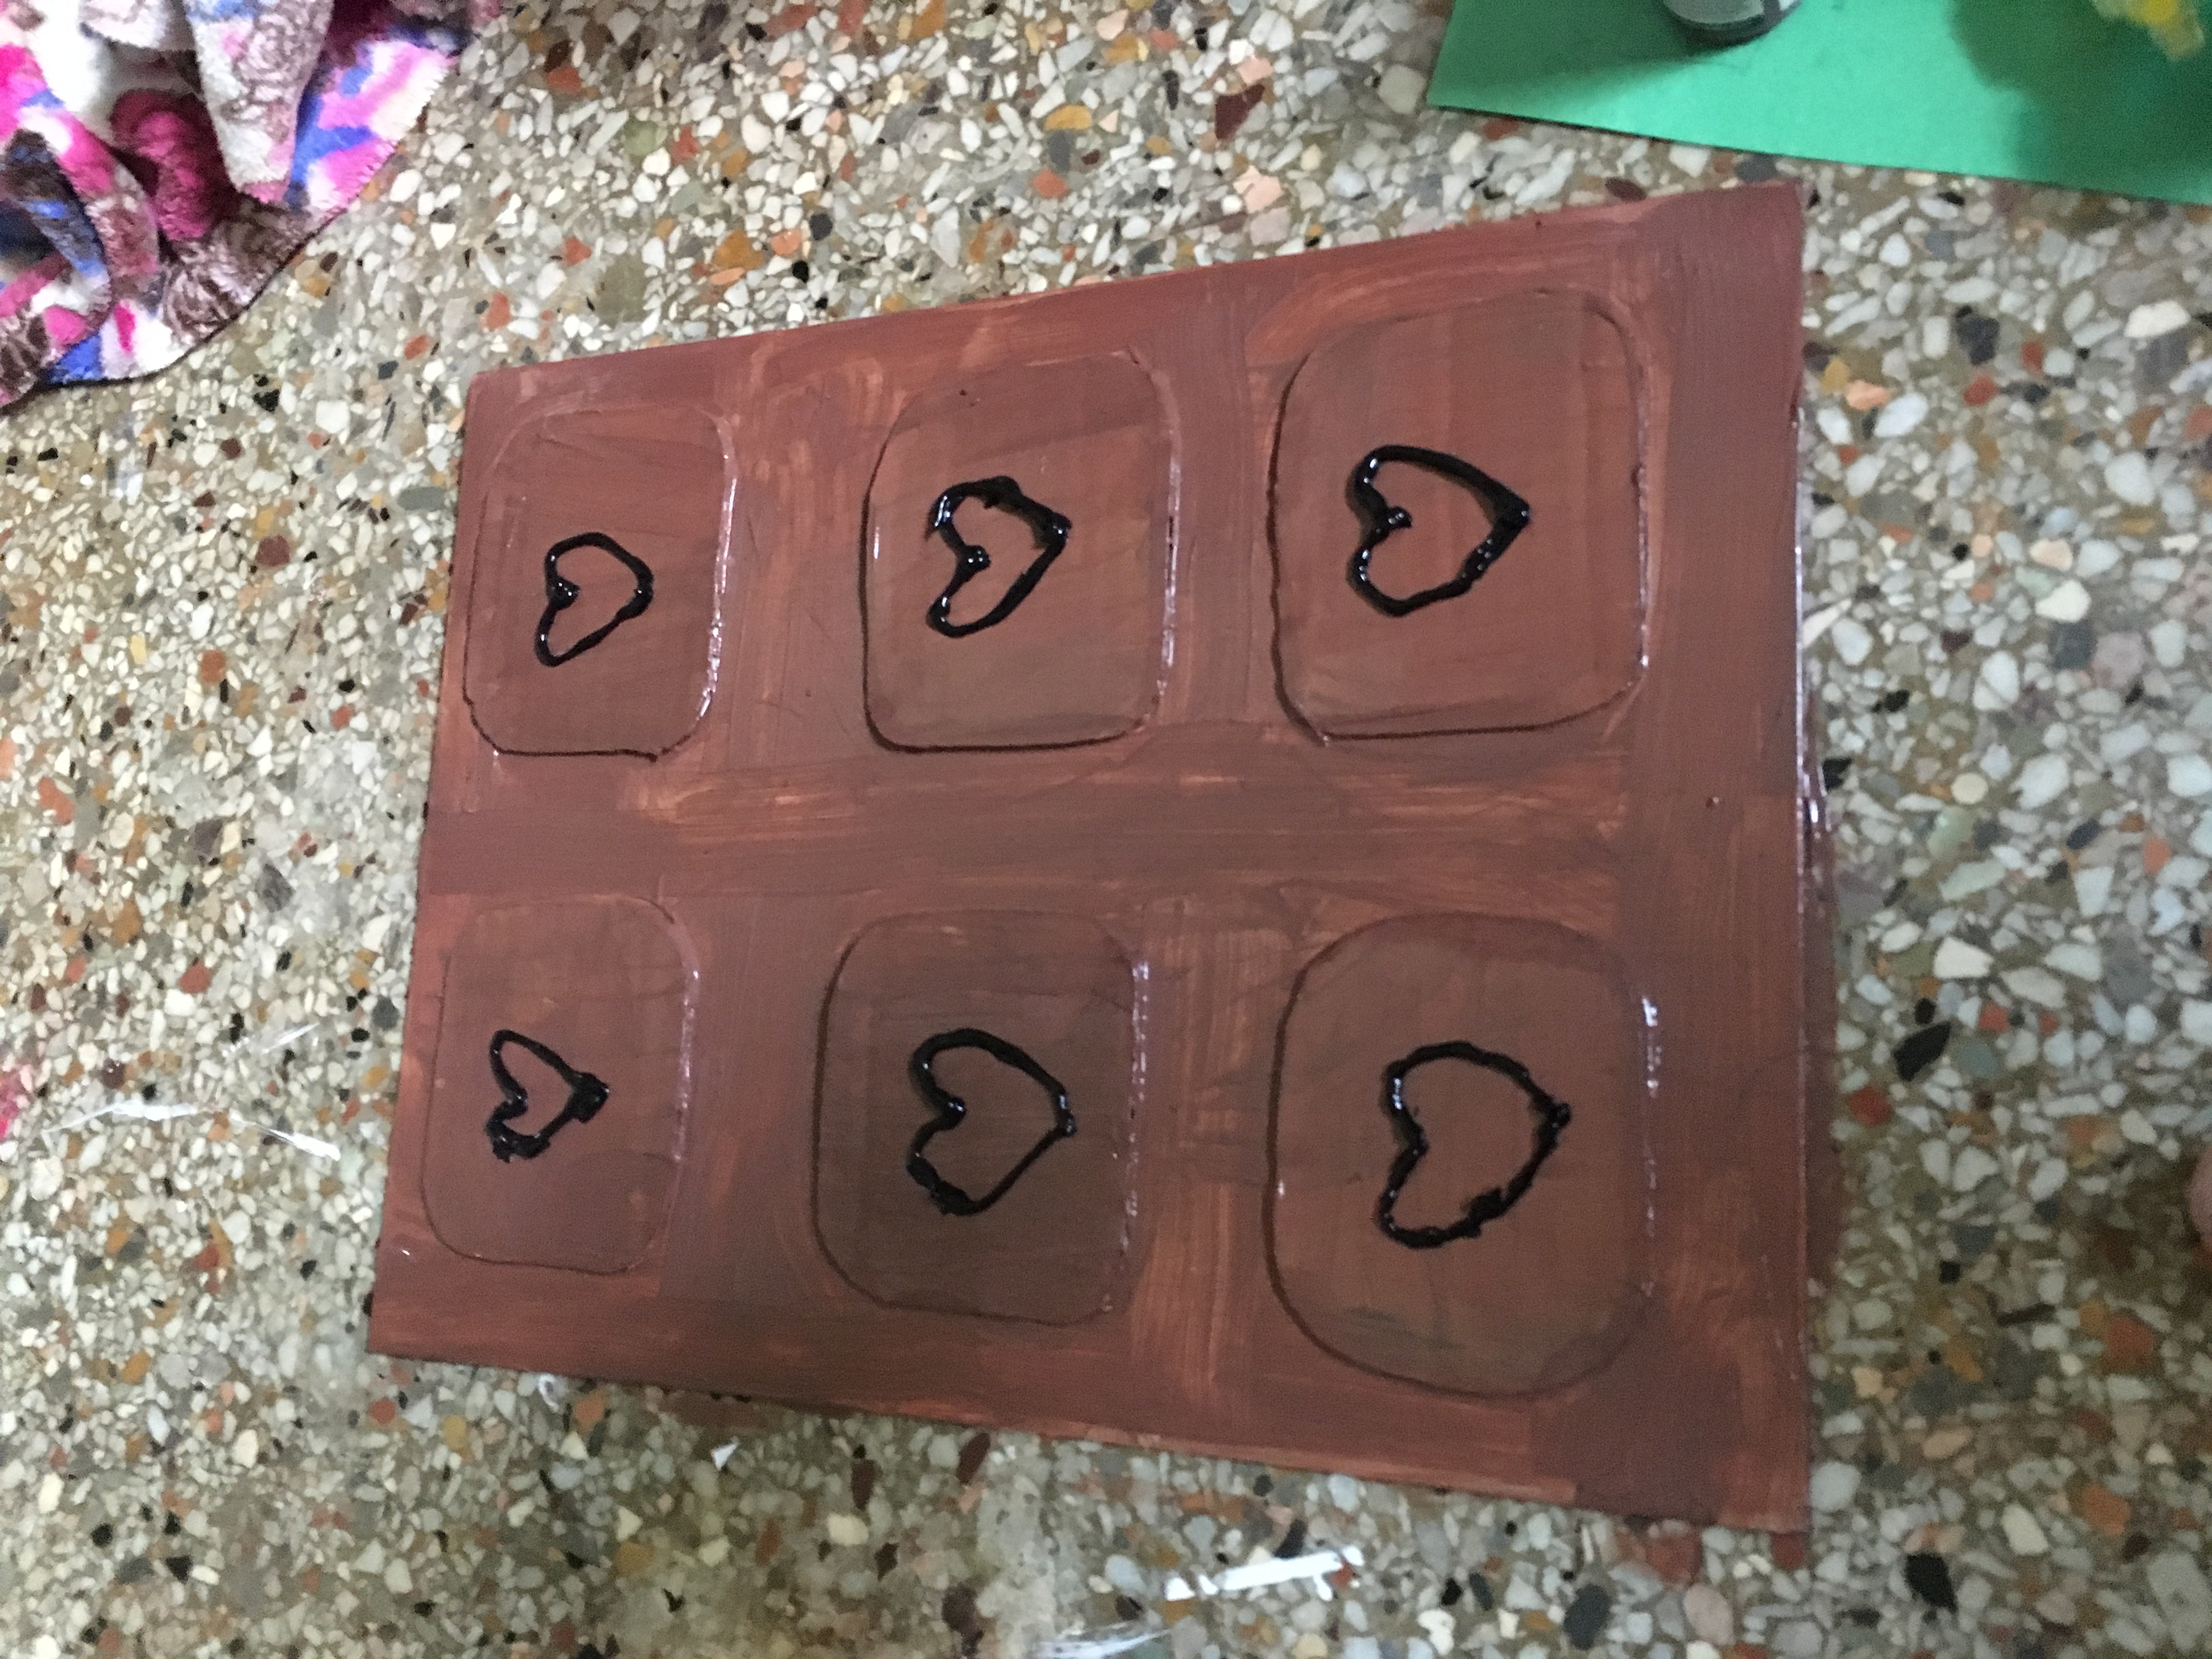
Draw hearts on the chocolate with puffy paint, or write cocoa, or cacao, or your initials, or someone else’s. Make it your own special chocolate notebook.
Step 13: Finish
Add a clear coat or leave it plain, this notebook is adorable and definitely unique. Happy crafting!