

Love nature and sculpting? This tutorial is for you. Today the thing being sculpted is a silly derpy little pickle dragon chilling under a tree. This tree looks super cool and whimsical, and the expression that wound up on this little guy’s face is hilarious. Here is how I made this perfect pair with Sculpey 3.
What you will need
Polymer clay in
- Red
- Light green
- Dark green
- White
- Orange
- Pink
- Brown
- Wire
- Pliers
- Rubbing Alcohol
Making the Nature Dragon Base
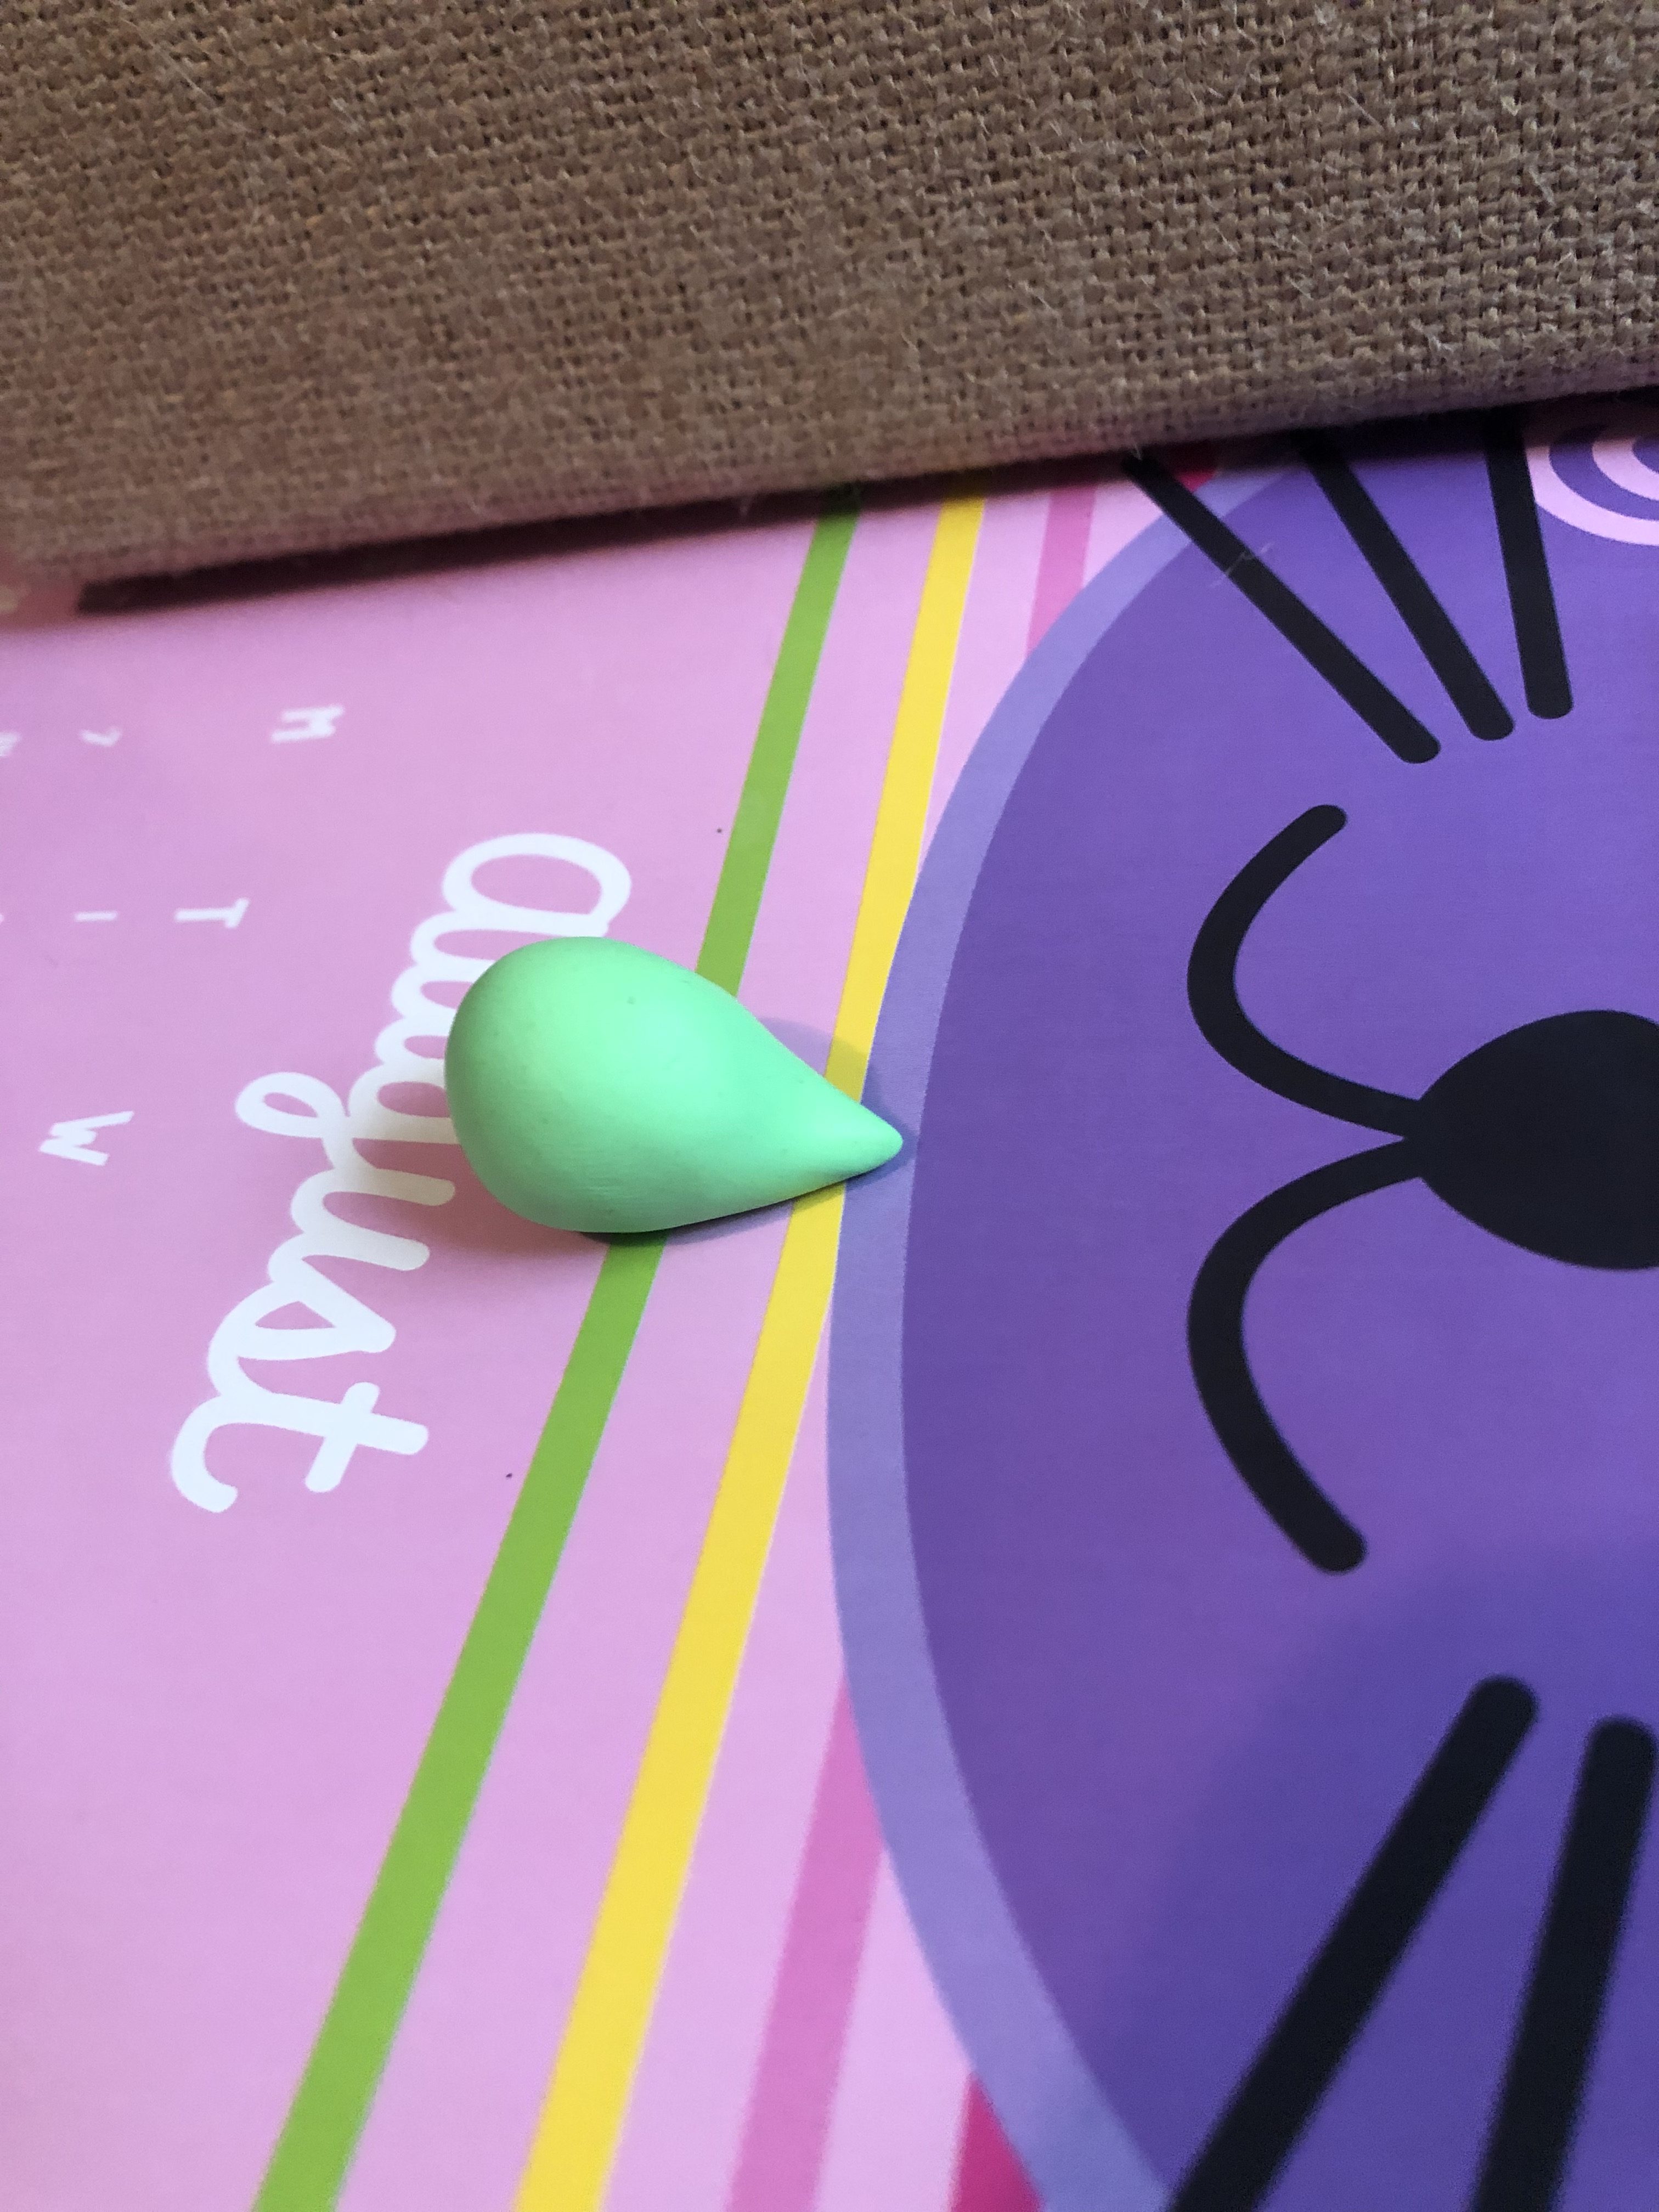
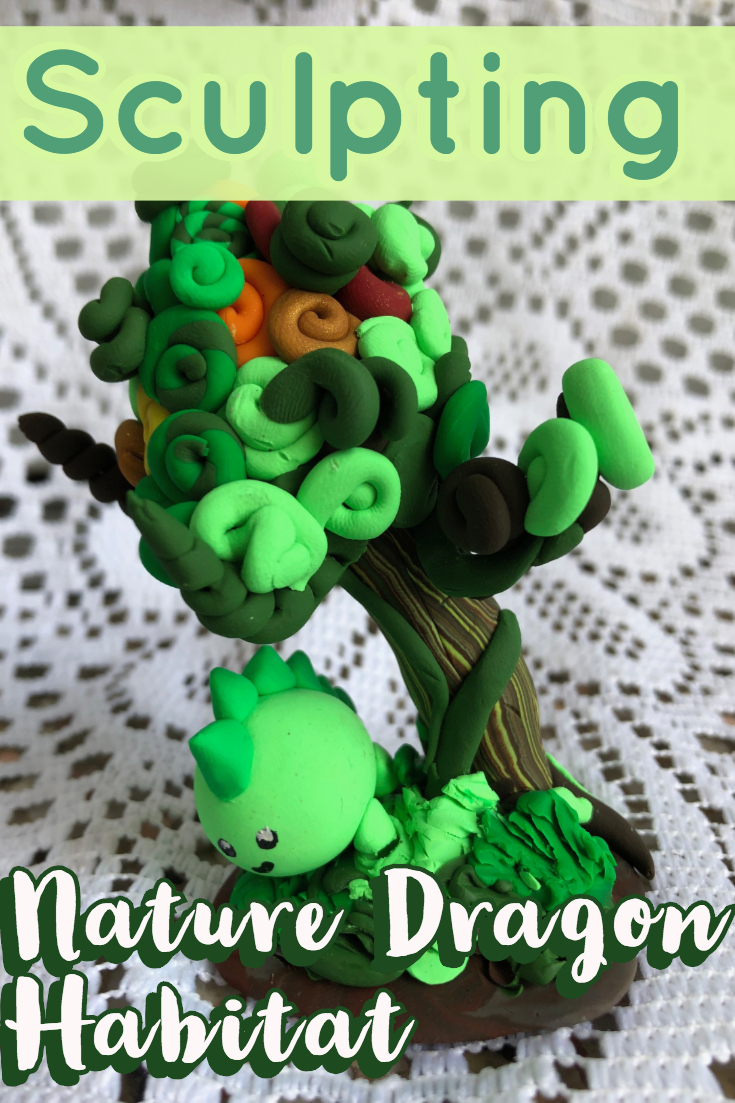
Start with a ball of light green clay. Roll it into a teardrop shape that can sort of hold itself up, with a slightly longer pointed end than is normally seen on a rain drop. Add four ridiculously small marshmallow shaped stubby nubby legs for him to waddle around with. And thus, Pickle the tinysaur is into the world.
Adding Spikes to the Nature Dragon
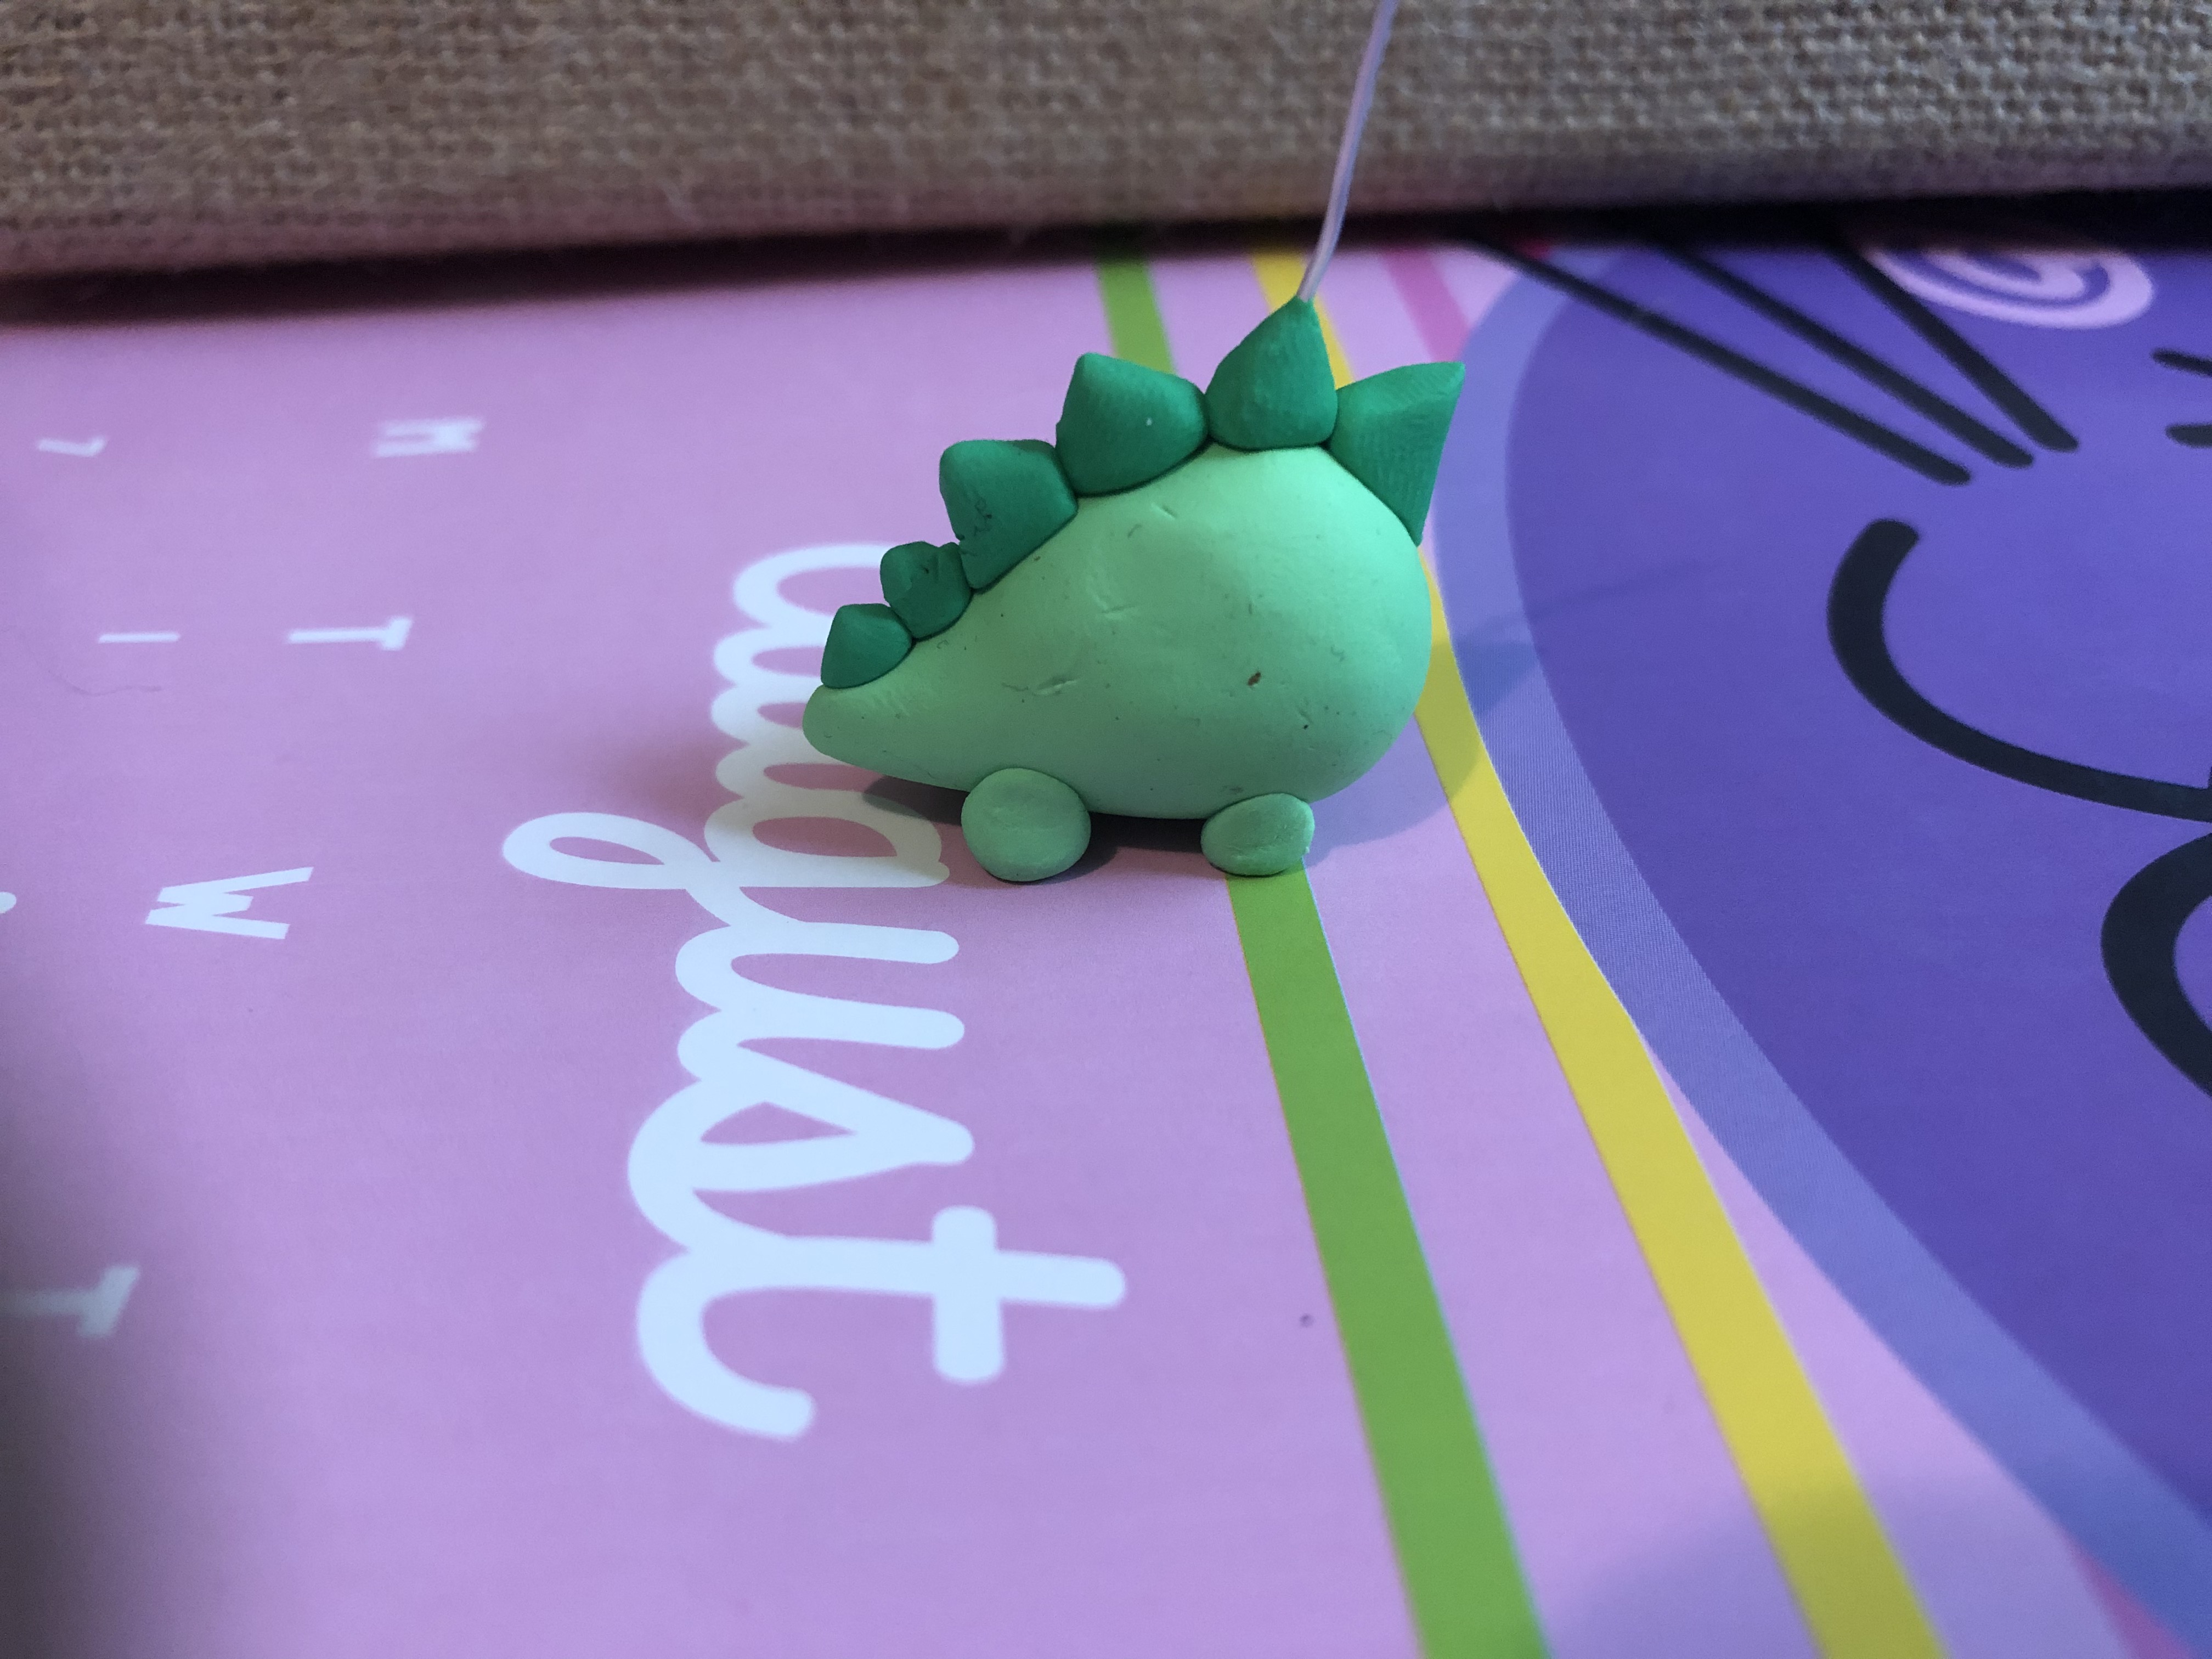
Sculpt some darker green clay into little points. Keep it rounded, as this is a kawaii piece and sharp harsh details are not usually commonly found in the kawaii style. Gently press these fat little spikes all along the tinysaur’s back. Make sure the spikes decrease in size as they get closer to his tail.
Painting on the Face
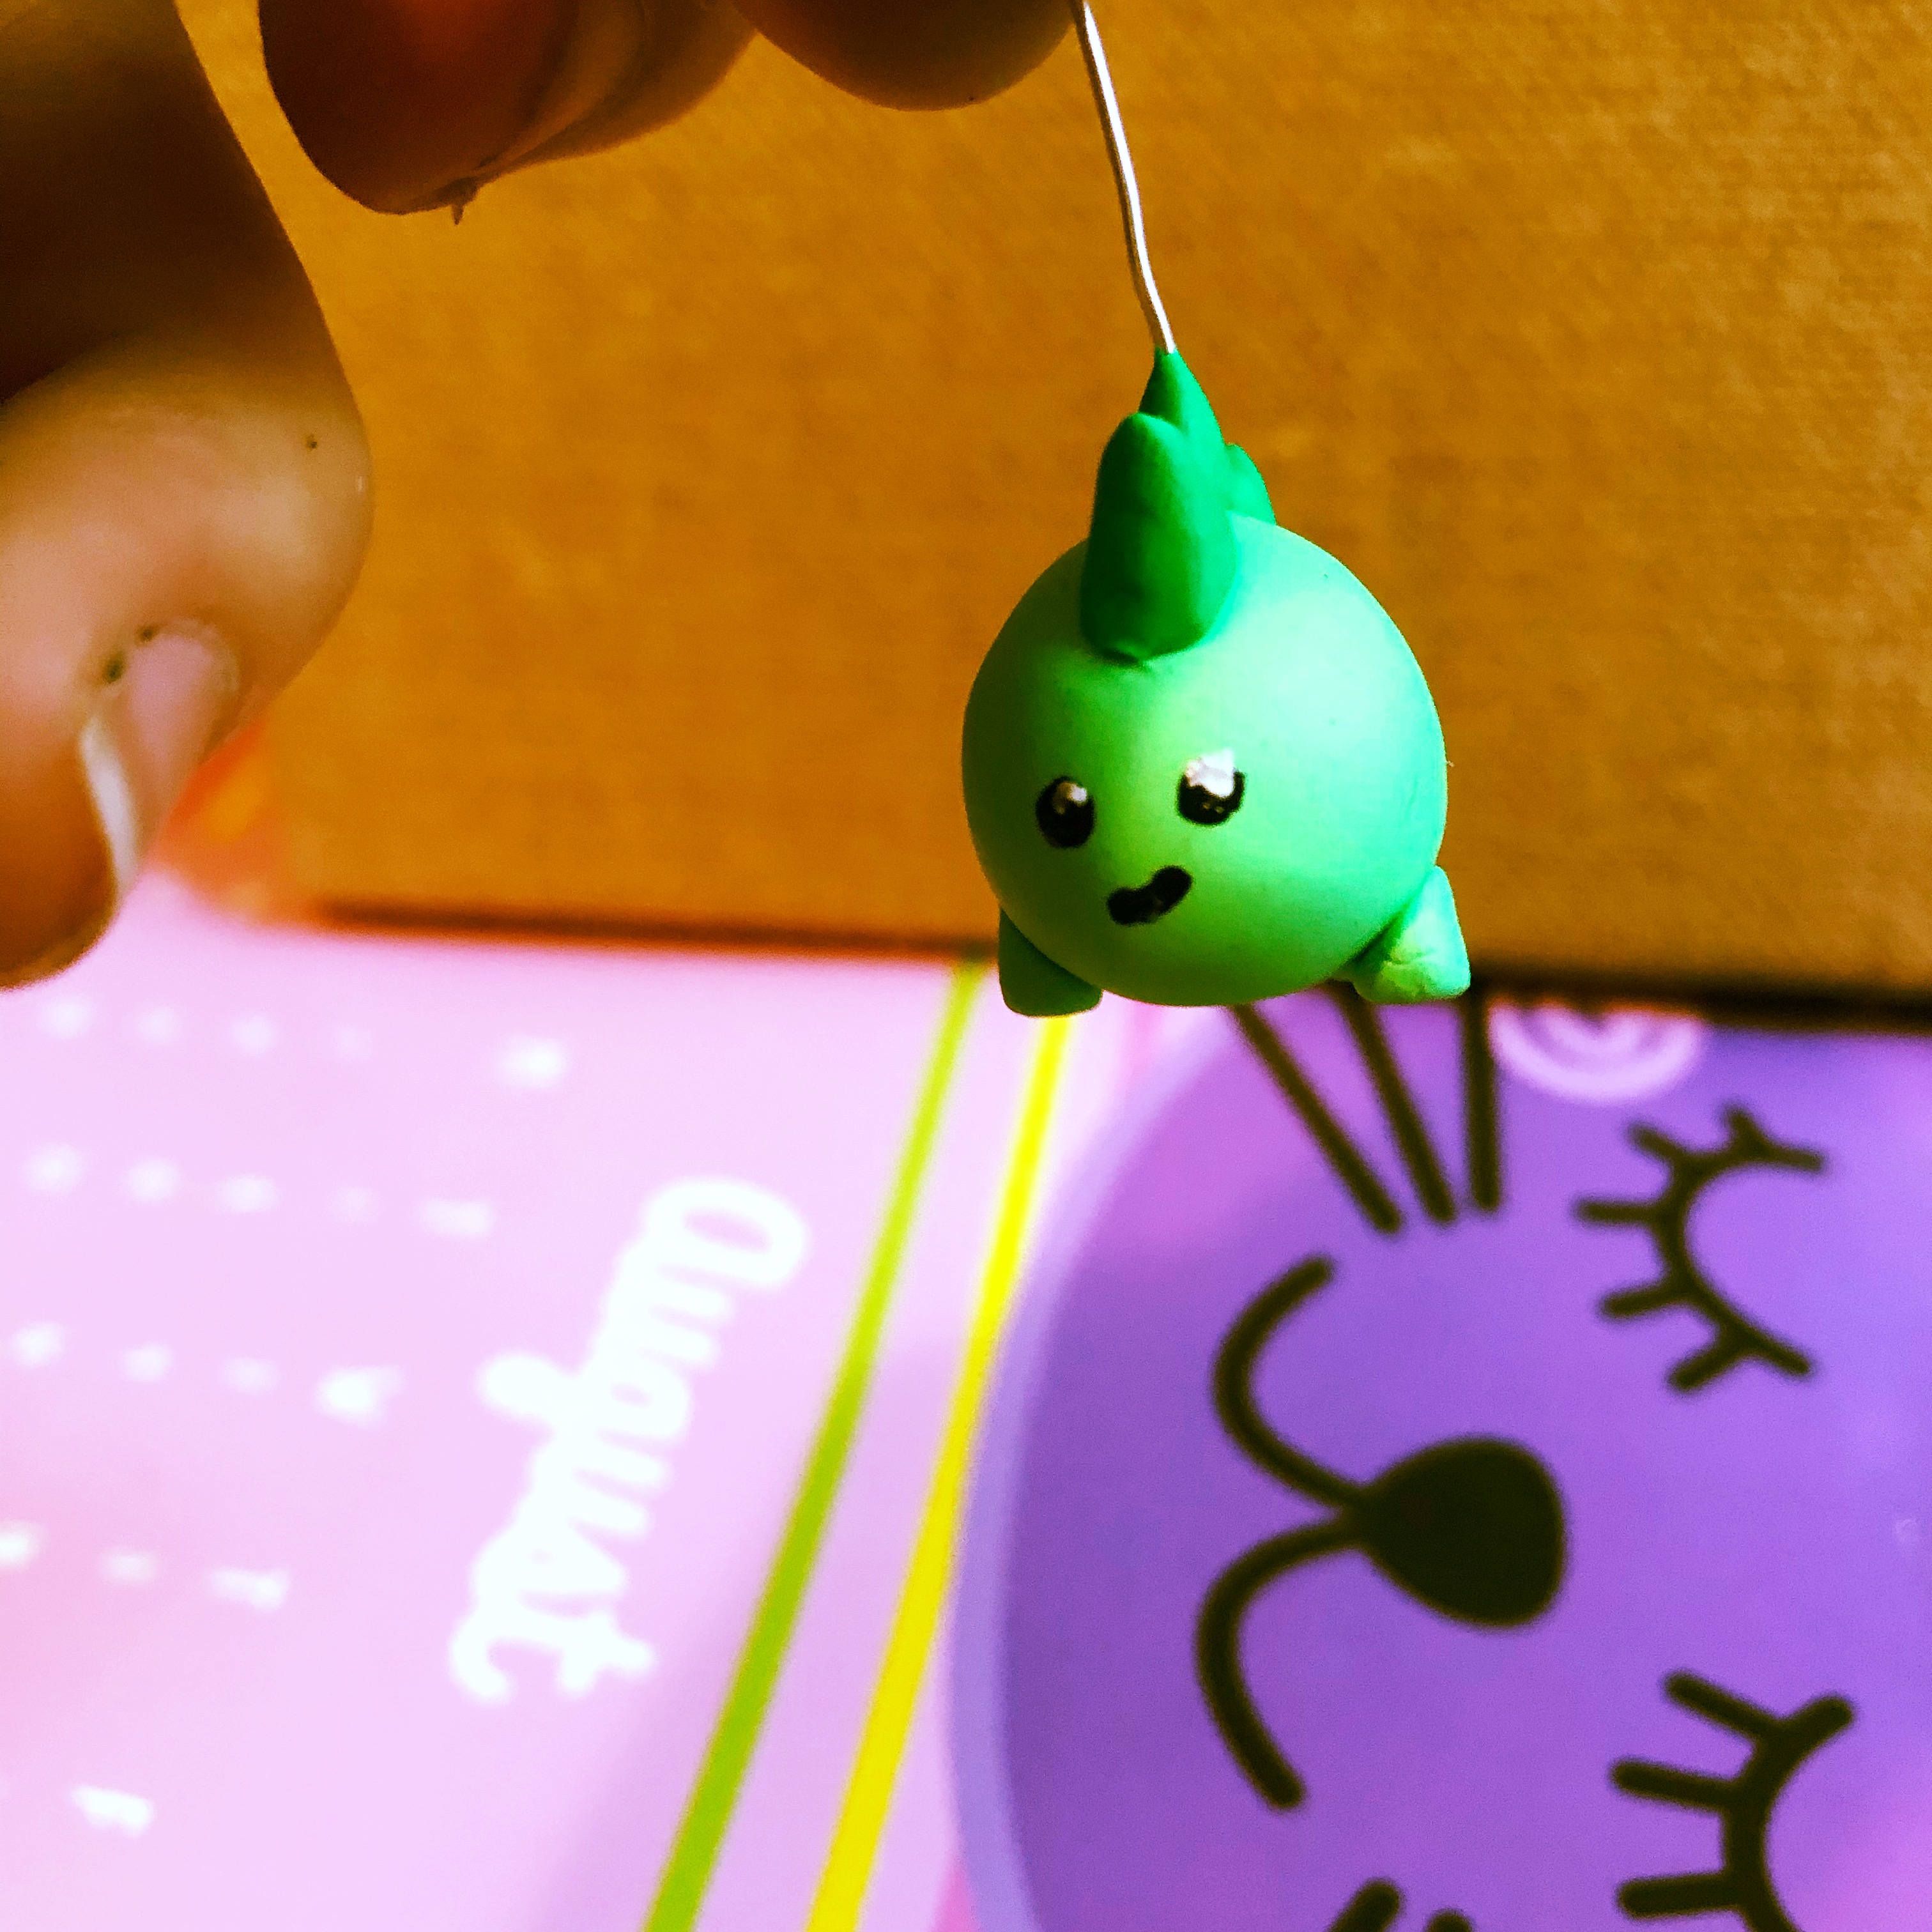
Using a dotting tool and acrylic paint, paint little eyes and a smile onto his face. Mine turned out a little smirky, but I love him anyway. Add a small white dot to each of his eyes to bring him to life.
The Golden Rule of Painting with Acrylic on Unbaked Clay
Acrylic paint can go into the oven on unbaked clay, but only if it specifies non toxic. Using not nontoxic paint can result in hazardous fumes being released during the baking process, which can harm you and others around you. Always craft safely and research before you try something new.
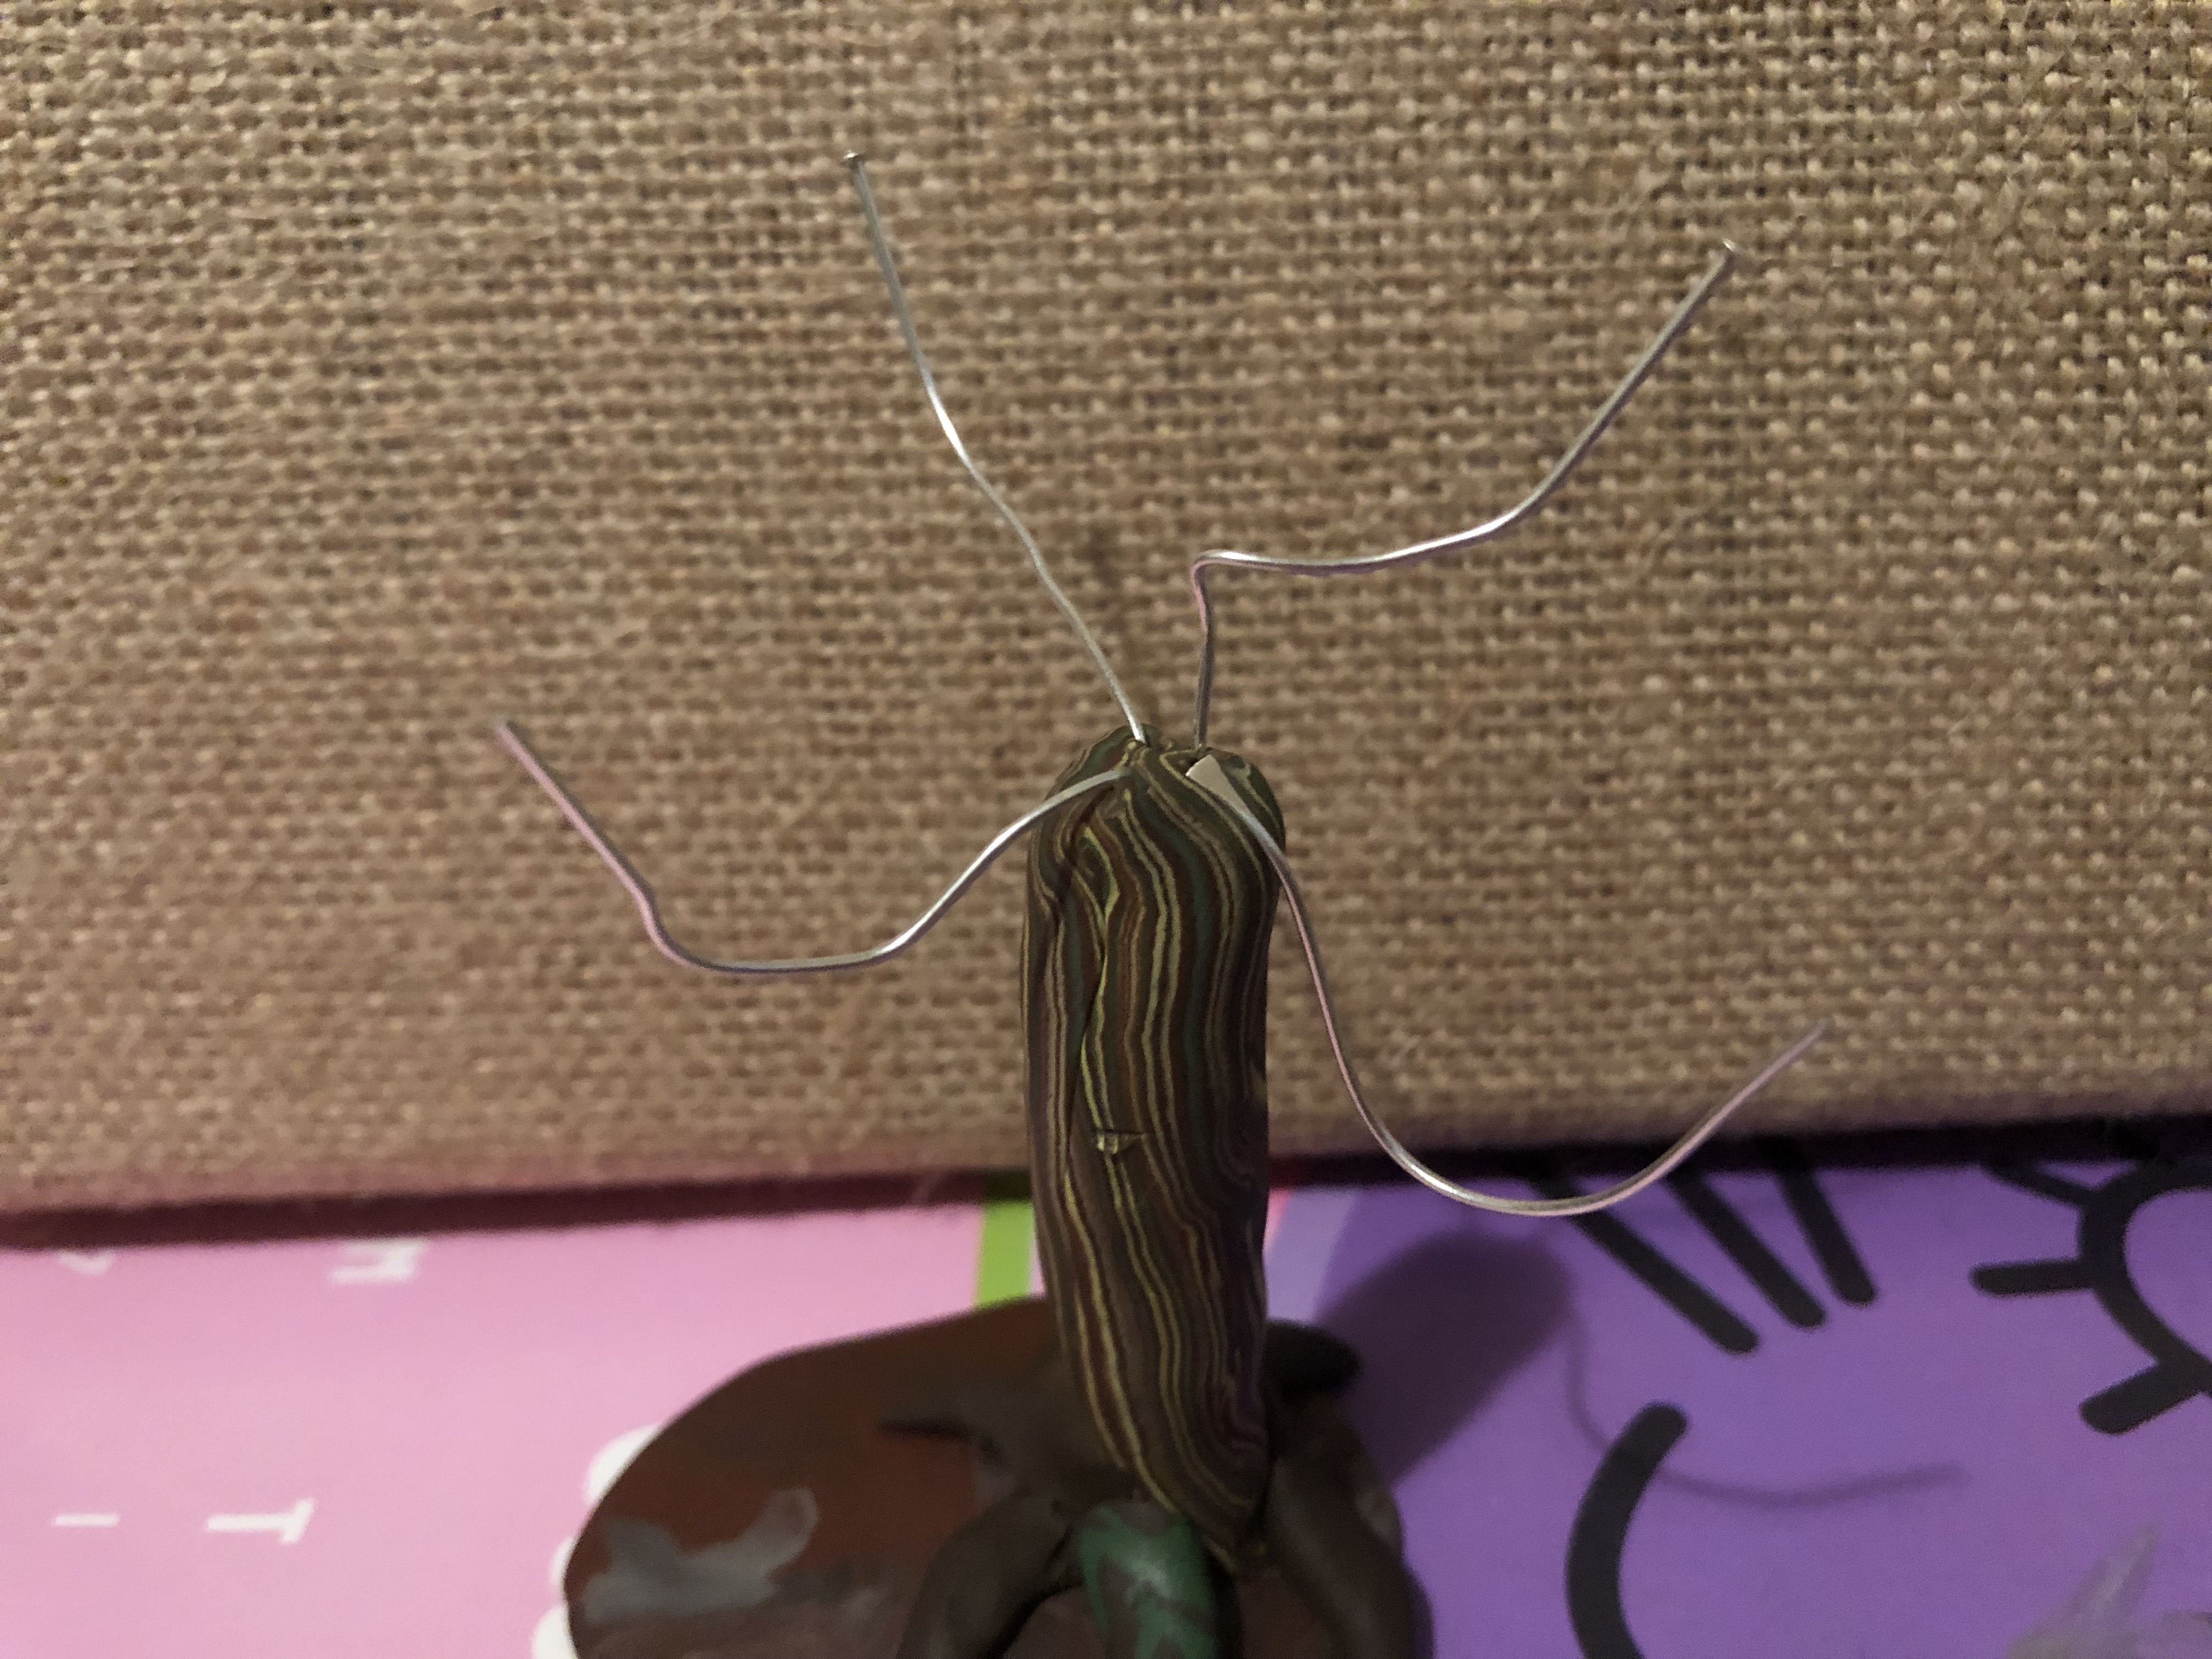
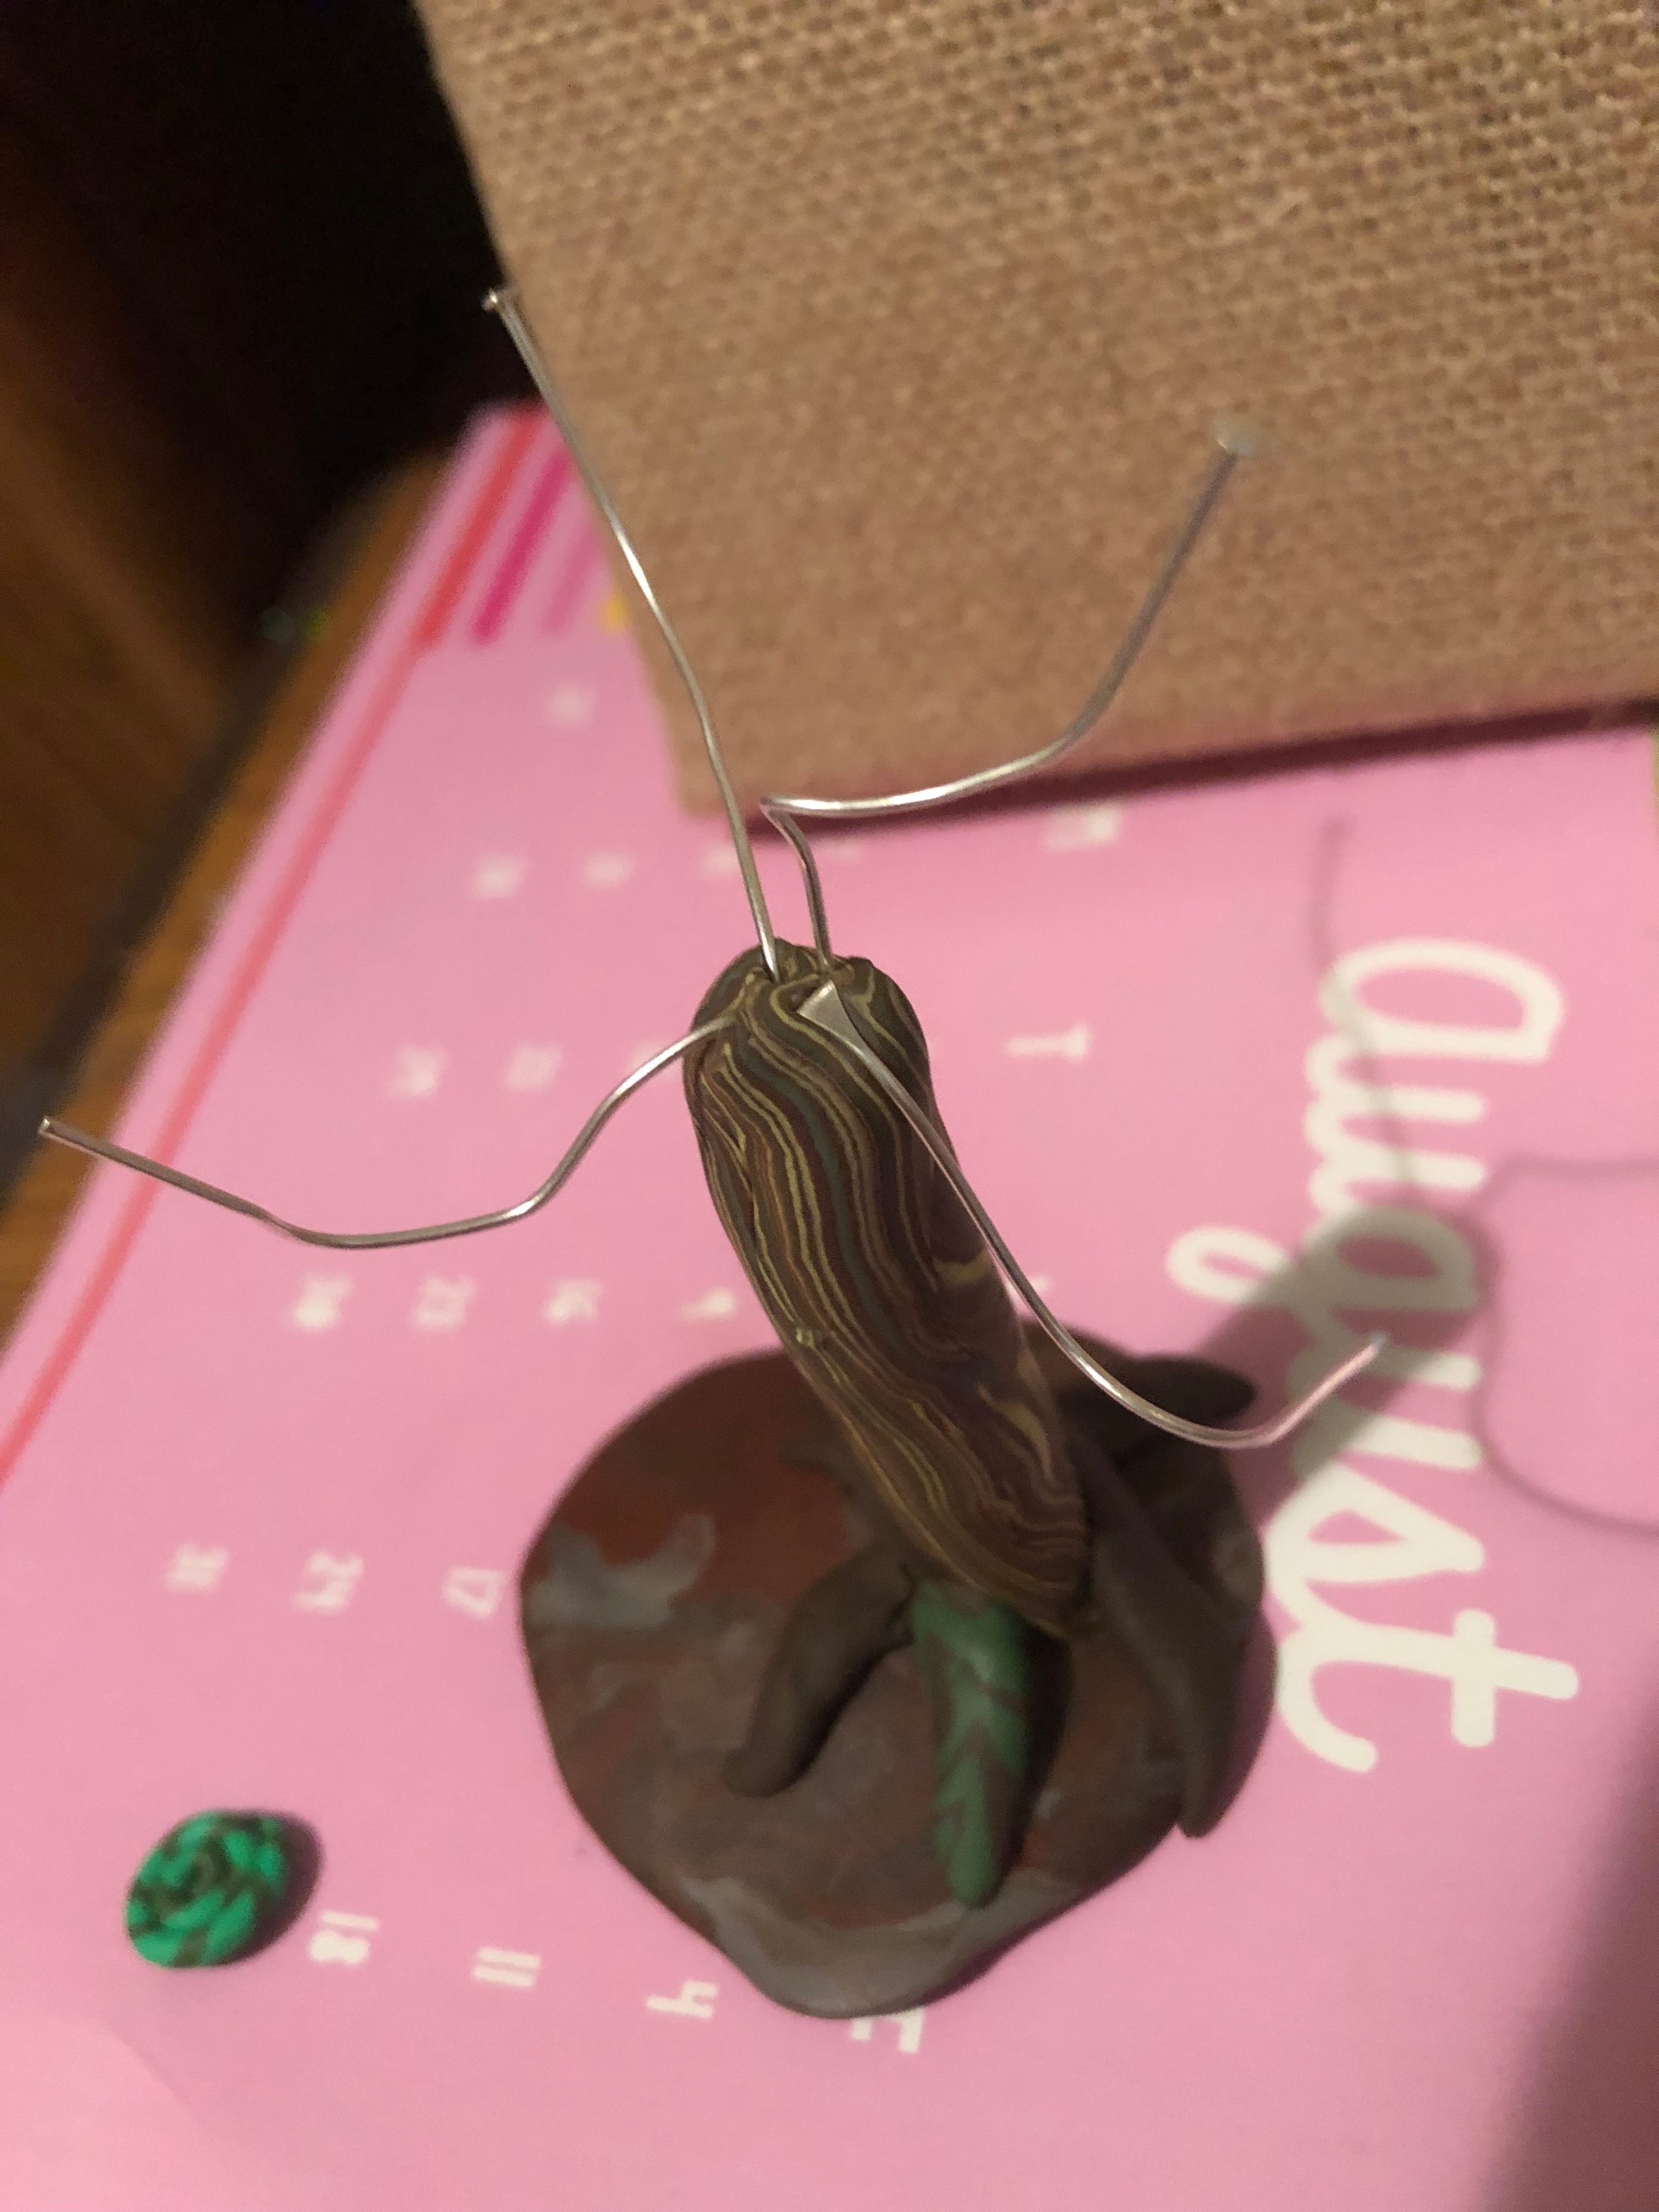
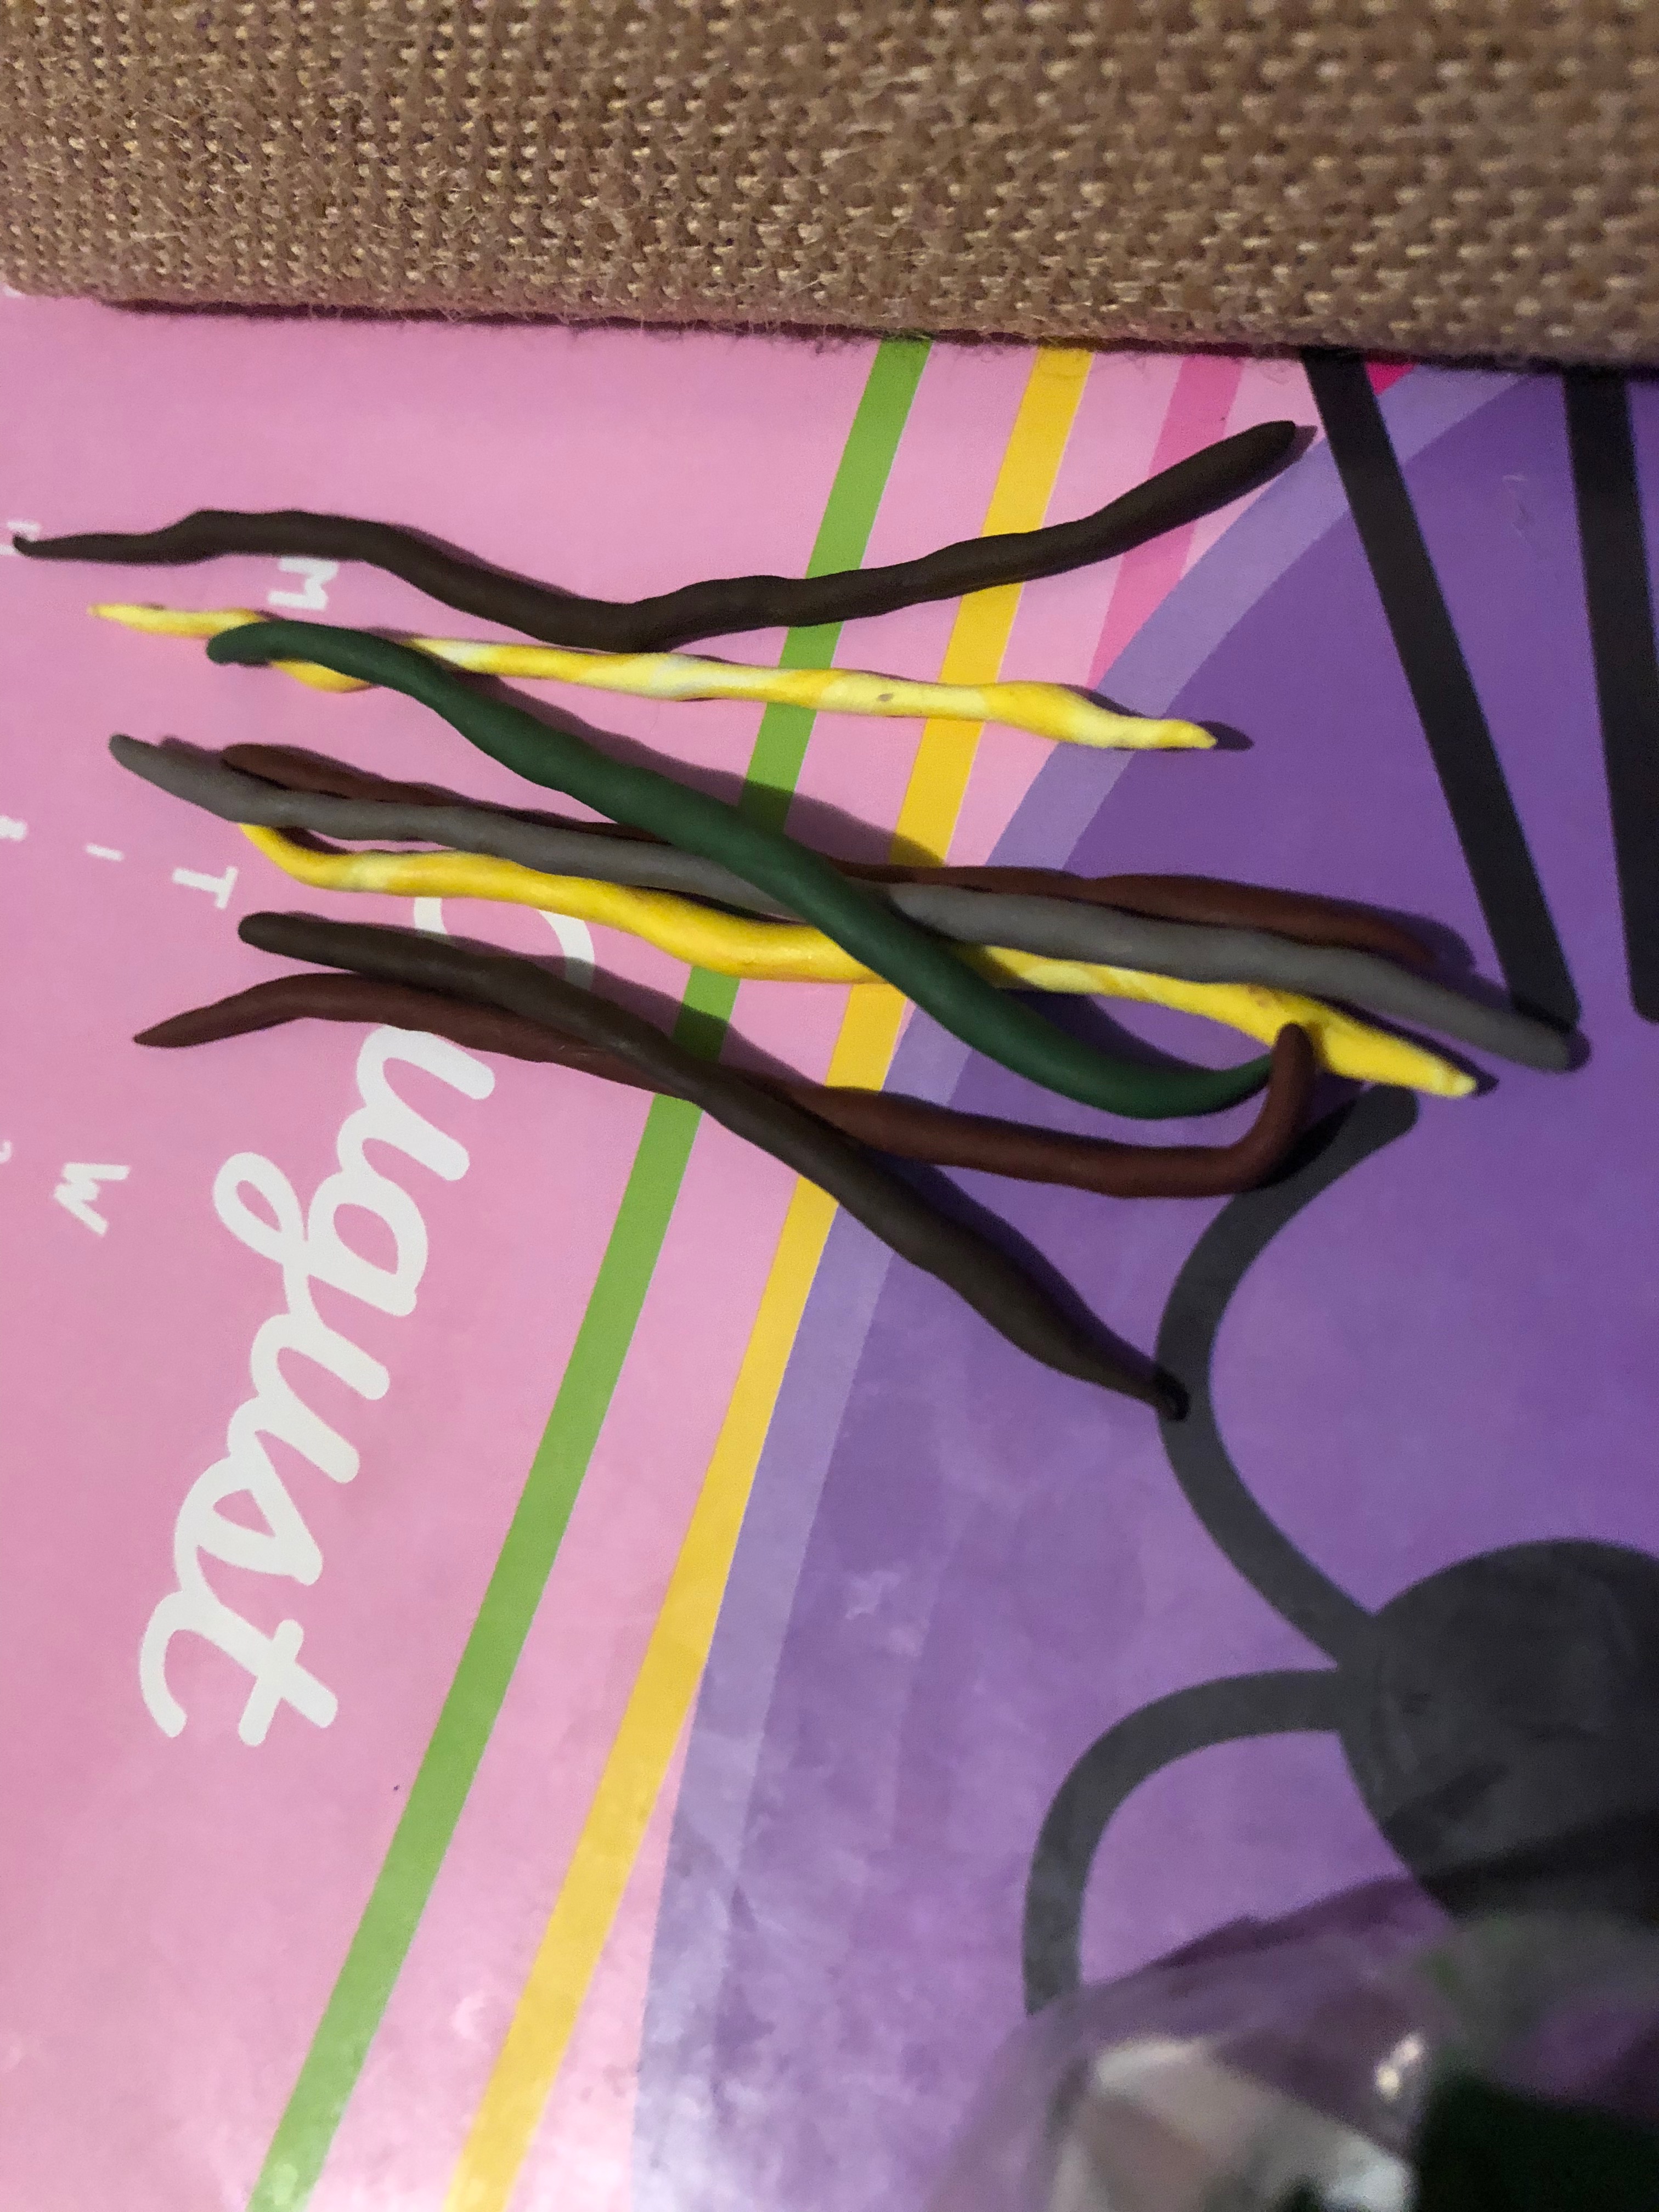
Making the Wire of the Nature Dragon Tree
Make a little bundle of branches and a sort of tree trunk from wire. It’s okay if the base looks messy, it will be really cool once we are done with it.
Making the Base of the Tree
Flatten out a brownish red piece of clay into a dome shape, and stick the wires off a little to one side. Make sure there is plenty of room for your little nature dragon to stand.
Sculpting Bark on the Nature Dragon Tree
Mix some dark green, yellow, light brown, and dark brown together in strips, folding it and rolling it out repeatedly so the grain goes the way it is supposed to. Attach this to the trunk of the tree, smoothing out any creases. In my case, I stuck the wires into the tree after I put the trunk on the base. This was a huge mistake, and I do not recommend repeating this process.
Making Grass for the Nature Dragon
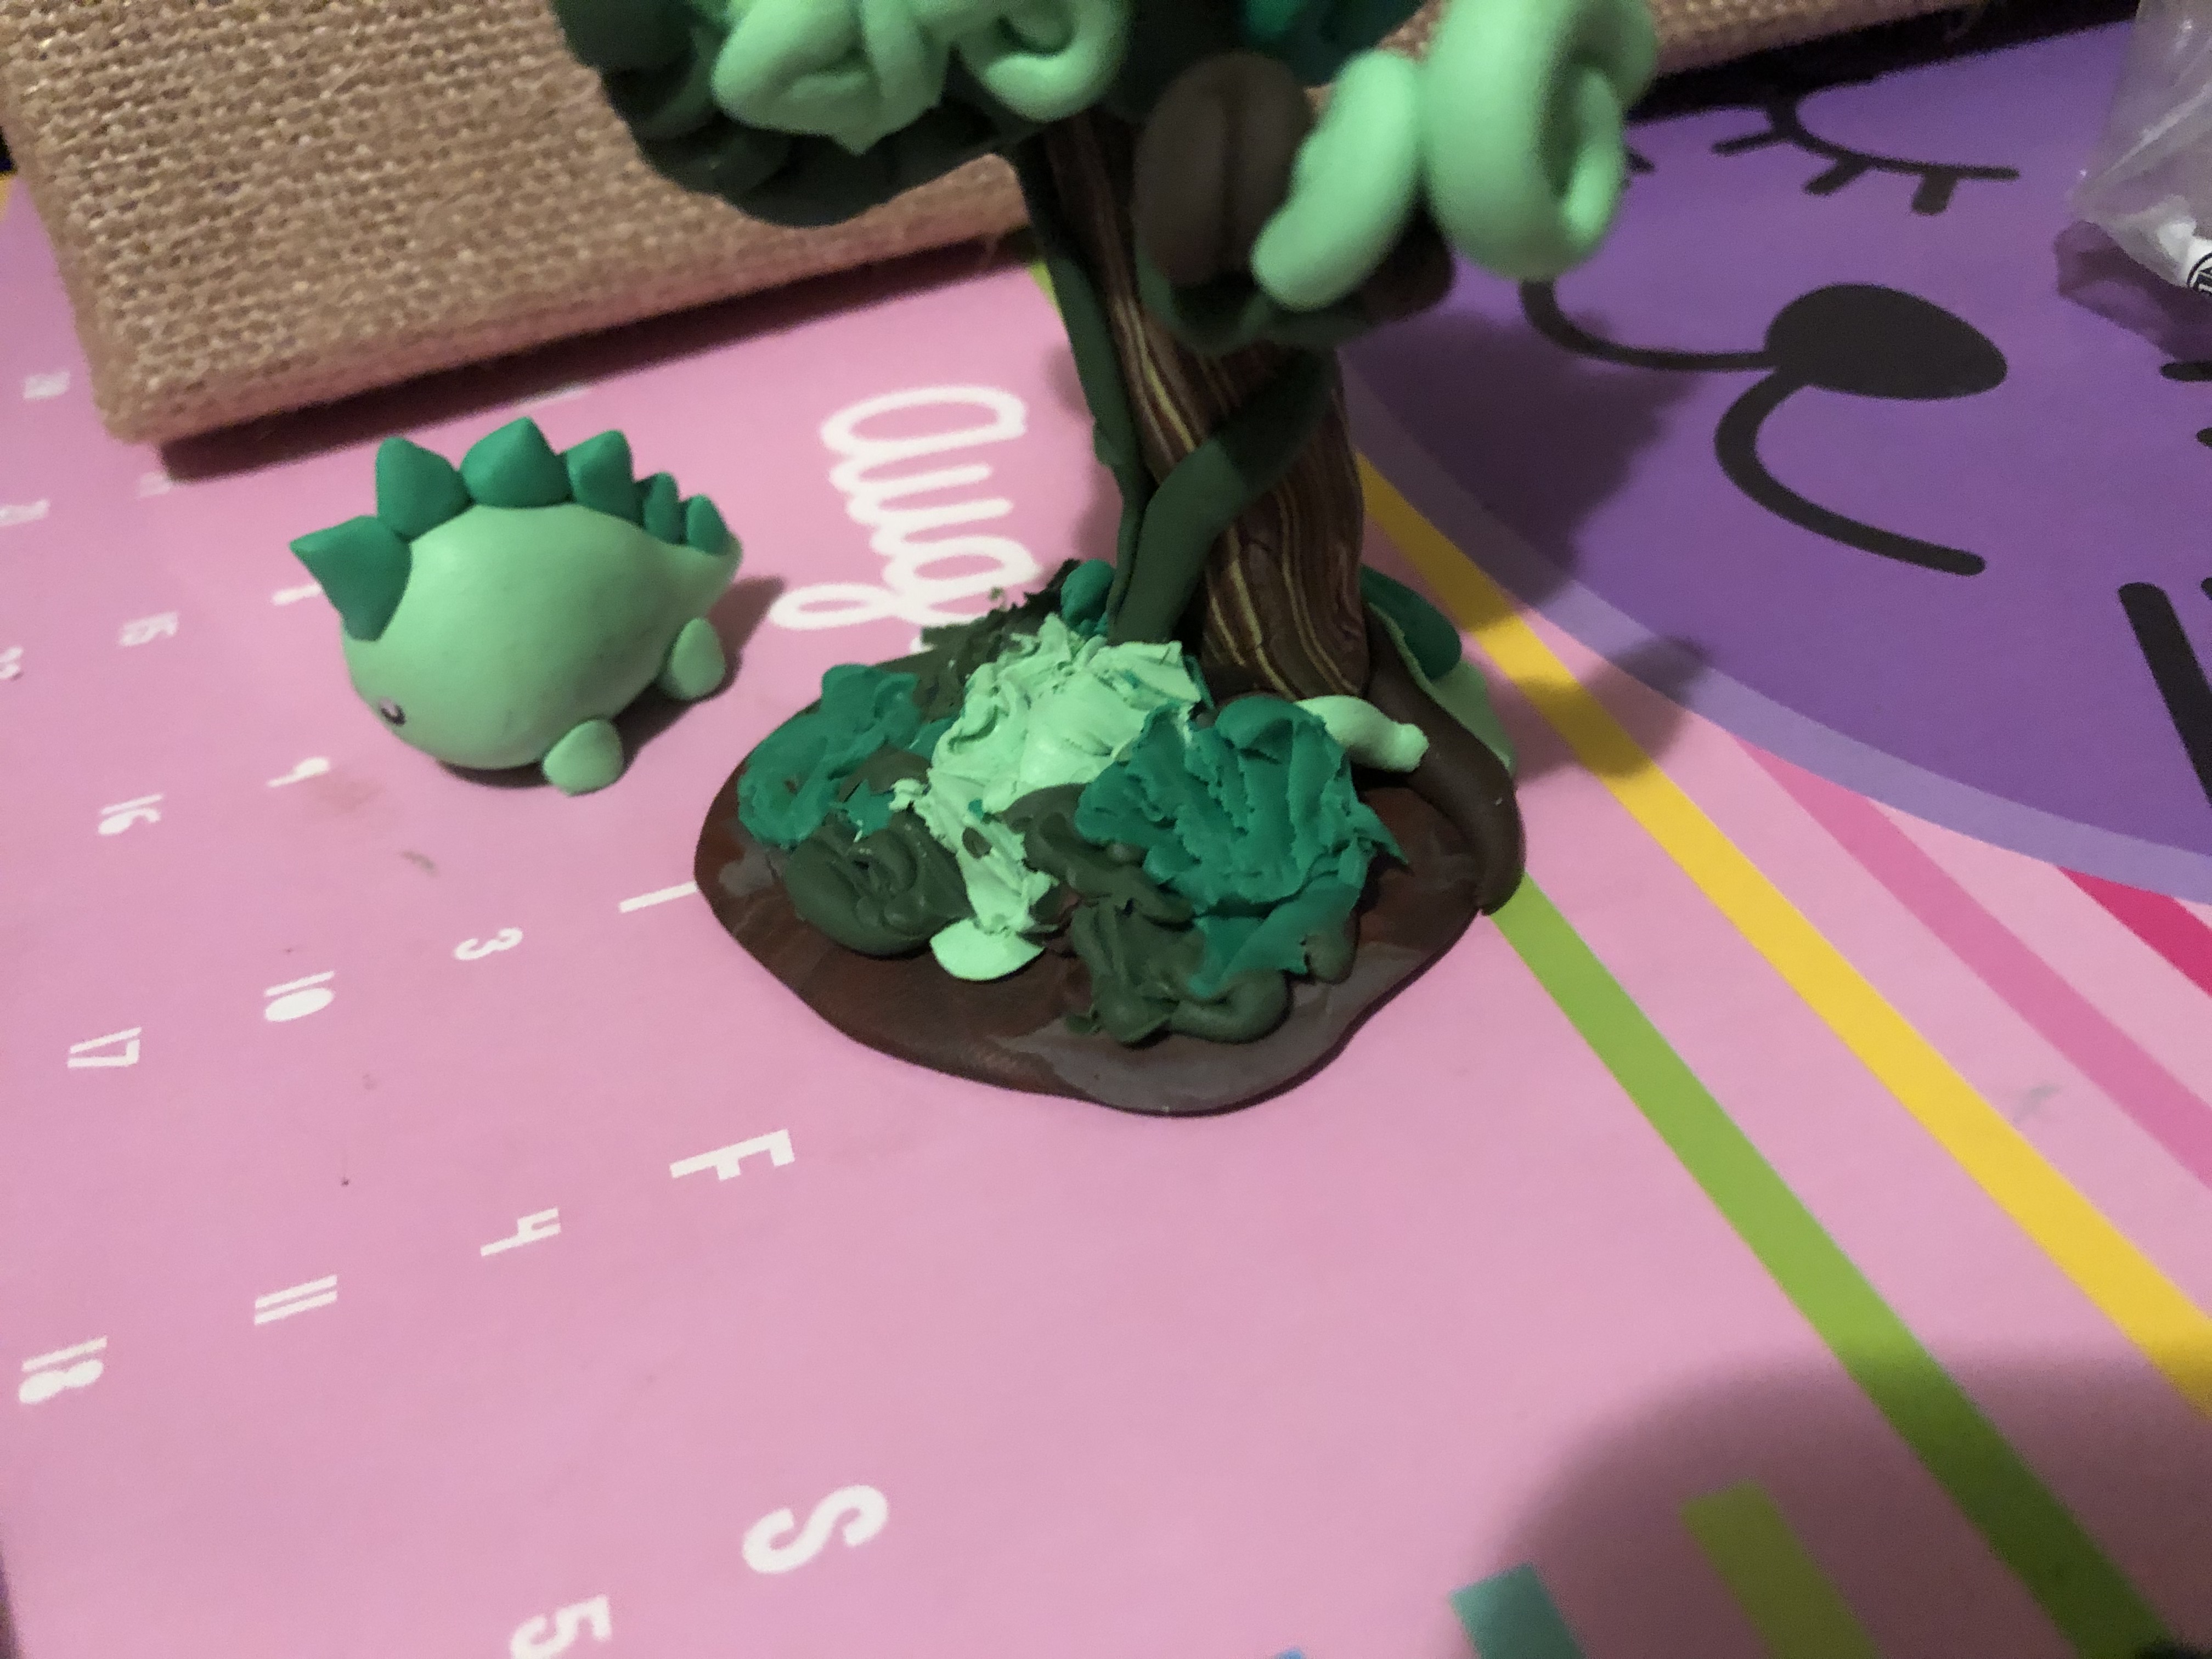
Flatten light and dark green clay, and cut it with a sharp blade to make it look like grass. Lightly press it onto the base and fluff it up with your blade. Use a dotting tool to make a little indent for your nature dragon to stand in.
Making the Top Part of the Tree
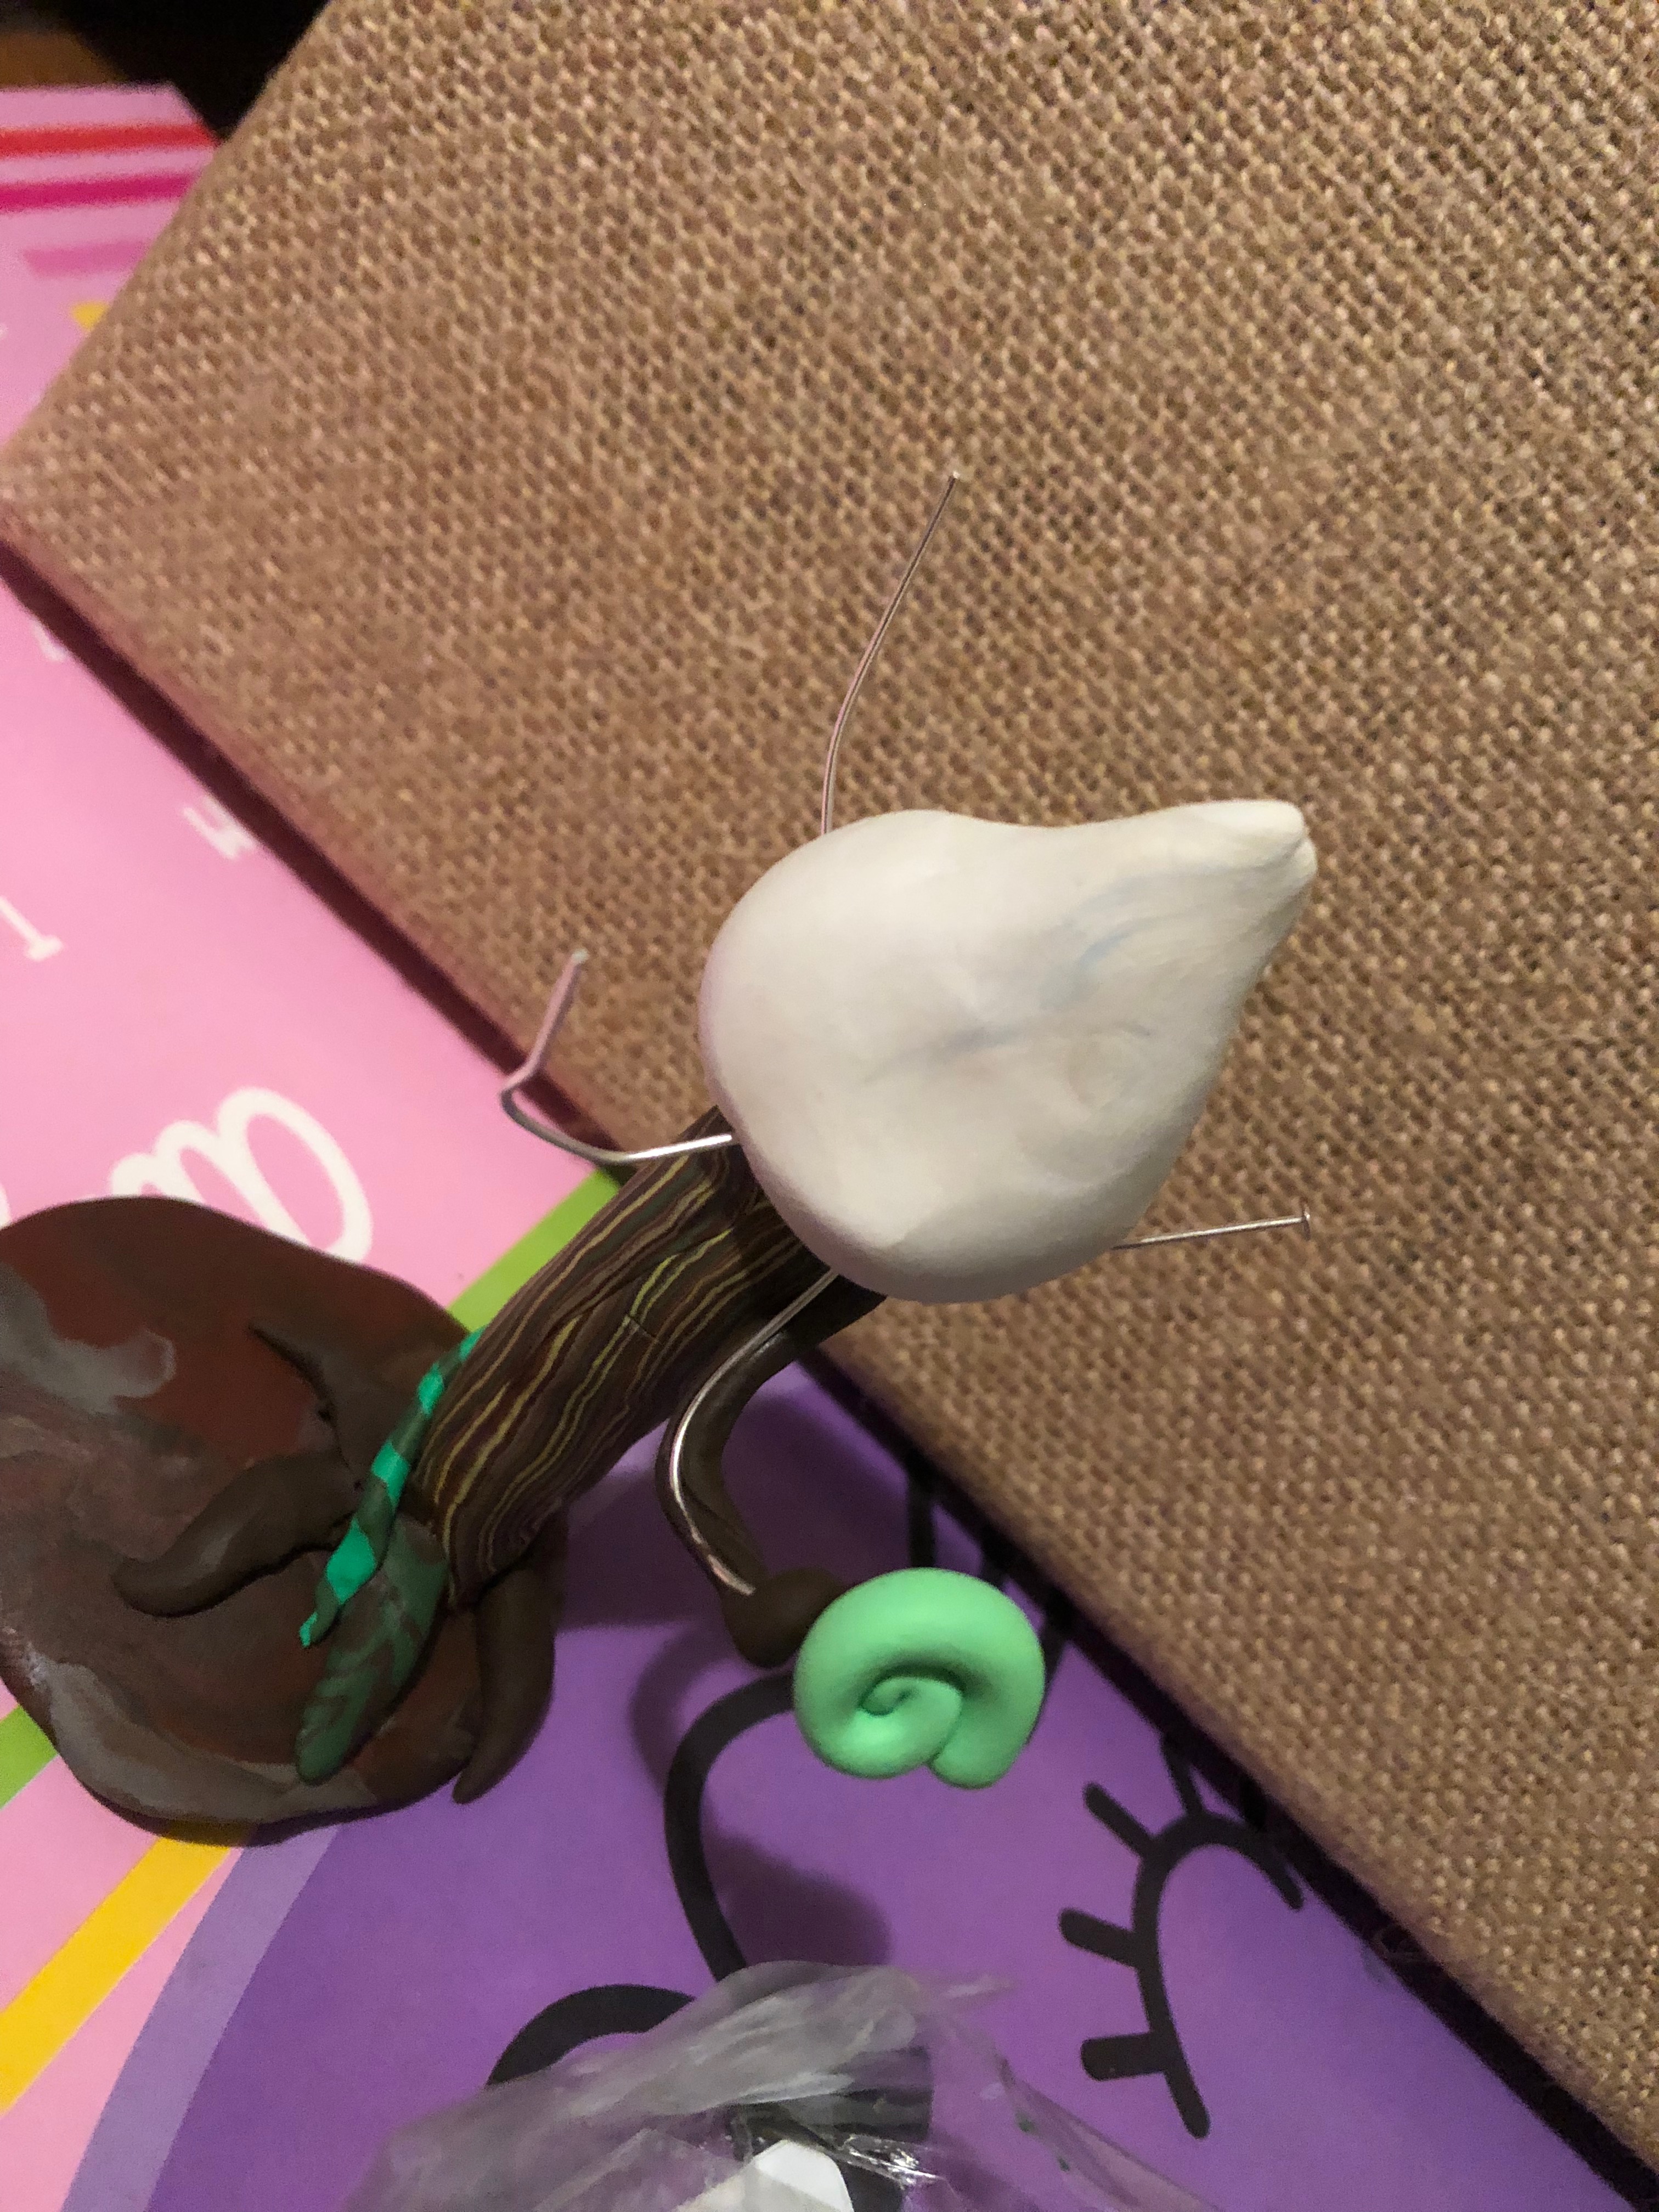
Make a ball of white clay and stick it to the top. It doesn’t have to be perfect, since this is the core of the tree and will be getting covered up anyway.
Adding Decorative Swirls
Using all colors of clay but primarily greens, cover the entire top of the tree with little swirls. Make the swirls by rolling out the clay and curling it up like a snail. Twist colors together to make special swirls, and make sure to have some on top of others to give the tree depth. For the random wires sticking out, wrap clay around them like those twisty things sold at Hobby Lobby.
Attaching Securing Vines
Since my tree was tilting, I added a wire to the side to push the tree trunk upright. Since this wire was not very pretty looking, I wrapped dark green clay over it and around the base of the tree to blend it all together. You can optionally add little flowers to the vine to make it look even prettier.
Attaching the Tiny Derpy Nature Dragon

Set the little friend right where he goes next to the tree. You can optionally glue him to the base with liquid Sculpey, but I chose to leave him loose so I could turn him into a charm if I wanted.
Smoothing out Fingerprints
Using a Q-tip and a little rubbing alcohol, smooth out any fingerprints and remove any dirt your piece has collected. Be careful not to use too much, because it can cause your piece to crack.
Baking
His tree is all solid clay, therefore, this piece will take a good half an hour to bake. Set your oven to preheat to 275 F. Once your oven is ready, pop him into the oven and set your timer.
Finish
Your adorable nature dragon and environment are now done. You can use a clear coat if you would like to make it shiny, but I like the matte look Sculpey has. If you did this craft, feel free to let me know how it worked out in the comments. Happy Crafting! If you liked this craft, and would like to see more crafts like this, check out my Nature Wyvern and my Derpasaur Terrarium.