
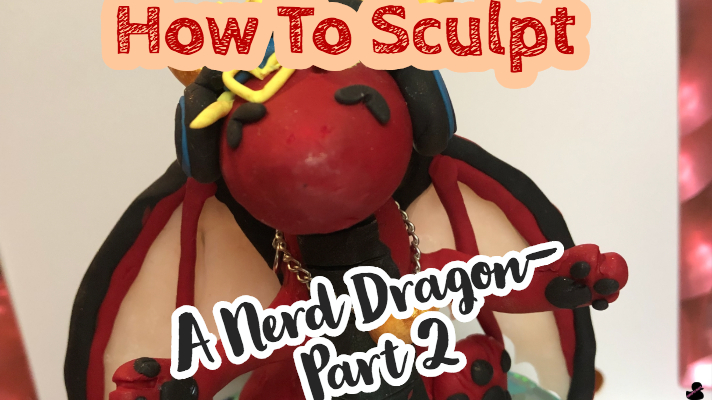
So, you have made this pretty little DIY Dragon that looks pretty good… but the more you look at it, the more disappointing it looks to you. I believe that if you are dissatisfied with your art, that you should keep trying and trying and force your art to be the best it can be. I decided to try a new method I have yet to try, and that is re-baking a piece that was finished with a makeover.
What you will need
- Yellow polymer clay
- Anger issues
- Oven
- Super glue
- Wire
- Dotting tools
- Pan
Starting the Remake—Admitting the Problems
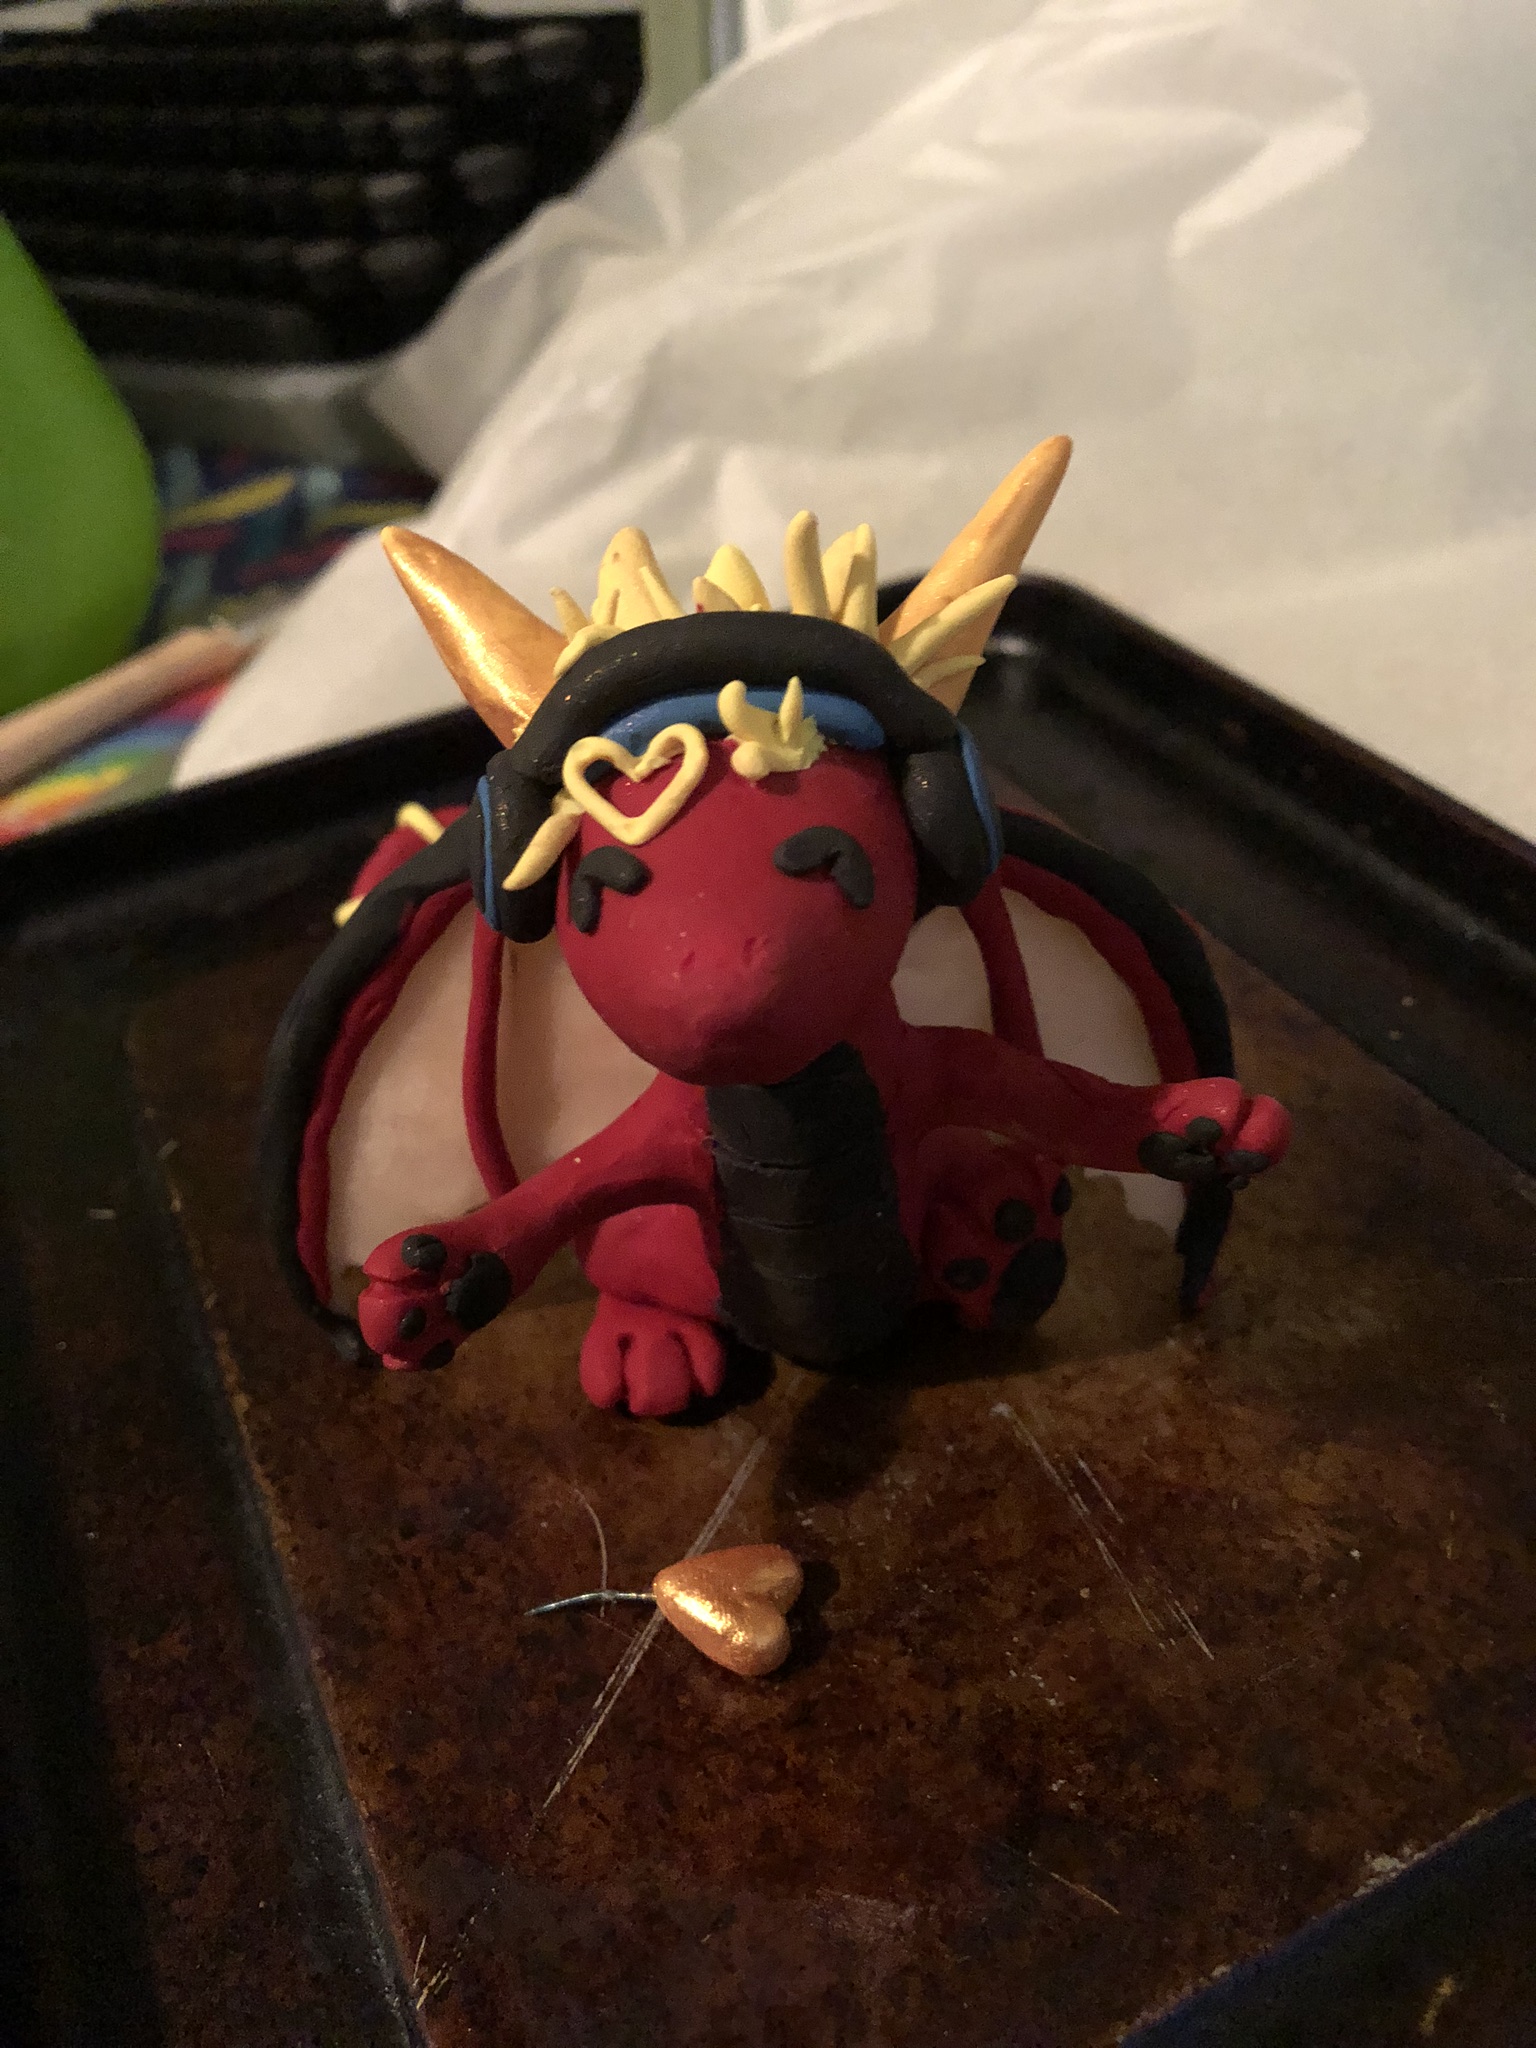
So you pulled him out of the oven and… ew. Sure, when you were tired he looked great. But now that it is the next day and you look at him with a fresh mind, more problems become apparent. The arm is breaking off, the back of the head looks awful, there are no back spines. There seems to be no hope for this creature.
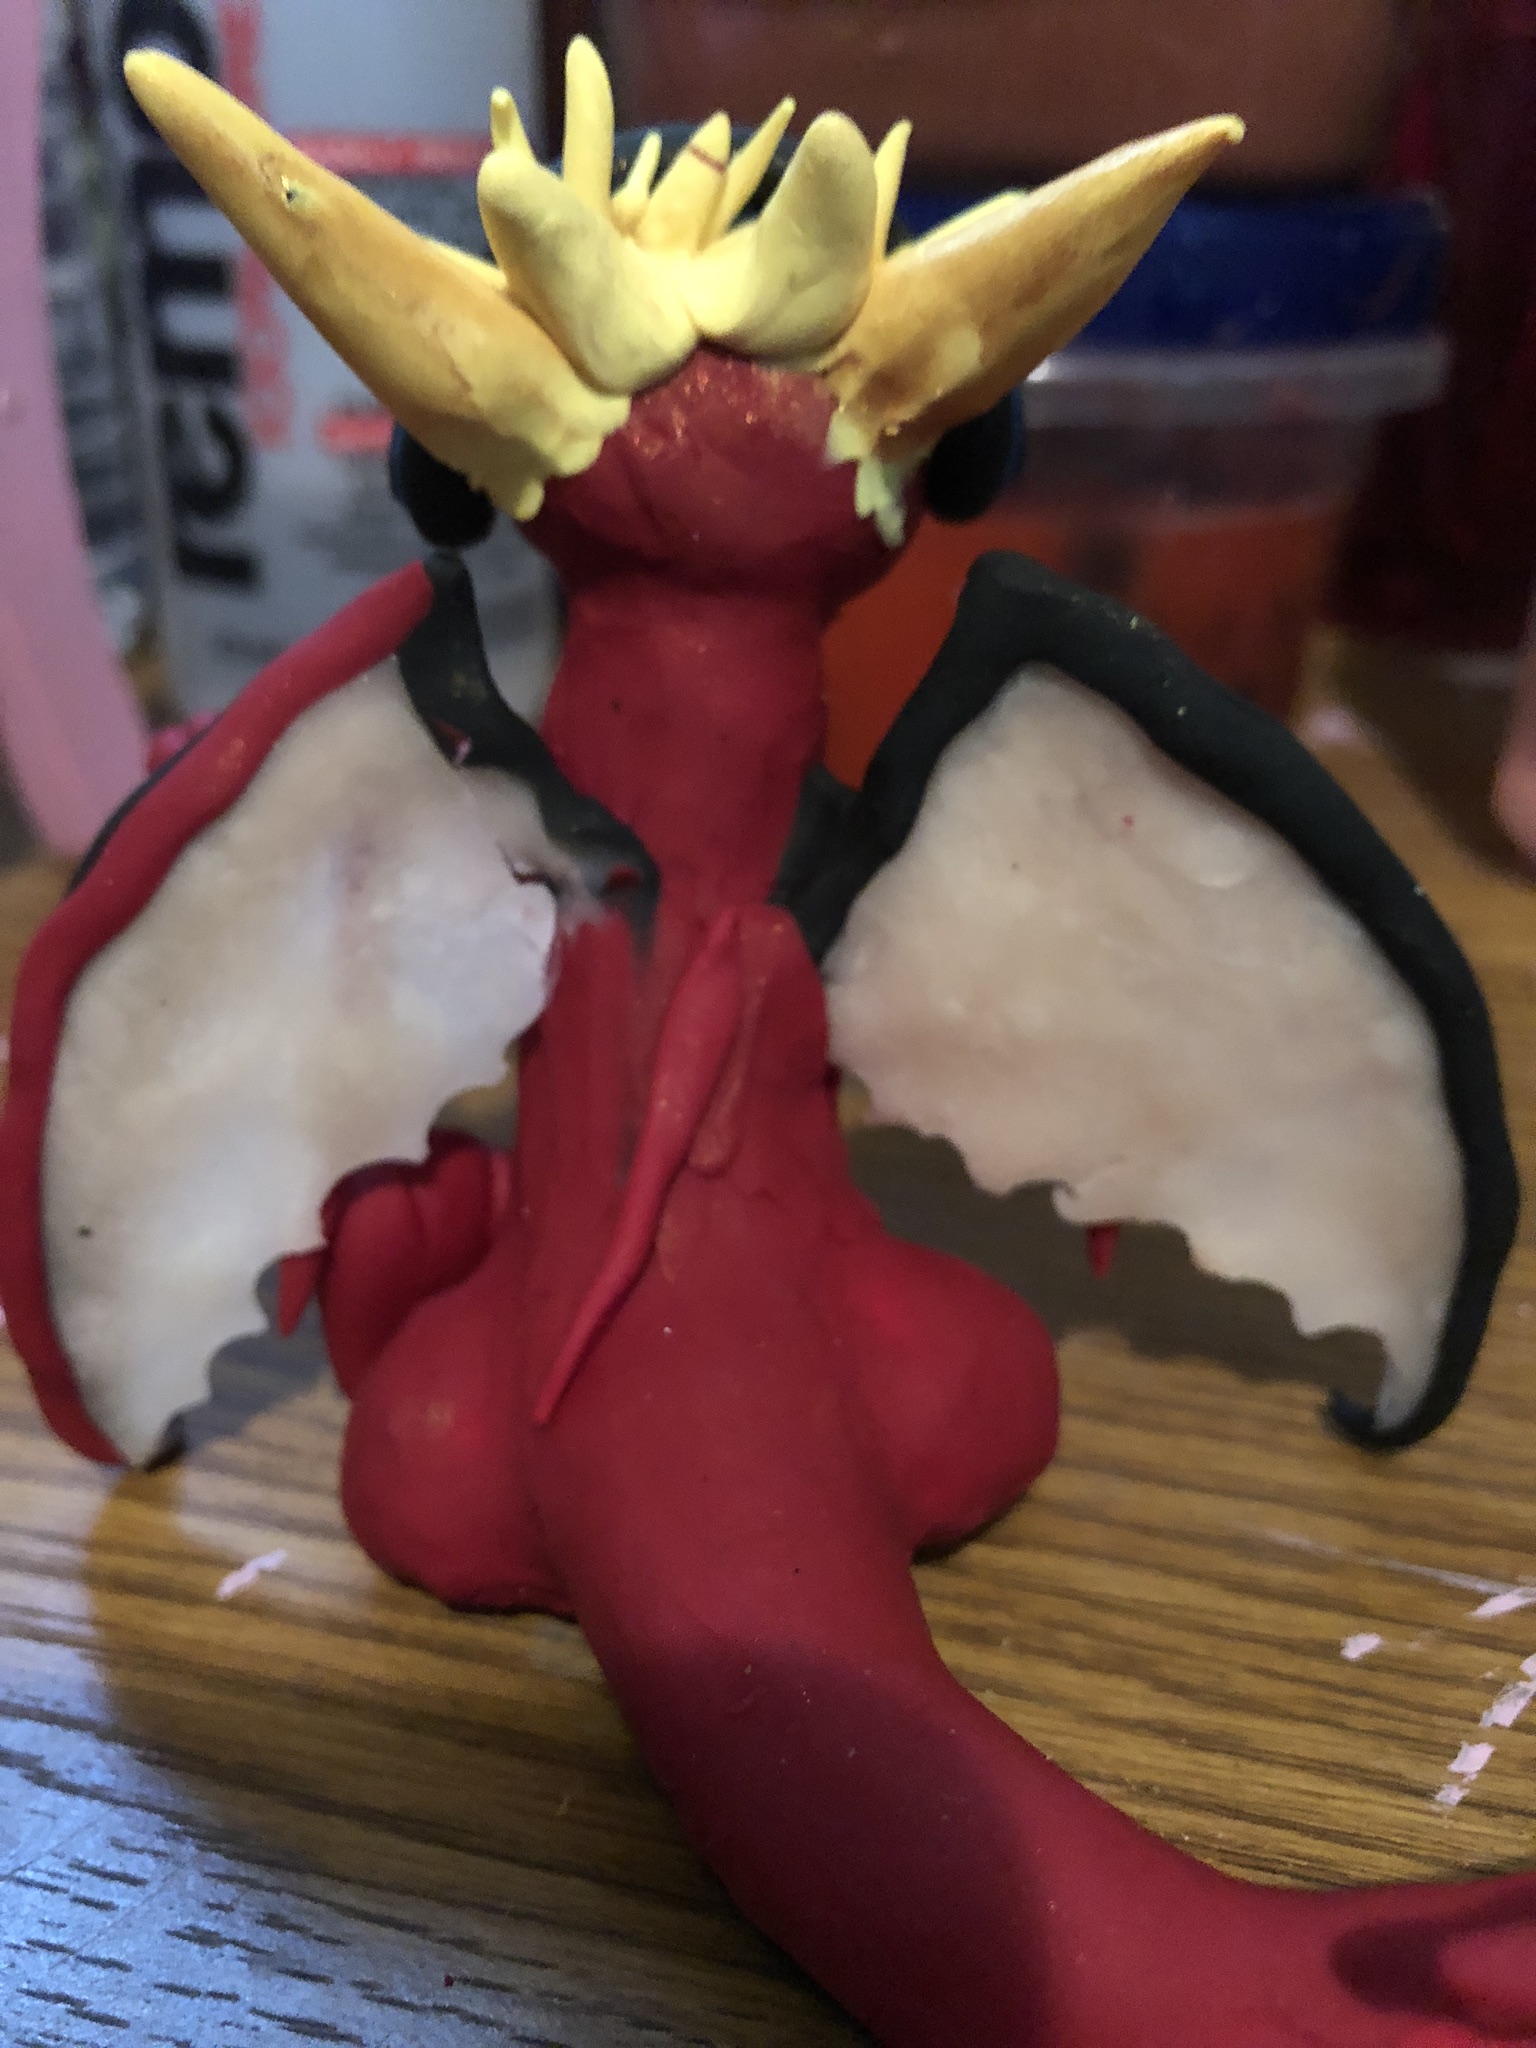
Sculpting the Back Spikes of the DIY Dragon
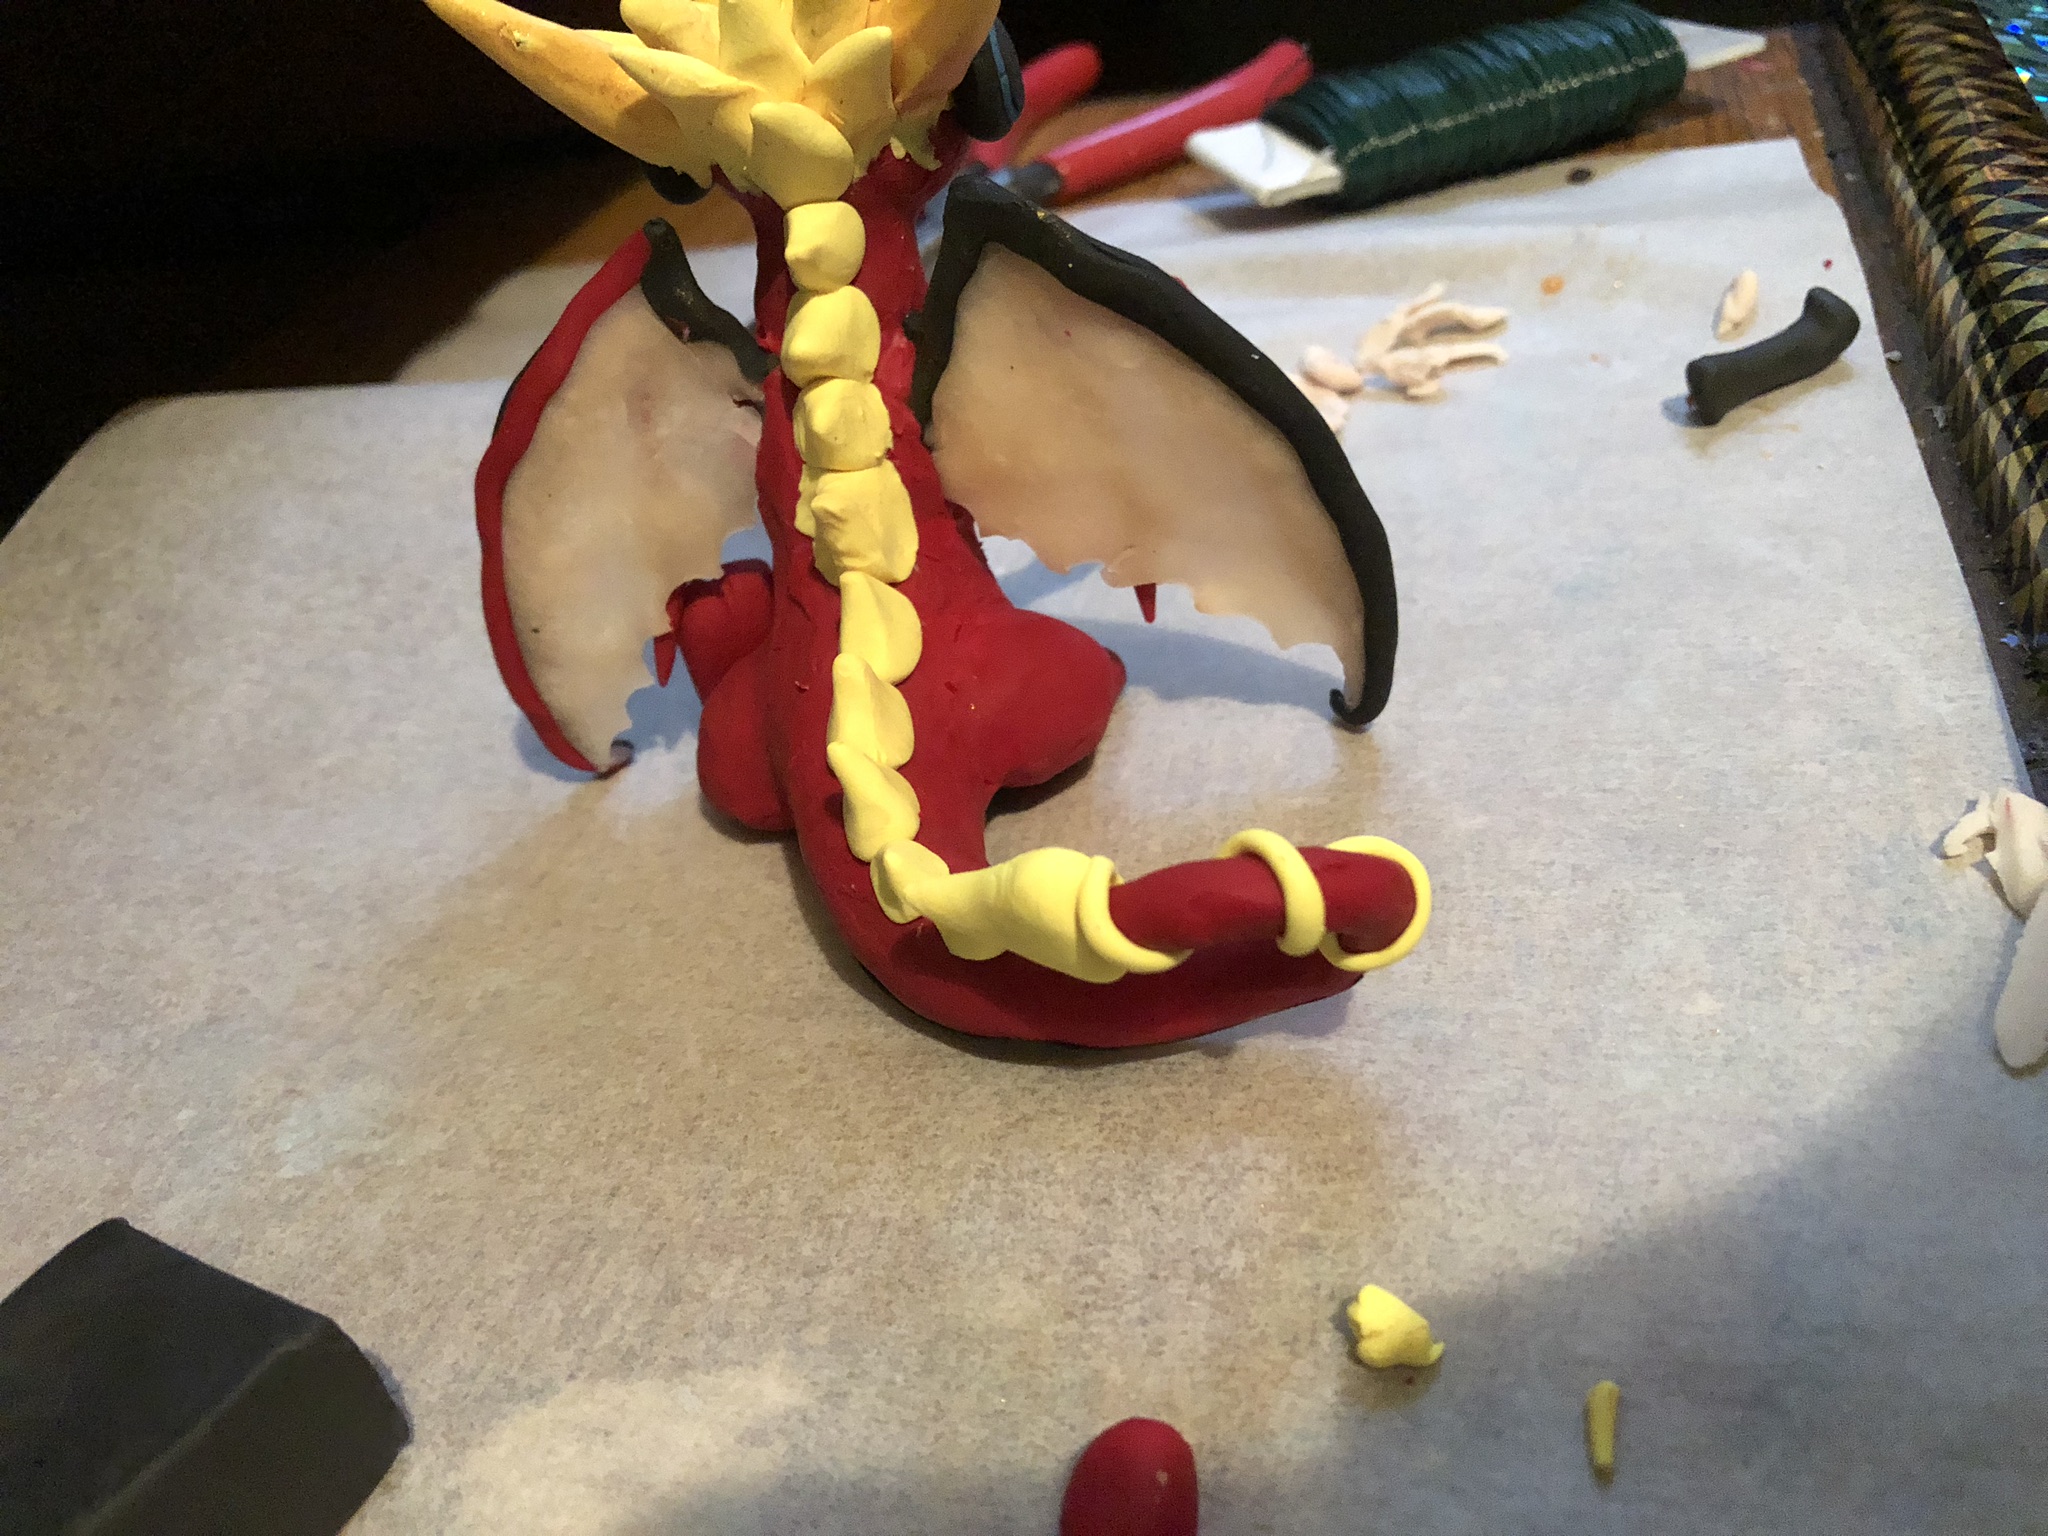
The lack of back spikes is a huge problem. Using some bright yellow clay, sculpt little yellow spikes and press them onto the back of the dragon. Remember to smooth the clay as best as you can, and you can use a dotting tool to help blend the clay better. Don’t overthink or overblend the clay. Fix the back of his head by attaching more spikes to the back of his head too.
Sculpting the Tail Spike
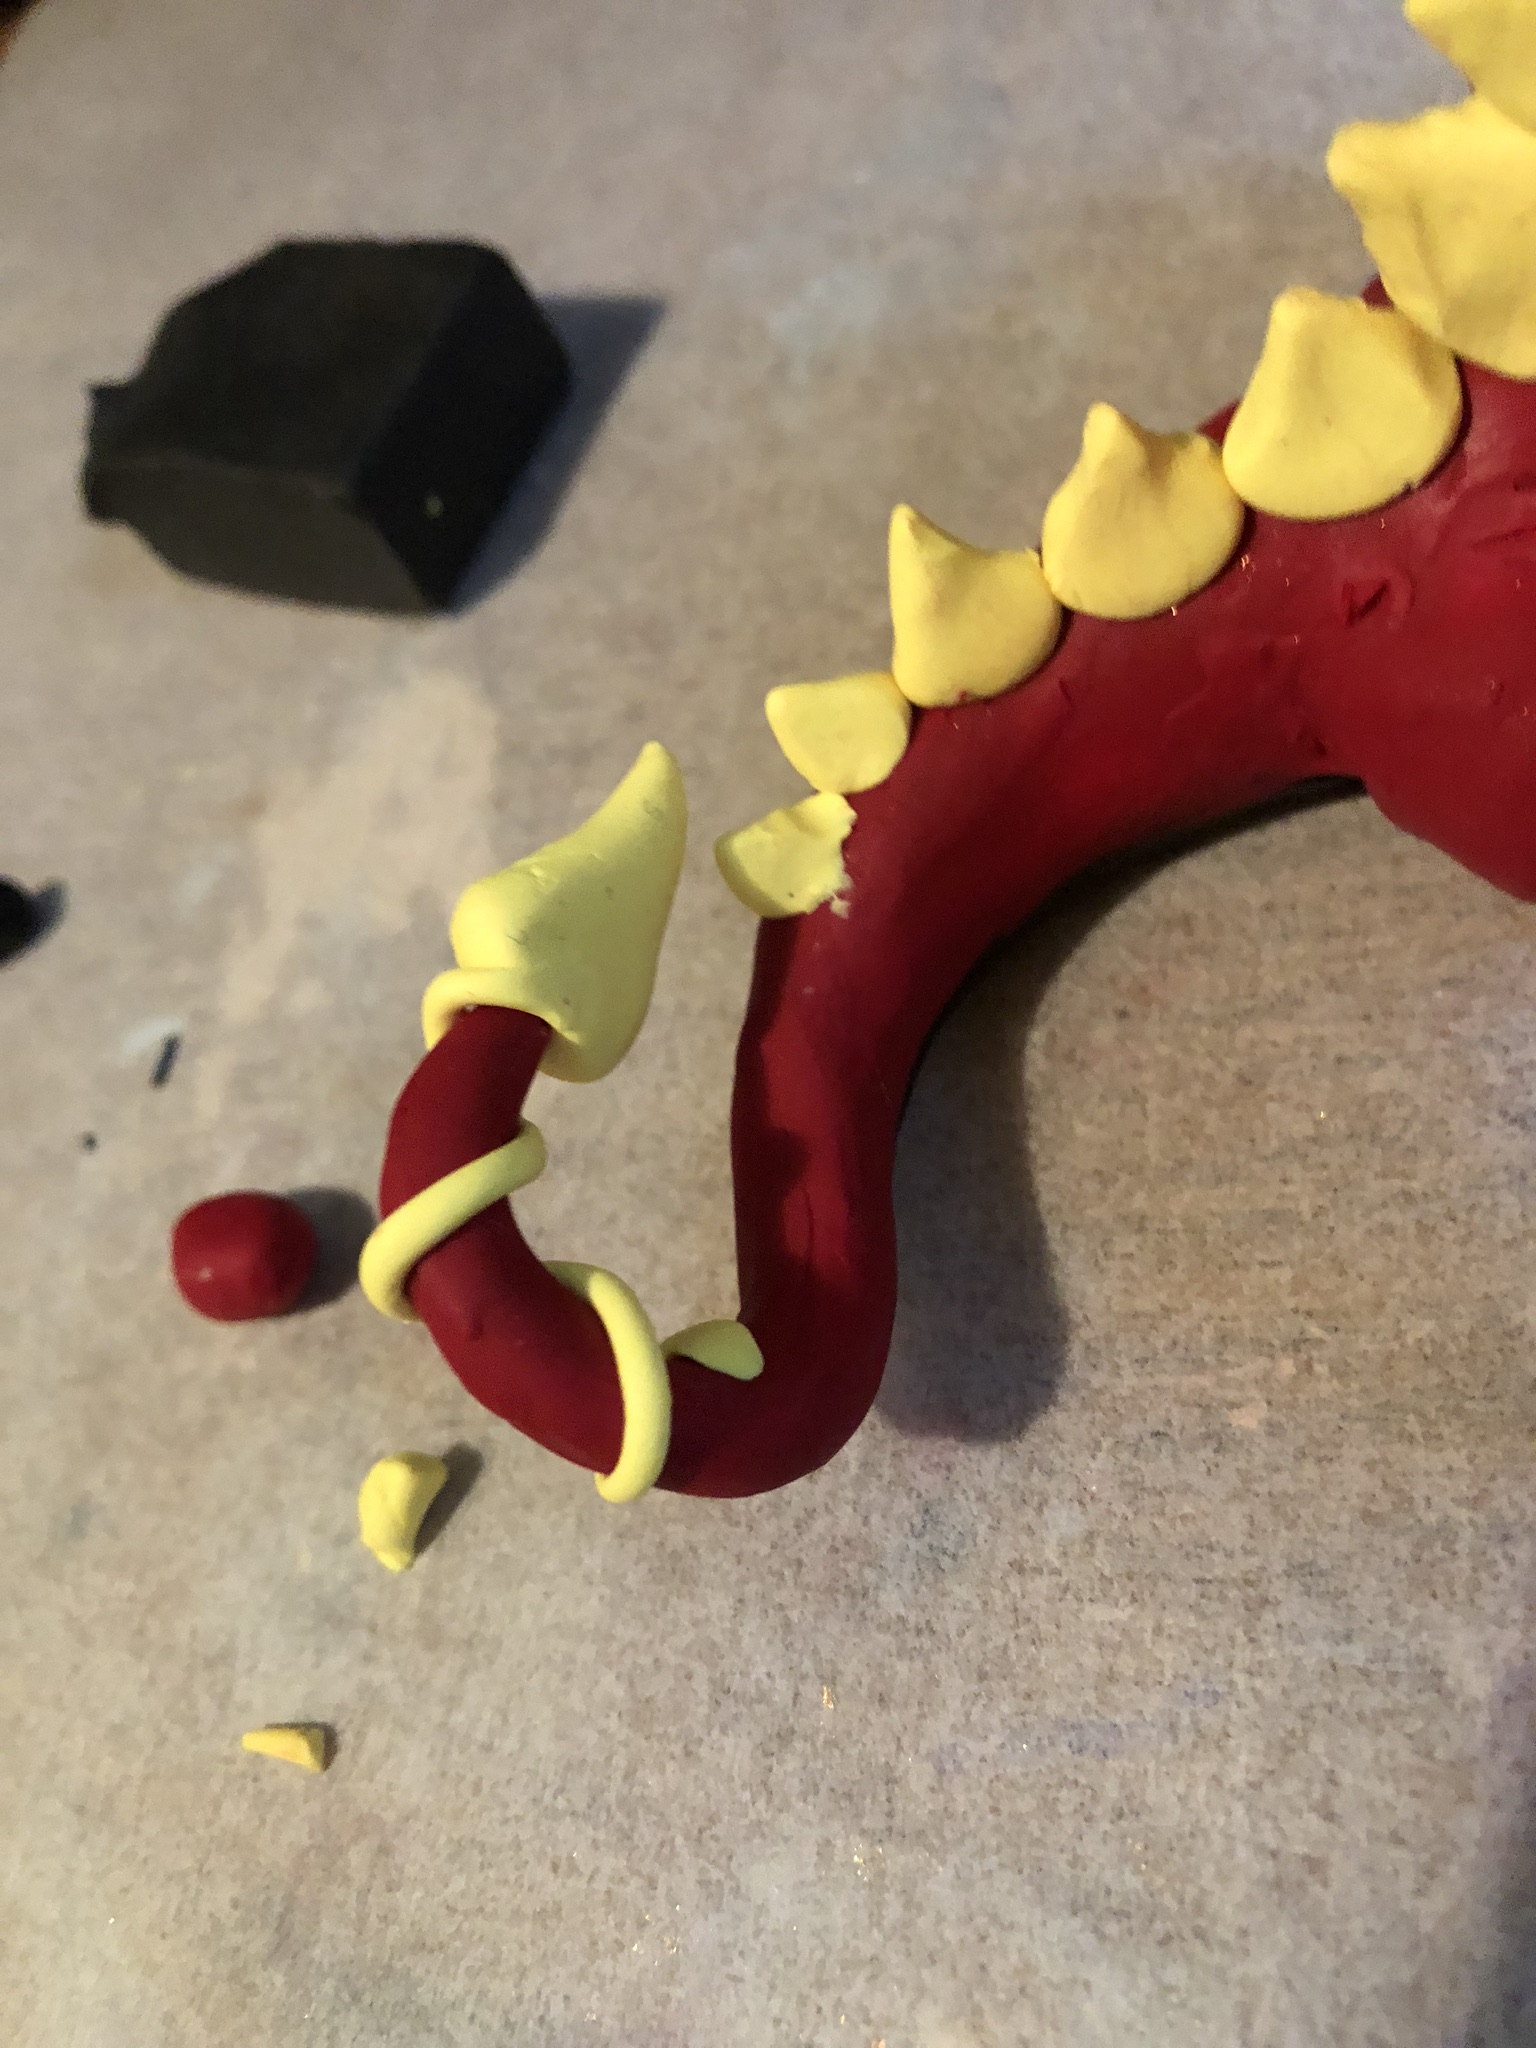
The tail spike is in the shape of a fang. Roll a teardrop shape out and squish it slightly. Keep adjusting the shape until the tail spike looks decent.
Attaching the Tail Spike
Squish the tail spike onto the tail of the DIY Dragon. It may not want to get on there, in which case use a piece of yellow clay to make a slinky shape to attach the tail spike to the tail, winding the clay securely around the tail.
Touching Up the DIY Dragon
Add red clay to any places with cracks, and fix anything you can before you throw him into the oven.
Baking the Dragon
Bake the tiny friend at 275 and pull him out after about 20 minutes. Let the clay cool before touching.
Regluing Fallen Pieces and Reinforcing
If the tail spike is still loose, tuck a little super glue into the gap and let it cure. Do the same for any weak points, including on spikes and wing joints that don’t want to behave.
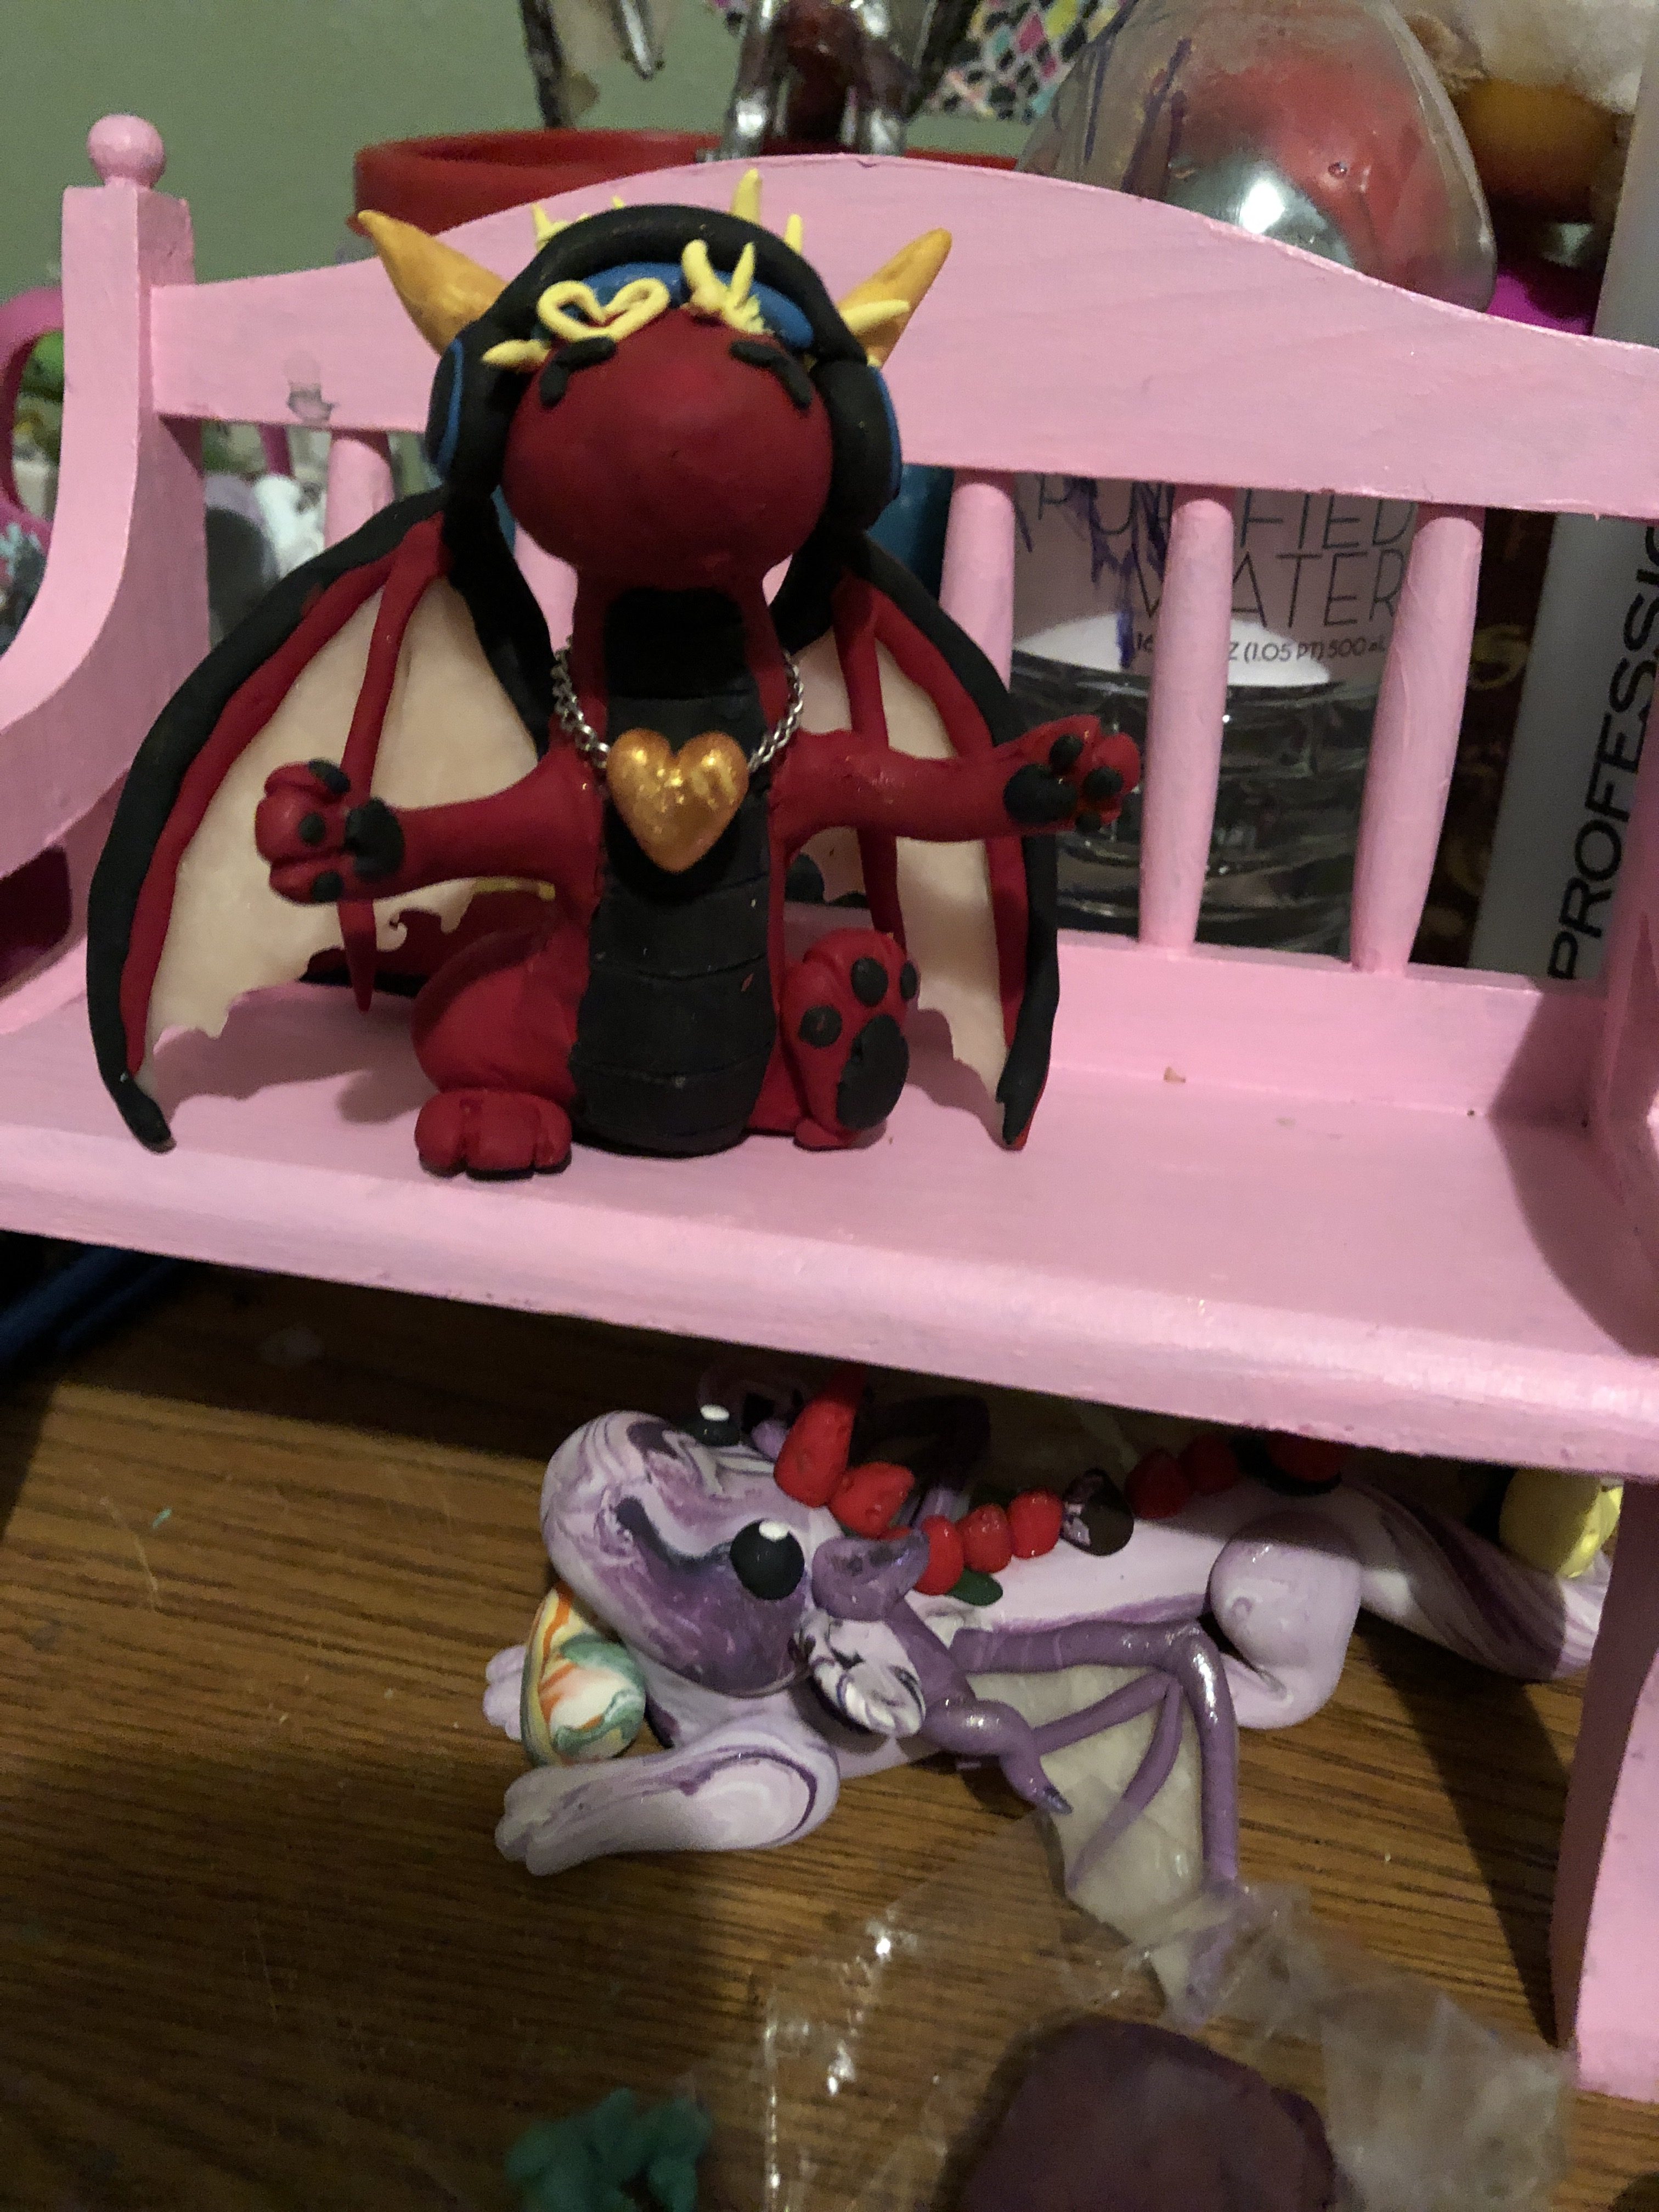
Bonus Gold Chain Heart Necklace
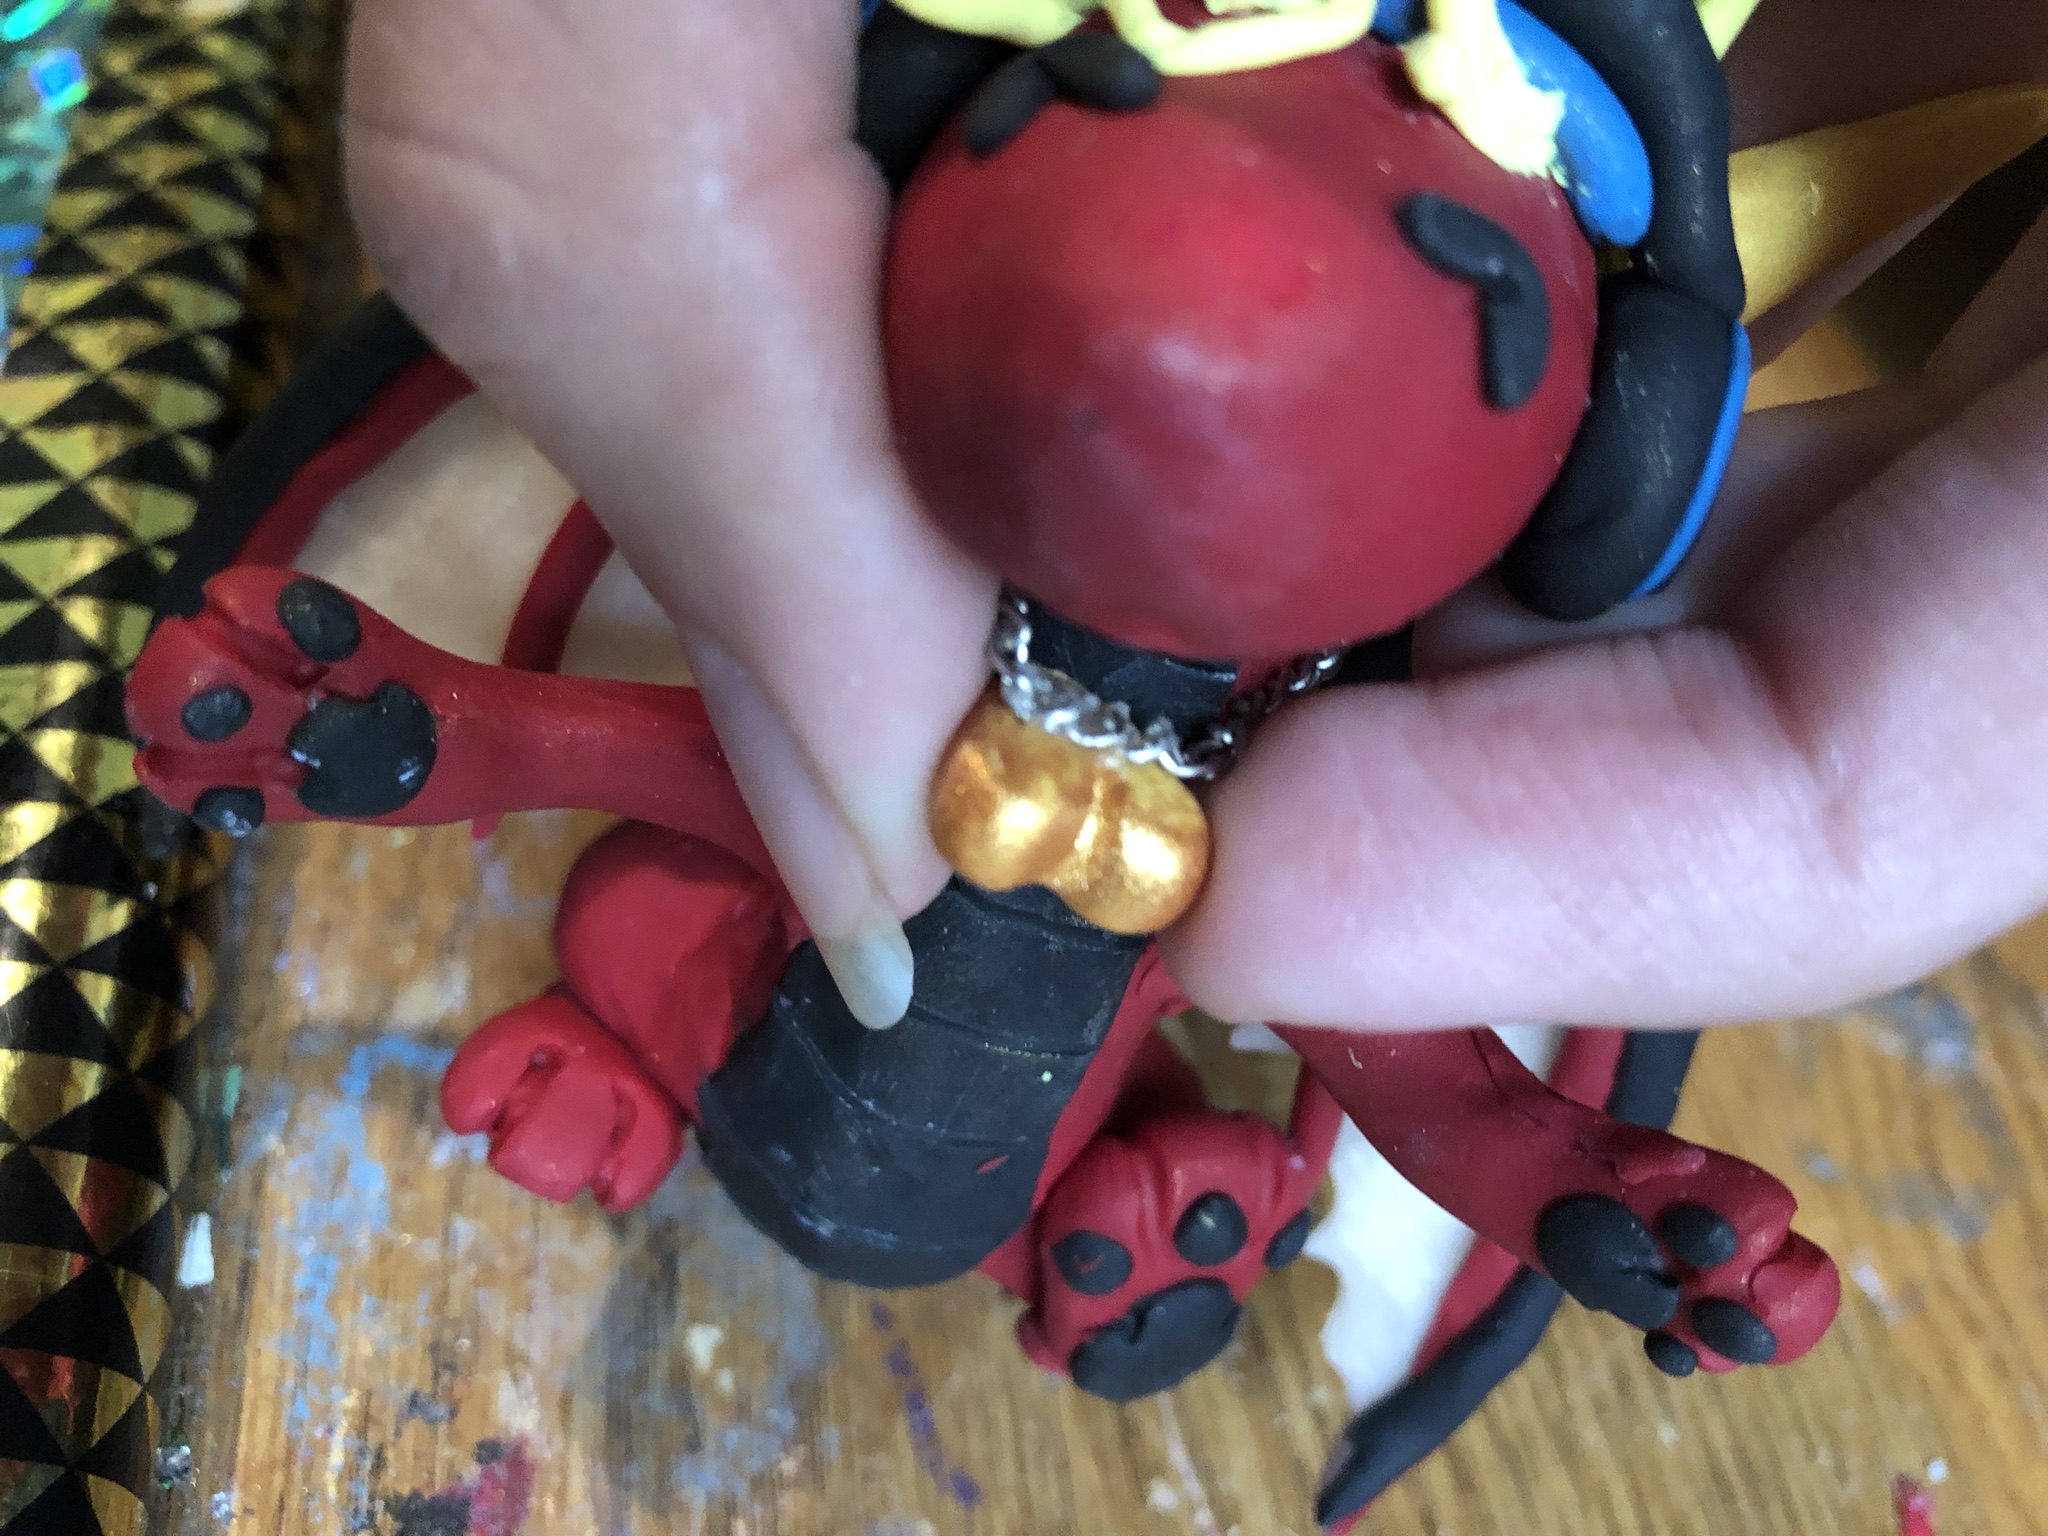
For his adorable little heart of gold, bake a little heart out of white clay and cover it in clear glue. Dip the heart in the pearlex powder and use acrylic sealer to keep the gold from rubbing off. Use superglue to attach the heart to a little piece of chain, then once the glue dries you can put the little necklace on the neck of your dragon by bending the links to make a loose fitting necklace.
Finish
Now, after three days of work, your friend is ready to finally get off of your crafting table and sit on your shelf or desk as a paperweight forevermore. Happy Crafting!